
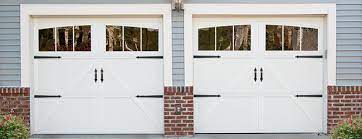
A properly functioning Garage Door Repair Lantana TX is essential for the security and safety of your home. Over time, you may notice that your garage door doesn’t close as tightly as it used to, which can lead to drafts, energy loss, and potential security issues. Fortunately, adjusting your garage door to close tighter is a relatively straightforward process that you can do yourself with some basic tools and a little patience.
In this guide, we will provide you with step-by-step instructions on how to adjust your garage door for a tighter close.
Step 1: Safety First Before attempting any adjustments, it’s crucial to ensure your safety. Disconnect the power to the garage door opener to prevent any accidental openings or closings during the adjustment process. Also, wear protective gloves and safety glasses to protect yourself from potential injuries.
Step 2: Identify the Type of Garage Door Garage doors come in different types, such as sectional roll-up, canopy, or side-hinged. The adjustment process may vary slightly depending on the type of door you have. Identify the type of garage door you own and consult the manufacturer’s manual for any specific instructions related to adjustments.
Step 3: Check the Balance An imbalanced garage door can affect its ability to close tightly. Start by manually opening the garage door and raising it halfway. Release the door gently, and observe if it stays in place or starts to fall. If it falls, the door may be imbalanced and require professional attention. However, if it stays in place, proceed with the adjustment process.
Step 4: Inspect the Weatherstripping Inspect the weatherstripping around the edges of the garage door for signs of wear, cracks, or gaps. If necessary, replace the weatherstripping to ensure a tight seal when the door is closed. This will help prevent drafts and energy loss.
Step 5: Adjust the Limit Switches Most modern garage door openers have limit switches that control the opening and closing points of the door. Adjusting these switches can help fine-tune the door’s closing position. Locate the limit switch adjustment screws on the opener unit and consult the manufacturer’s manual for their precise location. Use a screwdriver to turn the adjustment screws slightly to modify the closing position. Make small adjustments, testing the door’s closing after each change until you achieve the desired tightness.
Step 6: Check the Rollers and Tracks Inspect the rollers and tracks for any signs of damage, wear, or misalignment. Damaged or misaligned rollers can hinder the door’s ability to close properly. Use a lubricant specifically designed for garage doors to lubricate the rollers and tracks. This will ensure smooth operation and assist in achieving a tighter close.
Step 7: Adjust the Spring Tension The spring tension plays a crucial role in the operation of your garage door. If the springs are too loose, the door may not close tightly. Adjusting the spring tension should be approached with caution, as the springs are under high tension and can be dangerous if mishandled. It’s recommended to seek professional assistance for this step.
Step 8: Test and Fine-Tune After making the necessary adjustments, test the garage door’s closing action to ensure it closes tightly. If you are satisfied with the results, reconnect the power to the opener. If not, make further adjustments using the same process as before, taking care not to over-tighten or misalign any components.
Conclusion: Adjusting your Garage Door Repair Lantana TX to close tighter is a practical DIY task that can enhance the security, energy efficiency, and overall functionality of your home. By following these step-by-step instructions, you can ensure that your garage door closes tightly, providing peace of mind and protecting your belongings.
Lantana Garage & Overhead Doors
3501 FM 407 #15, Lantana, TX 76226
940-400-3038
Leave a Reply