Local Services in Texas

Tag: Garage Door Repair Lantana TX

How To Change Liftmaster Garage Door Battery – Lantana Gates & Garage Doors

Changing the battery in your LiftMaster Garage Door Repair Lantana TX is a simple and essential maintenance task to ensure the reliable functioning of your garage door.

Follow these step-by-step instructions for a smooth battery replacement process.

: Preparation

Before you begin, gather the necessary materials:

  • A new battery compatible with your LiftMaster garage door opener.
  • A secure ladder to reach the motor unit.
  • A screwdriver, usually a Phillips-head, for removing the cover.

: Safety First

Always prioritize safety. Ensure that the garage door is closed to prevent any accidents. Additionally, disconnect the power supply to the garage door opener. This can be done by either unplugging it from the power outlet or turning off the circuit breaker dedicated to the garage door opener.

: Locate the Battery Compartment

Identify the battery compartment on the motor unit of your LiftMaster garage door opener. Typically, it is located on the back or side of the unit. Safely position the ladder to access the motor unit.

: Remove the Cover

Using the screwdriver, carefully remove the screws securing the cover of the battery compartment. Keep the screws in a safe place to avoid misplacement.

: Extract the Old Battery

With the cover removed, you will see the old battery. Gently disconnect it from the terminals. Take note of the battery’s orientation to ensure proper installation of the new one.

: Install the New Battery

Retrieve the new battery and connect it to the terminals in the same orientation as the old battery. Ensure a secure and snug connection to prevent any issues with the garage door opener’s operation.

: Replace the Cover

Once the new battery is securely in place, position the cover back onto the battery compartment. Use the previously removed screws to secure the cover tightly. Ensure that the cover is properly sealed to protect the battery.

Reconnect Power

Reestablish the power connection to the garage door opener. This can be done by either plugging it back into the power outlet or turning on the circuit breaker.

: Test the Garage Door Opener

To confirm the success of the battery replacement, test the garage door opener. Operate the door by opening and closing it to ensure smooth functionality.

: Properly Dispose of the Old Battery

Dispose of the old battery following local regulations and guidelines. Many areas have specific recycling programs for household batteries to minimize environmental impact.

You have completed the process of changing the battery in your LiftMaster Garage Door Repair Lantana TX. Regularly checking and replacing the battery when needed is crucial for maintaining the optimal performance of your garage door system.

Lantana Gates & Garage Doors

1180 Central Way, Lantana, TX 76226, United States

1-940-400-3038

How To Get A Garage Door On Track – Lantana Gates & Garage Doors

Addressing a Garage Door Repair Lantana TX that has derailed from its tracks is a task that demands a systematic approach.

By following a detailed set of steps, you can not only rectify the immediate issue but also ensure the long-term functionality of your garage door. Here’s a comprehensive guide in English on how to get a garage door back on track:


: Preliminary Assessment

Begin by visually inspecting the garage door and its tracks. Identify any visible issues such as bends, dents, or misalignments. This initial assessment will guide you in understanding the extent of the problem.

: Safety First

Prioritize safety by disconnecting the power supply to the garage door opener. This can typically be done by unplugging it or switching off the dedicated circuit breaker. Ensuring the power is off prevents any accidental activations during the repair process.

: Gather Essential Tools

Collect the tools necessary for the task. These may include an adjustable wrench, screwdriver, level, rubber mallet, ladder, C-clamps, and pliers. Having the right tools at hand will make the repair process more efficient.

: Examine Tracks and Rollers

Thoroughly inspect the tracks for any deformities or obstructions. Simultaneously, examine the rollers to confirm they are securely attached to the door and are free from damage.

: Straighten Bent Tracks

If the tracks are bent, use a rubber mallet to gently straighten them out. Place a block of wood over the affected area to prevent further damage while applying controlled force.

: Tighten Loose Hardware

Check for any loose nuts, bolts, or screws on both the garage door and its tracks. Utilize an adjustable wrench to securely tighten any components that may have come loose.

: Align the Tracks

Employ a level to verify the alignment of the tracks. They should be perfectly vertical. If misalignment is detected, loosen the screws or bolts securing the tracks, adjust as necessary, and then securely tighten them again.

: Lubricate Moving Parts

Enhance the door’s movement by applying a silicone-based lubricant to the rollers, hinges, and tracks. This minimizes friction, ensuring a smoother operation.

: Check Roller Alignment

Ensure the rollers are properly aligned within the tracks. If any are off-center, utilize pliers to make the necessary adjustments.

: Secure Tracks with C-Clamps

To prevent the garage door from moving during the repair process, utilize C-clamps to secure the tracks to the frame. This safety measure provides additional stability.

: Test the Door

After making adjustments, cautiously test the garage door by opening and closing it multiple times. This step is crucial to confirm that the door operates smoothly and stays on track.

: Reconnect Power

Once satisfied with the door’s performance, reconnect the power supply to the garage door opener.

: Regular Maintenance

To prevent future issues, establish a routine maintenance schedule for your garage door. This includes regular lubrication of moving parts, checking for loose hardware, and inspecting tracks and rollers.


In conclusion, addressing a Garage Door Repair Lantana TX that has derailed involves a combination of careful observation, precise adjustments, and a commitment to safety. Regular maintenance is key to preventing such issues, but if problems persist or if you’re unsure about the repair process, seeking professional assistance is always a prudent choice. This detailed guide aims to empower homeowners to tackle the task confidently, ensuring the optimal performance of their garage doors.

Lantana Gates & Garage Doors

1180 Central Way, Lantana, TX 76226, United States

1-940-400-3038

How To Install Ryobi Garage Door Opener – Coppell Gates & Garage Doors

Installing a Ryobi Garage Door Repair Lantana TX requires careful planning and execution to ensure the safety and functionality of your garage door system.

Below are detailed instructions on how to install a Ryobi garage door opener in approximately.

Before you start, it’s essential to gather all the necessary tools and materials:

Tools and Materials:

  1. Ryobi garage door opener kit (includes motor unit, rail, remote controls, safety sensors, wall control unit, and hardware).
  2. Ladder
  3. Tape measure
  4. Pencil
  5. Screwdriver
  6. Wrench
  7. Drill with bits
  8. Level
  9. Safety glasses
  10. Wire strippers and crimping tool
  11. Electrical outlet and extension cord (if needed)

: Prepare Your Garage Door

  1. Disconnect the power to your garage door opener (if you have an existing one). Unplug it or turn off the circuit breaker.
  2. Remove any existing garage door opener and hardware, including the opener, rail, and brackets. If you’re installing a new opener, skip this step.

: Assemble the Rail and Trolley:

  1. Lay out the rail sections on the floor and follow the manufacturer’s instructions to assemble them. Ensure that you have the necessary carriage, pulleys, and brackets.
  2. Attach the rail to the motor unit as specified in the manual. Make sure it’s level and secure.
  3. Install the trolley onto the rail, ensuring it’s properly aligned with the chain or belt.

: Mount the Motor Unit:

  1. Determine the ideal location for the motor unit on the ceiling. It should be positioned centrally above the garage door.
  2. Use a pencil to mark the screw holes on the ceiling bracket. Drill pilot holes for the lag screws, then secure the motor unit to the ceiling with the provided hardware.
  3. Attach the rail to the motor unit, following the manufacturer’s instructions. Ensure it’s securely fastened.

: Install the Safety Sensors:

  1. Place the safety sensors on either side of the garage door, about 6 inches above the floor. Use a level to ensure they are aligned with each other.
  2. Run the sensor wires to the motor unit, securing them along the walls or ceiling with cable clips. Strip the wire ends and connect them to the motor unit following the provided instructions.

: Wiring and Electrical:

  1. Plug the motor unit into a nearby electrical outlet. If there isn’t one nearby, consider hiring an electrician to install one. Use an extension cord if necessary.
  2. Connect the wall control unit to the motor unit following the instructions in the manual.
  3. Program your remote controls by following the manufacturer’s instructions.

: Adjust Travel Limits:

  1. Use the control unit to run the garage door opener through a complete cycle. This will help you identify any issues with the door’s movement.
  2. Adjust the travel limits if necessary. These settings control how far the door opens and closes. Refer to the manual for specific instructions on adjusting these limits.

: Test the Safety Features:

  1. Test the safety features by placing an object in the path of the closing garage door. It should reverse immediately upon contact.
  2. Check the safety sensors by breaking the beam while the door is closing. The door should reverse.

: Final Adjustments:

  1. Ensure that the garage door opens and closes smoothly without any unusual noises or jerky movements.
  2. Lubricate the garage door’s moving parts, including rollers, tracks, and hinges, to maintain smooth operation.
  3. Secure any loose hardware and clean up the installation area.

: Operational Checks:

  1. Operate the garage door opener several times to ensure it’s functioning correctly.
  2. Program any additional features, such as timer-to-close or MyQ integration, if your Ryobi garage door opener supports them.

: Safety First:

  1. Review the safety precautions in the manual and educate your household members on safe operation.
  2. Keep the manual and any additional documentation for future reference.

Congratulations! You have successfully installed your Ryobi Garage Door Repair Lantana TX. If you encounter any issues or are unsure about any steps, consult the user manual or consider seeking professional assistance to ensure the safe and proper functioning of your garage door system.

Coppell Gates & Garage Doors

440 Shadowcrest Ln, Coppell, TX 75019, United States

1-972-449-7776

Garage Door Costs vs. Long-Term Savings: An Investment Perspective – Lantana Gates & Garage Doors

As a homeowner, I’ve always believed in the value of thoughtful investments in my property. Recently, the time had come to replace my aging garage door, and I found myself pondering the age-old question: How much should I invest in a new garage door, and how will it impact my long-term savings?

In this article, I’ll share my insights into the cost considerations of garage doors and the potential long-term savings they can offer, allowing you to make an informed investment in your home as stated in Garage Door Repair Lantana TX.

The Initial Cost of a Garage Door

Before diving into the long-term savings, it’s essential to understand the upfront costs associated with purchasing and installing a new garage door. These costs can vary significantly depending on several factors:

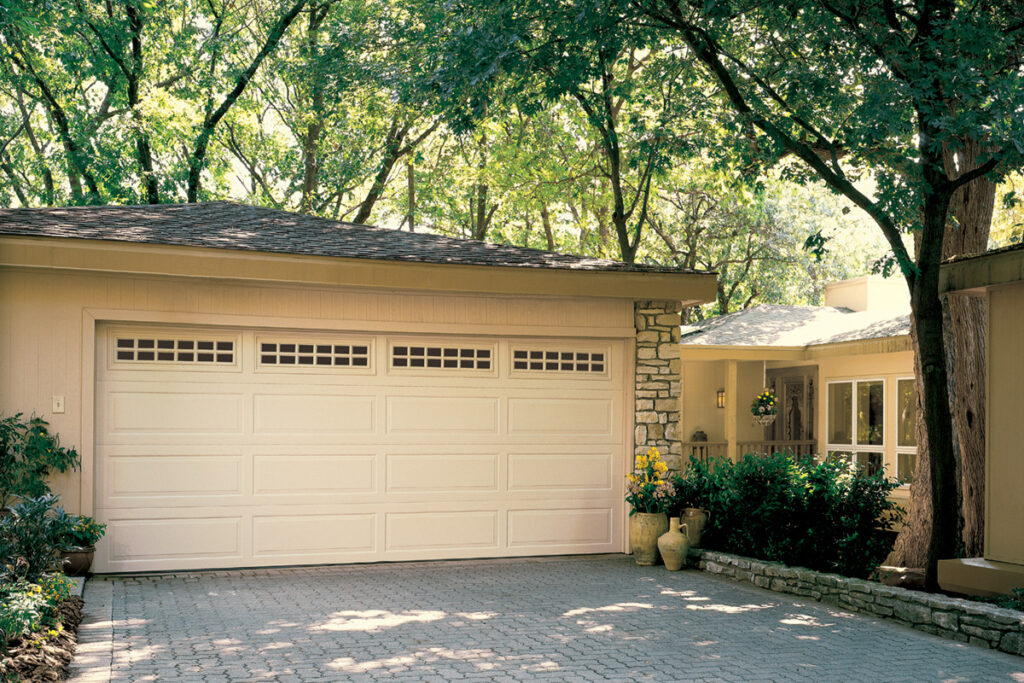
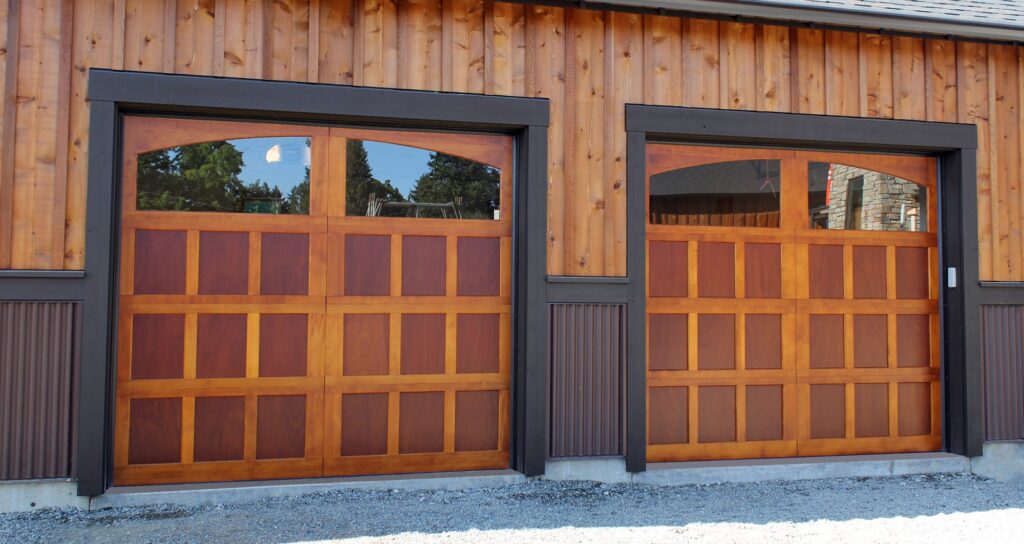
1. Type of Garage Door: The material and style of the garage door greatly affect the initial cost. Common materials include steel, wood, aluminum, and composite. Each material comes with its own price range.

2. Size and Design: Larger or more complex garage doors, as well as those with intricate designs or custom features, tend to be more expensive.

3. Insulation Level: Garage doors come with varying levels of insulation. Insulated doors are generally more costly upfront but offer energy savings in the long run.

4. Brand and Manufacturer: Different garage door brands and manufacturers offer products at different price points. Reputable brands often come with higher price tags.

5. Installation Costs: The cost of professional installation is a significant factor. While some homeowners may choose to install the door themselves, professional installation ensures proper setup and can involve additional charges.

6. Additional Features: Extras such as windows, decorative hardware, smart technology, and advanced security features can add to the total cost.

Long-Term Savings and ROI

While the initial cost of a garage door can be a substantial investment, it’s crucial to consider the potential long-term savings and return on investment (ROI) that a high-quality garage door can offer:

1. Energy Efficiency: An insulated garage door can significantly improve the energy efficiency of your home. It helps regulate the temperature in your garage, which can have a direct impact on your heating and cooling bills. Over time, these energy savings can add up, contributing to your long-term financial well-being.

2. Home Value: A well-maintained and aesthetically pleasing garage door enhances the curb appeal and value of your home. Should you decide to sell your property in the future, a quality garage door can lead to a higher resale value and a faster sale.

3. Reduced Maintenance Costs: High-quality garage doors often require less maintenance and repair over their lifespan. While they may have a higher initial cost, the savings from fewer repairs and replacements can be substantial in the long run.

4. Enhanced Security: A reliable and secure garage door can deter break-ins and burglaries, potentially saving you from property loss and costly security upgrades.

5. Peace of Mind: Knowing that your garage door is dependable and well-maintained can reduce stress and anxiety related to unexpected repair costs.

Energy Savings with Insulated Garage Doors

One of the most significant long-term savings associated with garage doors is energy efficiency. Insulated garage doors provide thermal resistance, preventing outdoor temperatures from affecting the interior of your garage. Here’s how insulated garage doors contribute to energy savings:

1. Reduced Heating Costs: During the winter months, an insulated garage door helps retain heat within the garage, which can be especially important if your garage is attached to your home. This reduces the workload on your home’s heating system, leading to lower heating bills.

2. Lower Cooling Costs: In hot summer weather, insulated garage doors help keep the garage cooler. This reduces the heat transfer into your home, reducing the demand on your air conditioning system and lowering cooling costs.

3. Year-Round Comfort: With proper insulation, your garage can become a more comfortable space for activities or storage, making it usable throughout the year.

4. Extended HVAC System Lifespan: Reduced reliance on your heating and cooling systems can extend their lifespan, delaying the need for costly replacements.

5. Eco-Friendly Benefits: Energy-efficient garage doors contribute to reducing your carbon footprint by conserving energy and promoting sustainable living.

Return on Investment (ROI) Considerations

When evaluating the investment in a new garage door, it’s essential to calculate the potential ROI over time. Here’s a simplified formula to consider:

ROI = (Total Long-Term Savings – Initial Cost) / Initial Cost x 100

Keep in mind that the long-term savings can vary based on factors such as local energy costs, climate, and usage patterns. However, it’s not uncommon for homeowners to recoup a significant portion of their initial investment through energy savings, increased home value, and reduced maintenance expenses.

Garage Door Maintenance and Lifespan

Another aspect that impacts long-term savings is garage door maintenance. Regular maintenance can extend the lifespan of your garage door and help avoid costly repairs or premature replacements. Here are some maintenance tasks to consider:

1. Regular Inspections: Periodically inspect your garage door for signs of wear and tear, such as damaged panels, worn-out weatherstripping, or malfunctioning components.

2. Lubrication: Lubricate moving parts, such as springs and rollers, to ensure smooth operation and prevent premature wear.

3. Weatherstripping Replacement: Replace weatherstripping as needed to maintain proper insulation and prevent drafts.

4. Painting or Staining: Wood garage doors may require periodic painting or staining to protect against the elements and maintain their appearance.

5. Professional Tune-Ups: Consider scheduling professional garage door tune-ups annually or as recommended by the manufacturer.

By investing in routine maintenance, you can prolong the lifespan of your garage door and minimize the risk of unexpected repair or replacement costs.

Making an Informed Decision

In my quest for the perfect garage door, I realized that while the initial cost was a consideration, it was equally crucial to factor in the long-term savings and ROI potential. By investing in an energy-efficient, high-quality garage door and prioritizing regular maintenance, I not only improved the comfort and security of my home but also set the stage for long-term financial benefits. As a homeowner, making thoughtful investments in your property can pay dividends over time, and a quality garage door is undoubtedly one of those investments.

Conclusion: An Investment in Comfort, Savings, and Security

Overall, as per Garage Door Repair Lantana TX, when evaluating the cost of a new garage door, it’s essential to view it as an investment in your home’s comfort, savings, and security. While the upfront cost may seem significant, the long-term benefits, including energy savings, increased home value, reduced maintenance expenses, and peace of mind, can make it a wise financial decision. By considering both the initial cost and the potential for long-term savings, you can confidently invest in a garage door that not only enhances your property but also contributes to your financial well-being.

Lantana Gates & Garage Doors

1180 Central Way, Lantana, TX 76226, United States

940-400-3038

How To Open Garage Door Manually From Inside – Lantana Gates & Garage Doors

Your Garage Door Repair Lantana TX is an essential part of your home’s security and convenience, providing access to your vehicle and storage space.

However, there may be situations where you need to manually open your garage door from the inside, such as during a power outage or if your automatic opener malfunctions. In this comprehensive guide, we will walk you through the steps to manually open your garage door safely and efficiently.

  1. Gather Necessary Tools

Before attempting to open your garage door manually, it’s essential to gather the required tools and equipment. You will need:

  • A sturdy ladder
  • A flashlight (if it’s dark)
  • A pair of pliers
  • A cord or rope (about 6-8 feet long)
  • An emergency release kit (if your garage door has one)
  1. Locate the Emergency Release Cord

Most modern garage doors come equipped with an emergency release cord or handle. This cord is typically red and hangs from the garage door opener rail or the trolley. If you have an emergency release kit, it will include a handle or cord specifically for this purpose. Locate the emergency release cord and make sure it’s within reach.

  1. Disconnect the Garage Door Opener

To ensure your safety while manually opening the garage door, it’s crucial to disconnect the automatic opener. This prevents the opener from attempting to operate the door while you’re manually lifting it. You can disconnect the opener by pulling on the emergency release cord. This action will disengage the door from the opener carriage.

  1. Position the Ladder

Place your ladder beneath the garage door opener so that you can comfortably reach the emergency release cord. Make sure the ladder is stable and secure before climbing it.

  1. Pull the Emergency Release Cord

With the ladder in position and the garage door opener disconnected, reach up and firmly grasp the emergency release cord or handle. Pull down on it in the direction that the cord runs, which is typically towards the garage door itself. This will release the garage door from the automatic opener carriage, allowing you to manually operate the door.

  1. Lift the Garage Door

With the garage door released from the opener, carefully lift it using both hands. Depending on the size and weight of your garage door, this may require some effort. Be cautious, and do not rush; use slow and controlled movements to avoid injury.

  1. Secure the Door

Once the garage door is fully open, it’s essential to secure it in place to prevent it from closing unexpectedly. You can use a cord or rope to tie the door to a nearby track or another stable object. This will ensure that the door remains open until you are ready to close it.

  1. Test the Door

After securing the garage door in the open position, it’s a good idea to test it by manually closing and reopening it a few times to ensure it operates smoothly.

  1. Reconnect the Garage Door Opener

When the power is restored or the issue with your automatic opener is resolved, it’s time to reconnect it to the garage door. To do this, simply pull the emergency release cord in the opposite direction, towards the garage door opener rail. This will re-engage the door with the opener carriage.

  1. Operate the Door Using the Opener

With the opener reconnected, you can now use your automatic garage door opener as usual. Press the remote control or the wall-mounted button to open and close the door electronically.

Conclusion:

Knowing how to manually open your Garage Door Repair Lantana TX from the inside is a valuable skill that can come in handy during various situations. By following the steps outlined in this guide, you can safely and effectively open your garage door manually when needed. Remember to prioritize safety, use the necessary tools, and take your time when performing these steps to avoid accidents or damage to your garage door.

Lantana Gates & Garage Doors

1180 Central Way, Lantana, TX 76226, United States

1-940-400-3038

Different Types of Garage Door Insulation Materials Explained – Lantana Gates & Garage Doors

As a homeowner who values energy efficiency and a comfortable living environment, I’ve come to realize the importance of proper insulation throughout my home. What’s often overlooked, though, is the insulation of my garage door. Recognizing the potential benefits of insulating this space, I embarked on a journey to understand the various types of garage door insulation materials available.

In this article, I’ll share my discoveries, breaking down the characteristics, advantages, and considerations for different types of garage door insulation as stated in Garage Door Repair Lantana TX.

Polystyrene Insulation: Affordable and Practical

Characteristics:

Exploring my options, I learned about polystyrene insulation, often referred to as EPS foam. This type of insulation is known for its affordability and insulation properties.

Benefits:

  1. Budget-Friendly: One aspect that immediately caught my attention is the cost-effectiveness of polystyrene insulation. It’s an excellent choice for homeowners seeking practical solutions without breaking the bank.
  2. Weight Consideration: Polystyrene insulation is lightweight, which means that it won’t add significant extra weight to the garage door, ensuring smooth and efficient operation.
  3. Thermal Efficiency: While it may not have the highest R-value (thermal resistance), polystyrene insulation still provides reasonable thermal efficiency, helping to regulate indoor temperatures.
  4. DIY Possibility: What’s particularly appealing is that polystyrene panels are relatively easy to handle and install, making it a suitable option for those who enjoy tackling DIY projects.

Polyurethane Insulation: Superior Performance

Characteristics:

As I delved deeper, I encountered polyurethane insulation, known for its exceptional insulation capabilities and durability.

Benefits:

  1. Top-Notch Insulation: Polyurethane insulation boasts a higher R-value compared to other options. Its superior thermal efficiency can play a pivotal role in maintaining consistent comfort in the garage space.
  2. Structural Enhancement: What fascinated me is that polyurethane insulation can actually strengthen the garage door’s structure. It’s a feature that promises both enhanced rigidity and long-term durability.
  3. Noise Dampening: Beyond its thermal benefits, polyurethane insulation acts as a barrier to external noise, creating a quieter and more pleasant garage environment.
  4. Slim Profile: Despite its impressive insulating capabilities, polyurethane insulation is relatively thin. This ensures that it won’t take up excessive space within the garage.
  5. Professional Installation: Admittedly, the installation of polyurethane insulation requires specialized equipment and expertise. While it involves a cost, the long-term benefits often justify the investment.

Reflective Foil Insulation: Mastering Radiant Heat

Characteristics:

I also discovered reflective foil insulation, also known as radiant barrier insulation, which focuses on reflecting heat rather than resisting it.

Benefits:

  1. Heat Reflection: Reflective foil insulation is designed to bounce radiant heat away, making it a fantastic choice for garages that experience intense sun exposure.
  2. Versatility in Climate: An exciting aspect is its adaptability to different climates. Whether I’m dealing with a hot or cold environment, reflective foil insulation seems to have me covered.
  3. Ease of Installation: Reflective foil insulation is relatively straightforward to install, which is great news for homeowners like me who enjoy tackling projects on their own.
  4. Space Efficiency: Since this type of insulation is often thin and lightweight, I can rest assured that it won’t take up too much valuable space within the garage.
  5. Complementing Other Insulation: While reflective foil insulation might not be the most effective on its own, it can complement other insulation materials to enhance overall thermal performance.

Fiberglass Batt Insulation: Tried and True

Characteristics:

Lastly, my exploration led me to fiberglass batt insulation, a familiar choice used for wall and attic insulation.

Benefits:

  1. Familiarity: Fiberglass batt insulation is a common and recognizable option. Its widespread use in various applications makes it a reliable choice.
  2. Budget Considerations: Affordability is a definite plus. For homeowners seeking insulation solutions that won’t strain their wallets, fiberglass batts can be an attractive option.
  3. DIY Possibility: If I’m feeling up to the challenge, I can install fiberglass batt insulation myself. This hands-on approach appeals to my DIY sensibilities.
  4. Thermal Performance: While it might not match the thermal efficiency of some other materials, properly installed fiberglass batts can still provide reasonable insulation.

Choosing the Ideal Insulation Material

As I navigate the sea of garage door insulation options, I’m keeping a few key factors in mind:

  1. Budget: I’m evaluating my budget and seeking an insulation material that aligns with my financial considerations.
  2. Climate: Considering the climate in my region, I’m leaning toward materials that provide optimal insulation for my specific weather conditions.
  3. Purpose: Temperature regulation and noise reduction are both important to me. I’m seeking a material that strikes a balance between these priorities.
  4. Installation: Given my comfort level with DIY projects, I’m considering materials that I can install on my own without compromising on effectiveness.
  5. Long-Term Savings: While some insulation materials come with a higher initial cost, I’m weighing the potential long-term energy savings they can offer.

Overall, in reference to Garage Door Repair Lantana TX, my journey into the world of garage door insulation materials has been enlightening and empowering. From polystyrene and polyurethane to reflective foil and fiberglass batts, there’s an array of options that cater to different preferences, needs, and budgets. By assessing my priorities, considering factors like climate, budget, and installation, I’m confident that I’ll make an informed decision that not only enhances the comfort and efficiency of my garage space but also contributes to my overall home’s well-being.

Lantana Gates & Garage Doors

1180 Central Way, Lantana, TX 76226, United States

940-400-3038

How to Adjust Garage Door to Close Tighter-Lantana Garage & Overhead Doors

A properly functioning Garage Door Repair Lantana TX is essential for the security and safety of your home. Over time, you may notice that your garage door doesn’t close as tightly as it used to, which can lead to drafts, energy loss, and potential security issues. Fortunately, adjusting your garage door to close tighter is a relatively straightforward process that you can do yourself with some basic tools and a little patience.

In this guide, we will provide you with step-by-step instructions on how to adjust your garage door for a tighter close.

Step 1: Safety First Before attempting any adjustments, it’s crucial to ensure your safety. Disconnect the power to the garage door opener to prevent any accidental openings or closings during the adjustment process. Also, wear protective gloves and safety glasses to protect yourself from potential injuries.

Step 2: Identify the Type of Garage Door Garage doors come in different types, such as sectional roll-up, canopy, or side-hinged. The adjustment process may vary slightly depending on the type of door you have. Identify the type of garage door you own and consult the manufacturer’s manual for any specific instructions related to adjustments.

Step 3: Check the Balance An imbalanced garage door can affect its ability to close tightly. Start by manually opening the garage door and raising it halfway. Release the door gently, and observe if it stays in place or starts to fall. If it falls, the door may be imbalanced and require professional attention. However, if it stays in place, proceed with the adjustment process.

Step 4: Inspect the Weatherstripping Inspect the weatherstripping around the edges of the garage door for signs of wear, cracks, or gaps. If necessary, replace the weatherstripping to ensure a tight seal when the door is closed. This will help prevent drafts and energy loss.

Step 5: Adjust the Limit Switches Most modern garage door openers have limit switches that control the opening and closing points of the door. Adjusting these switches can help fine-tune the door’s closing position. Locate the limit switch adjustment screws on the opener unit and consult the manufacturer’s manual for their precise location. Use a screwdriver to turn the adjustment screws slightly to modify the closing position. Make small adjustments, testing the door’s closing after each change until you achieve the desired tightness.

Step 6: Check the Rollers and Tracks Inspect the rollers and tracks for any signs of damage, wear, or misalignment. Damaged or misaligned rollers can hinder the door’s ability to close properly. Use a lubricant specifically designed for garage doors to lubricate the rollers and tracks. This will ensure smooth operation and assist in achieving a tighter close.

Step 7: Adjust the Spring Tension The spring tension plays a crucial role in the operation of your garage door. If the springs are too loose, the door may not close tightly. Adjusting the spring tension should be approached with caution, as the springs are under high tension and can be dangerous if mishandled. It’s recommended to seek professional assistance for this step.

Step 8: Test and Fine-Tune After making the necessary adjustments, test the garage door’s closing action to ensure it closes tightly. If you are satisfied with the results, reconnect the power to the opener. If not, make further adjustments using the same process as before, taking care not to over-tighten or misalign any components.

Conclusion: Adjusting your Garage Door Repair Lantana TX to close tighter is a practical DIY task that can enhance the security, energy efficiency, and overall functionality of your home. By following these step-by-step instructions, you can ensure that your garage door closes tightly, providing peace of mind and protecting your belongings.

Lantana Garage & Overhead Doors

3501 FM 407 #15, Lantana, TX 76226

940-400-3038

Powered by WordPress & Theme by Anders Norén