Local Services in Texas

Month: November 2023 Page 1 of 7

How Much Does It Cost To Install A Garage Door – Brothers Garage Door Service

The cost of installing a Garage Door Repair Livonia MI can vary widely based on several factors, including the type of door, materials, labor costs, and additional features.

In this detailed guide, we’ll explore the various factors influencing the cost of garage door installation and provide insights into what you can expect.

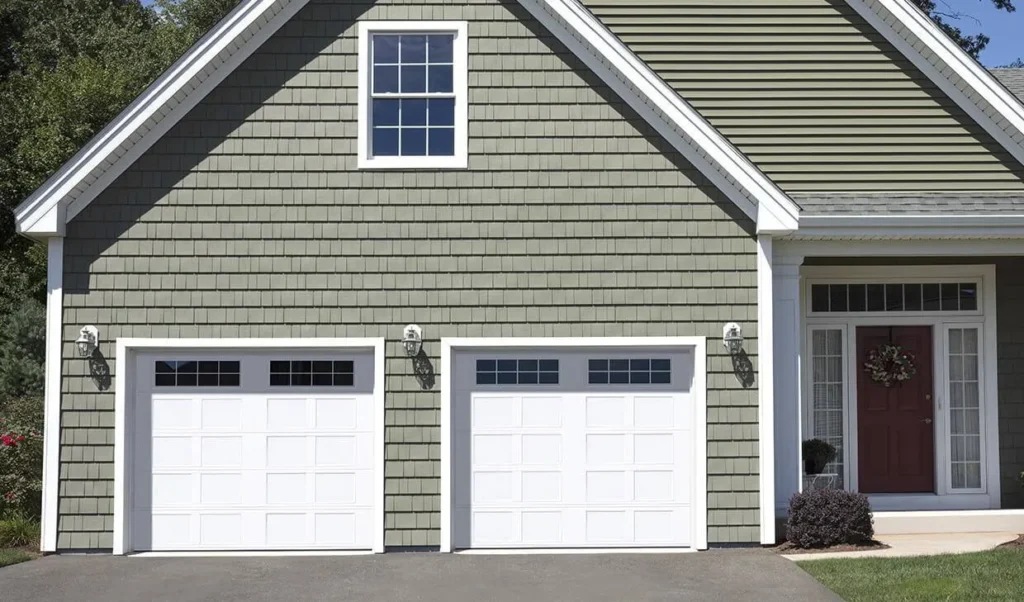
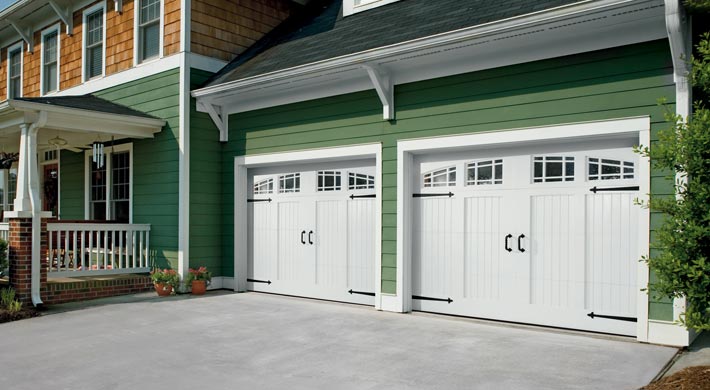
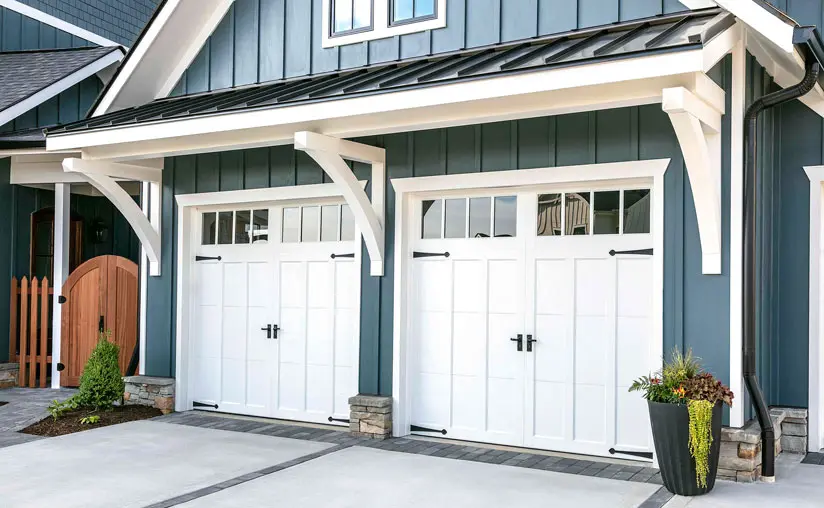
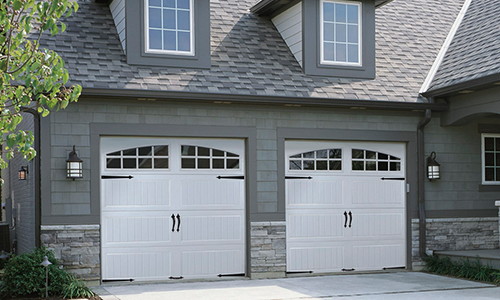
1. Types of Garage Doors:

  • The choice of garage door significantly impacts the overall cost. Common types include:
    • Single Tilt-Up Doors: Typically the most affordable option.
    • Roll-Up Doors: Common in commercial settings.
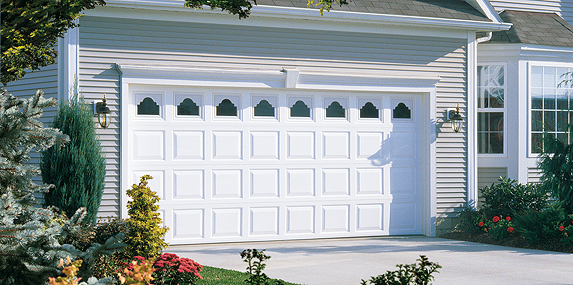
    • Sectional Doors: Popular for residential use, offering insulation and a range of designs.
    • Side-Hinged Doors: Traditional swing-out doors.

2. Material Selection:

  • Steel Doors: Durable and cost-effective.
  • Wood Doors: Elegant but often more expensive.
  • Aluminum Doors: Lightweight and corrosion-resistant.
  • Fiberglass Doors: Low maintenance and resistant to humidity.

3. Size and Style:

  • Larger doors cost more to install. Customization, such as windows or unique designs, can also add to the cost.

4. Insulation:

  • Insulated garage doors offer better temperature control but come at a higher price. Consider your climate and the purpose of the garage.

5. Opener System:

  • The type of garage door opener can affect costs. Chain-drive openers are more affordable, while belt-drive and screw-drive openers tend to be pricier but quieter.

6. Professional Installation:

  • Labor costs are a significant portion of the installation budget. Hiring a professional ensures proper installation, but it comes with a fee.

7. Location and Accessibility:

  • Installation costs may vary based on your location and how accessible your garage is.

8. Additional Features:

  • Windows: Adding windows for natural light can increase costs.
  • Smart Technology: Garage door openers with smart features may be more expensive but offer added convenience and security.

9. Removal of Old Door:

  • If replacing an existing door, there might be a fee for removing and disposing of the old door.

10. Warranty and Maintenance:

  • Consider the warranty offered on the garage door and opener. Quality doors may have a higher upfront cost but lower maintenance expenses over time.

11. DIY vs. Professional Installation:

  • While some homeowners opt for DIY installation to save money, professional installation ensures safety and adherence to local building codes.

12. Quotes and Comparisons:

  • Obtain quotes from multiple contractors to compare costs and ensure you’re getting a fair deal.

In conclusion, the cost of installing a Garage Door Repair Livonia MI can range from a few hundred to several thousand dollars, depending on your choices. It’s essential to consider factors such as materials, size, insulation, and additional features when budgeting for a new garage door. Always consult with professionals and obtain detailed quotes to make informed decisions based on your specific needs and preferences.

Brothers Garage Door Service

29522 Wentworth St, Livonia, MI 48154, United States

1-734-292-0971

How To Program A Garage Door Remote – MF Solutions Inc

The convenience of a Garage Door Repair Buffalo Grove IL transforms the mundane task of opening and closing your garage into a seamless experience.

However, the key to this convenience lies in proper programming. In this in-depth guide, we’ll unravel the mysteries of programming a garage door remote, spanning a thousand words to ensure that you not only master the process but also troubleshoot any potential hurdles along the way.

1. Understanding the Basics:

Before diving into the programming intricacies, familiarize yourself with the type of remote you’re working with. Garage door remotes come in various forms, including single-button remotes, multi-button remotes, and universal remotes that can operate multiple devices. Knowing the type of remote at your disposal sets the stage for a smoother programming journey.

2. Locating the “Learn” Button:

The cornerstone of garage door remote programming lies in locating the “Learn” button on your garage door opener. This button, typically found on the opener unit itself, is the gateway to synchronizing your remote with the garage door. Consult your garage door opener’s manual if you’re having trouble locating this crucial button.

3. Clearing the Slate:

Before introducing a new remote to the mix, it’s essential to clear the slate of any previous codes. This ensures a clean and effective programming process. To do this, press and hold the “Learn” button until the indicator light blinks or changes color, signifying the successful erasure of existing codes.

4. Timing is Everything:

Once the slate is cleared, it’s time to initiate programming mode. This step varies depending on the type of garage door opener you have. For most models, pressing the “Learn” button and releasing it prompts the opener to enter programming mode, indicated by a blinking light. Be mindful of the time window for the subsequent steps, as prompt action is often required.

5. Remote Rituals:

With the garage door opener in programming mode, the next step is syncing the remote with the opener. This typically involves pressing and holding the desired button on the remote until the indicator light on the opener blinks or changes color. The remote is now successfully paired with the opener.

6. Multiplicity of Buttons:

For remotes with multiple buttons, each button can be programmed to control a specific function. Follow the same steps as above, but after syncing the first button, repeat the process for the remaining buttons, assigning distinct functions to each.

7. Universal Appeal:

Universal remotes add an extra layer of complexity due to their ability to operate multiple devices. Consult the universal remote’s manual for specific instructions on programming it for your garage door opener. This usually involves inputting a specific code or series of codes that correspond to your opener’s make and model.

8. Testing, Testing:

The programming journey is incomplete without a thorough testing phase. Stand at a safe distance and press the programmed button on the remote to witness the magic unfold. The garage door should respond promptly, validating the successful programming of your remote.

9. Troubleshooting Tactics:

Even with careful execution, challenges may arise during the programming process. If the garage door doesn’t respond as expected, consider these troubleshooting tactics:

  • Double-check the remote’s battery and replace it if necessary.
  • Ensure you’re within the recommended distance from the garage door opener during programming.
  • Verify that the “Learn” button on the opener is pressed and held for the appropriate duration.
  • Confirm that you’re following the correct programming sequence outlined in your garage door opener’s manual.

10. Beyond the Basics:

Some garage door remotes come equipped with advanced features, such as the ability to control multiple garage doors or integrate with smart home systems. Explore your remote’s manual to unlock these advanced programming features, adding layers of convenience to your garage door operation.

Conclusion:

Programming a Garage Door Repair Buffalo Grove IL is a skill that elevates your daily routine and enhances the functionality of your garage door. By understanding the basics, locating the “Learn” button, initiating programming mode, syncing the remote, and troubleshooting challenges, you embark on a journey to master the remote realm. Whether dealing with a single-button remote, a multi-button marvel, or a universal powerhouse, this comprehensive guide equips you with the knowledge to navigate the intricacies of garage door remote programming. So, press those buttons with confidence and let the seamless dance of your garage door unfold at your command.

MF Solutions Inc

302 Cherrywood Rd Buffalo Grove, IL 60089

1-224-434-1780

How To Close Garage Door Manually – Sanger Garage Door Experts

Closing a Garage Door Repair Sanger TX is a straightforward process that can be useful in situations where there is a power outage or a malfunction with the automatic opener.

While the specific steps may vary depending on the type and model of your garage door, the following comprehensive guide provides general instructions applicable to many systems.

1. Disconnect the Garage Door Opener: Before attempting to close the garage door manually, you need to disconnect it from the automatic opener. Locate the emergency release cord, usually a red handle, hanging from the garage door opener rail. Pull this cord down, which releases the door from the opener carriage.

2. Verify Door Balance: Ensure that the garage door is in good balance by manually lifting it halfway. If the door stays in place when released, it is balanced correctly. If it falls or rises, there may be an issue with the spring tension, and it’s advisable to seek professional assistance.

3. Close the Door Partially: If the garage door is fully open, close it manually to the halfway position. This step helps reduce the strain on the springs when you lift the door manually.

4. Grip the Bottom of the Door: Stand inside the garage facing the door and grip the bottom of the door with both hands. Keep your feet shoulder-width apart for stability.

5. Lift the Door: Lift the garage door by bending your knees and using your leg muscles to avoid straining your back. Lift the door smoothly and steadily until it is fully closed. If the door is heavy, you may need assistance from another person.

6. Secure the Door: Once the garage door is closed, ensure that it is securely in place. Some doors have a locking mechanism, such as a slide bolt or handle lock, which you can engage to keep the door securely closed.

7. Reconnect the Opener: When power is restored or the issue with the automatic opener is resolved, you’ll need to reconnect the garage door to the opener. Pull the emergency release cord towards the garage door opener motor to engage it back with the carriage.

8. Test the Automatic Opener: After reconnecting the opener, test its functionality by using the remote control or wall-mounted button. Ensure that the door opens and closes smoothly with the automatic opener.

9. Check for Issues: Take a moment to inspect the garage door and its components for any visible issues. Look for loose hardware, damaged cables, or misaligned tracks. If you notice any problems, consider seeking professional assistance for repairs.

10. Lubricate Moving Parts: As part of regular maintenance, consider lubricating the moving parts of your garage door, including hinges, rollers, and springs. Use a recommended garage door lubricant to ensure smooth operation.

11. Keep Safety in Mind: When manually closing a garage door, prioritize safety. Lift with proper body mechanics, avoid placing hands or fingers between sections of the door, and be cautious of any obstructions in the door’s path.

12. Consider Installing a Lock: For added security, you may consider installing a manual lock on your garage door. This can provide an additional layer of protection against unauthorized access.

13. Seek Professional Assistance if Needed: If you encounter difficulties closing the garage door manually or if there are underlying issues with the door’s operation, it’s advisable to seek professional assistance. Garage door professionals have the expertise to diagnose and address various problems.

Conclusion:

Closing a Garage Door Repair Sanger TX is a useful skill for homeowners to have in case of power outages or issues with automatic openers. By following these general steps and prioritizing safety, you can ensure the efficient and secure manual operation of your garage door. Regular maintenance and prompt professional assistance for any issues contribute to the overall safety and functionality of your garage door system.

Sanger Garage Door Experts

600 N Stemmons St, Sanger, TX 76266, United States

1-940-308-2092

What Is The Best Way To Clean Windows With A Lot Of Dirt – DFW Window Cleaning Colleyville

Window Cleaning Service Colleyville TX with a significant amount of dirt may seem like a daunting task, but with the right approach and tools, you can restore them to a sparkling, clear state.

In this comprehensive guide, we’ll explore effective steps and techniques to tackle windows with a lot of dirt, ensuring a thorough and satisfying cleaning process.

1. Gather Your Cleaning Arsenal: Start by assembling the necessary tools and materials. You’ll need a bucket, mild dish soap, a squeegee, a soft sponge or microfiber cloth, a hose, and potentially a window cleaning solution for stubborn dirt.

2. Dust Off Loose Debris: Before applying any cleaning solution, dust off loose debris such as dirt, cobwebs, or leaves. You can use a soft brush or a handheld vacuum cleaner with a brush attachment to gently remove surface dirt.

3. Pre-Rinse with a Hose: Use a hose with a moderate spray setting to pre-rinse the windows. This helps to loosen and remove loose dirt, making the subsequent cleaning process more effective. Start from the top of the windows and work your way down.

4. Create a Powerful Soapy Solution: Fill your bucket with warm water and add a generous amount of mild dish soap. Mix the soap thoroughly to create a powerful soapy solution. The soap will help break down stubborn grime and grease on the windows.

5. Apply the Soapy Solution: Dip a sponge or microfiber cloth into the soapy water and generously apply it to the windows. Ensure that the entire surface is covered, paying extra attention to areas with heavy dirt buildup. Allow the soapy solution to sit for a few minutes to break down the dirt.

6. Scrub with a Soft Sponge or Brush: Use a soft sponge or a brush with soft bristles to scrub the windows. Focus on areas with visible dirt and stains, applying gentle pressure to avoid scratching the glass. The combination of the soapy solution and scrubbing will help lift and dislodge stubborn dirt.

7. Rinse Thoroughly with the Hose: Once you’ve scrubbed the windows, thoroughly rinse them with the hose. Use a moderate spray setting and start from the top, allowing the water to flow down and carry away the loosened dirt. Pay attention to corners and edges where dirt may accumulate.

8. Squeegee for a Streak-Free Finish: Use a squeegee to remove excess water and achieve a streak-free finish. Starting from the top corner, pull the squeegee down in a straight, overlapping motion. Wipe the squeegee blade with a dry cloth after each pass to prevent streaks.

9. Dry and Polish: After squeegeeing, use a dry, lint-free cloth to wipe away any remaining water from the edges of the windows. This final step helps prevent water spots and enhances the clarity of your windows. If desired, you can use a glass cleaner for an extra polish.

10. Check for Residue: Thoroughly inspect the windows for any leftover soap residue. If you notice any, rinse the windows again with clean water and repeat the squeegeeing process. Removing all soap residue is crucial for achieving spotless windows.

11. Use a Commercial Window Cleaning Solution (Optional): If the dirt on your windows is particularly stubborn, consider using a commercial window cleaning solution. Follow the manufacturer’s instructions for application and ensure compatibility with your window material.

12. Repeat as Necessary: For extremely dirty windows, you may need to repeat the cleaning process. Stubborn stains or layers of dirt may require additional scrubbing and rinsing. Be patient and persistent for the best results.

13. Consider Alternatives for Delicate Surfaces: If your windows have delicate surfaces, such as tinted glass or special coatings, consider alternative cleaning methods. Use a soft microfiber cloth and gentle cleaning solutions to avoid damaging the delicate features of the windows.

14. Interior Window Cleaning: For interior windows, follow the same steps but be mindful of protecting indoor surfaces from water splashes. Place towels or cloths on window sills and adjacent areas to catch any drips.

15. Regular Maintenance: Establish a regular window cleaning schedule to prevent the buildup of dirt and grime. Regular maintenance will make future cleanings quicker and more manageable.

16. Professional Window Cleaning Services: If you find that the dirt on your windows is too challenging to handle on your own, or if you have high or hard-to-reach windows, consider hiring professional window cleaning services. They have the expertise and equipment to tackle tough cleaning scenarios.

17. Safety First: Always prioritize safety during the cleaning process. If you’re using a ladder or working at heights, ensure proper safety measures, and have someone assist you if needed.

In conclusion, Window Cleaning Service Colleyville TX with a lot of dirt requires a systematic and thorough approach. By following these detailed steps and utilizing the right tools, you can achieve sparkling, clear windows and enjoy an unobstructed view of the world outside.

DFW Window Cleaning Colleyville

1808 Maplewood Trail, Colleyville, TX 76034, United States

1-817-813-8010

What Is The Average Time It Takes To Clean Windows In A House – Plano Window Cleaning & Glass Repair

The Window Cleaning Service Plano TX can vary significantly based on several factors, including the size of the house, the number of windows, the level of dirt and grime, and the cleaning methods employed.

In this exploration, we’ll delve into the various factors that influence the time it takes to achieve sparkling, streak-free windows and provide tips for optimizing your window-cleaning process.

1. House Size: The size of the house is a primary determinant of the overall time required for window cleaning. Larger homes with more windows naturally demand more time and effort. A small apartment with a few windows might take an hour or less, while a large multi-story house with numerous windows can take several hours.

2. Number of Windows: Unsurprisingly, the more windows you have, the longer it will take to clean them. Each window requires individual attention, from scrubbing and squeegeeing to wiping down frames and sills. If your house has a multitude of windows, it’s advisable to allocate sufficient time for a thorough cleaning.

3. Interior vs. Exterior Cleaning: Cleaning the interior of windows typically takes less time than tackling the exterior, especially if the exterior is hard to reach or requires specialized equipment. Exterior windows may accumulate more dirt, grime, and environmental elements, necessitating additional time and effort.

4. Level of Dirt and Grime: The existing condition of your windows plays a significant role in determining the time required for cleaning. If your windows haven’t been cleaned for an extended period, or if they are exposed to factors like bird droppings or tree sap, additional time may be needed to effectively remove stubborn stains.

5. Cleaning Methods: The choice of cleaning methods can impact the overall time spent on window cleaning. Traditional methods involving a squeegee, cleaning solution, and elbow grease are effective but may take more time, especially for intricate details. Alternatively, using modern tools like a window vacuum can expedite the process.

6. Frequency of Cleaning: Regular maintenance, such as cleaning your windows on a monthly or quarterly basis, can reduce the time required for each session. Windows that are cleaned regularly are less likely to have built-up grime, making the cleaning process more efficient.

7. Accessibility and Safety Measures: Accessibility to windows and the safety measures taken during the cleaning process also influence the time spent. If windows are easily reachable and safe to clean, the process will be quicker. However, for windows at height or in challenging locations, additional time may be needed to ensure a safe and thorough cleaning.

Tips for Efficient Window Cleaning:

  1. Gather All Supplies in Advance: Before starting, ensure you have all the necessary tools and cleaning supplies readily available. This prevents unnecessary interruptions during the cleaning process.
  2. Prioritize Safety: If your windows are in hard-to-reach places, consider using extension poles, ladders, or hiring professional services to ensure safety. Taking the time to set up these safety measures is crucial.
  3. Divide and Conquer: Break down the cleaning process into manageable sections. Tackle one room or area at a time to maintain focus and prevent feeling overwhelmed.
  4. Use Time-Saving Tools: Invest in time-saving tools like a window vacuum or a squeegee with an extension pole for high or hard-to-reach areas. These tools can expedite the cleaning process.
  5. Regular Maintenance: As mentioned earlier, cleaning windows regularly reduces the time and effort needed for each session. Stay proactive in maintaining your windows to avoid the accumulation of stubborn dirt.

Conclusion:

The Window Cleaning Service Plano TX varies based on several factors, but with careful planning, the right tools, and consistent maintenance, you can streamline the process. Whether you’re tackling a small apartment or a spacious home, the key is to approach window cleaning with patience, thoroughness, and the understanding that the time invested contributes to the overall cleanliness and aesthetic appeal of your living space.

Plano Window Cleaning & Glass Repair

1201 Legacy Dr #2114, Plano, TX 75023, United States

1-972-544-1373

Are There Any DIY Hacks For Streak-Free Windows – NRH Window Cleaning & Glass Repair

Window Cleaning Service North Richland Hills TX can transform the ambiance of any space, allowing natural light to flood in and providing an unobstructed view of the outside world.

While there are numerous commercial window-cleaning products available, you might be surprised to find effective solutions right in your pantry. In this guide, we’ll explore DIY hacks for achieving streak-free windows using common household items.

Vinegar and Water Solution

Create a simple yet powerful cleaning solution by mixing equal parts white vinegar and water. This natural concoction effectively cuts through grease and grime, leaving your windows sparkling. Apply with a microfiber cloth for optimal results.

DIY Citrus Cleaner

Harness the power of citrus to create a fragrant and effective window cleaner. Combine citrus peels with white vinegar and let the mixture sit for a few days. Strain the liquid and dilute it with water for a refreshing solution that leaves no streaks behind.

Cornstarch Magic

Believe it or not, cornstarch can be a game-changer in achieving streak-free windows. Mix two tablespoons of cornstarch with half a cup of vinegar and add this paste to a gallon of warm water. Apply and wipe with a lint-free cloth for a spotless finish.

Rubbing Alcohol Trick

Rubbing alcohol is not just for first aid; it’s also a fantastic window-cleaning ally. Mix one part rubbing alcohol with one part water and a dash of dish soap. This solution evaporates quickly, minimizing streaking.

Black Tea Elixir

Black tea isn’t just for sipping; it can also contribute to streak-free windows. Brew some strong black tea, let it cool, and apply with a sponge or cloth. The tannic acid in tea helps dissolve dirt and leaves your windows gleaming.

Newspaper Magic

If you’re looking for a low-cost solution, reach for yesterday’s newspaper. Spray your window with a vinegar-water solution and wipe it down with crumpled newspaper. The ink acts as a mild abrasive, helping to remove stubborn stains and streaks.

Club Soda Brilliance

Club soda isn’t just a refreshing drink; it’s also an excellent window cleaner. The effervescence helps break down dirt, and the lack of minerals in club soda reduces streaking. Spray and wipe for a quick and effective cleaning session.

Homemade Corn Vinegar Cleaner

Combine cornstarch, white vinegar, and water to create a potent homemade cleaner. This mixture not only tackles dirt but also adds a shine to your windows. Apply with a soft cloth for streak-free perfection.

Lemon Freshness

Lemons, with their natural acidity, can cut through grime and leave your windows smelling fresh. Mix lemon juice with water and a touch of vinegar for a citrusy cleaning solution. Bonus: Lemons also have antibacterial properties.

Essential Oil Elegance

Enhance your homemade cleaning solution with a few drops of essential oil. Lemon, lavender, or eucalyptus not only add a pleasant fragrance but also contribute to the cleaning power, leaving your windows streak-free and smelling delightful.

Fabric Softener Finish

Add a capful of fabric softener to warm water for a streak-free finish. The softening agents reduce water streaks, leaving your windows looking polished and inviting.

Coffee Filter Precision

For a lint-free wipe, opt for coffee filters instead of paper towels or cloth. They’re super absorbent and won’t leave behind fibers, ensuring a streak-free shine.

DIY Wipes for Quick Touch-ups

Create your own window-cleaning wipes by cutting paper towels into squares and soaking them in your preferred cleaning solution. Store them in a sealed container for quick and convenient touch-ups.

Microfiber Magic

Invest in quality microfiber cloths for a streak-free finish. These ultra-soft and absorbent cloths effectively lift dirt and grime, leaving your windows crystal clear without any residue.

Proper Technique Matters

Regardless of the cleaning solution, using the right technique is crucial. Wipe windows horizontally on one side and vertically on the other. This way, if there are streaks, you’ll know which side they’re on.

Conclusion:

Window Cleaning Service North Richland Hills TX doesn’t always require expensive commercial cleaners. With these DIY hacks using household items, you can enjoy a crystal-clear view without breaking the bank. Experiment with different solutions to find the one that works best for you, and say goodbye to streaks for good.

NRH Window Cleaning & Glass Repair

7510 Davis Blvd # B, North Richland Hills, TX 76182, United States

1-817-601-6082

What Is The Proper Way To Clean Exterior Windows – Southlake Window Cleaning & Glass Repair

Window Cleaning Service Southlake TX can be a daunting task, but with the right approach and a bit of planning, you can achieve sparkling results.

Whether you’re tackling ground-level windows or those on higher floors, here’s a comprehensive guide to the proper way to clean exterior windows, ensuring a clear view and enhancing the overall appearance of your home.

1. Safety First: Before embarking on any exterior window cleaning project, prioritize safety. If you’re working on windows above ground level, use a sturdy ladder, ensure it’s on level ground, and have someone assist you for added safety. Consider wearing protective gear, including gloves and safety glasses, to shield yourself from cleaning solutions and debris.

2. Gather Your Tools and Supplies: Collect all the necessary tools and supplies before starting the cleaning process. You’ll need a bucket, a reliable squeegee, a scrubber or sponge, a soft-bristle brush, a hose or bucket of water, a quality window cleaning solution or a homemade mixture, and lint-free microfiber cloths.

3. Remove Dust and Cobwebs: Begin by dusting off the exterior window frame and sill. Use a soft brush or a vacuum cleaner to remove loose dirt and cobwebs. This step prevents debris from mixing with the cleaning solution during the washing process.

4. Pre-Rinse the Windows: Use a hose or bucket of water to pre-rinse the exterior of the windows. This helps remove surface dirt and prepares the windows for the cleaning solution. If you’re dealing with stubborn stains or bird droppings, allow the water to soak on the affected areas for a few minutes.

5. Choose the Right Cleaning Solution: Select a suitable window cleaning solution based on your preferences and the level of grime on the windows. Whether it’s a commercial cleaner, a vinegar and water solution, or another DIY option, ensure the solution is appropriate for outdoor use and safe for your window material.

6. Apply the Cleaning Solution: Spray or apply the cleaning solution to the exterior of the windows. Start from the top and work your way down to ensure thorough coverage. Allow the solution to sit for a few minutes to break down dirt and stains. For higher windows, use an extension pole with a scrubber attachment for an even application.

7. Scrubbing and Agitation: Use a soft-bristle brush or a scrubber to agitate the cleaning solution on the window surface. Focus on areas with stubborn stains or built-up grime. This step helps loosen dirt, making it easier to remove during the rinsing process.

8. Squeegee Technique: Employ a high-quality squeegee to remove the cleaning solution. Start at the top and pull the squeegee down in a straight, vertical motion. Wipe the blade with a clean, dry cloth after each pass to prevent streaks. For larger windows, consider using a larger squeegee or a water-fed pole system.

9. Hose Rinse or Bucket Rinse: Rinse the windows thoroughly with a hose or, if working at ground level, use a bucket of clean water. This removes any remaining cleaning solution and ensures a spotless finish. For higher windows, an extension pole with a hose attachment or a pressure washer may be useful.

10. Addressing Frames and Sills: Don’t forget to clean the window frames and sills. Use a sponge or a dedicated brush to scrub away dirt and grime. Wipe down the frames and sills with a damp cloth or sponge for a comprehensive cleaning.

11. Dry with Microfiber Cloths: Once the windows are rinsed, use lint-free microfiber cloths to dry the glass and frames. Wipe in a circular motion to ensure all moisture is absorbed, leaving the windows streak-free and gleaming.

12. Repeat for Higher Windows: If your home has multiple stories, repeat the cleaning process for higher windows using a safe and secure method, such as an extension pole or a water-fed pole system. Alternatively, consider hiring professional window cleaners for hard-to-reach windows.

13. Regular Maintenance: To keep your exterior windows looking their best, establish a regular cleaning routine. The frequency of cleaning may depend on your location, climate, and the amount of exposure your windows have to environmental elements.

14. Consider Professional Help: For extensive cleaning needs, hard-to-reach windows, or if you simply prefer to leave the task to the experts, consider hiring professional window cleaners. They have the expertise, tools, and safety measures to handle challenging exterior window cleaning projects.

In conclusion, the proper way to Window Cleaning Service Southlake TX involves a systematic approach, prioritizing safety, and using the right tools and cleaning solutions. By following these steps, you can maintain clear, pristine windows that not only enhance the curb appeal of your home but also provide a bright and unobstructed view of the outdoors.

Southlake Window Cleaning & Glass Repair

1052 Summerplace Ln, Southlake, TX 76092, United States

1-817-839-4773

How Do I Program My Chamberlain Garage Door Keypad – Denzel Garage Door of Long Beach

Programming a Chamberlain Garage Door Repair Long Beach CA is a straightforward process that allows you to control your garage door without a remote.

Chamberlain, a reputable brand in garage door openers, provides keypads with user-friendly programming features. In this comprehensive guide, I’ll take you through the step-by-step process to ensure a successful programming experience for your Chamberlain garage door keypad.

1. Identify Your Keypad Model: Chamberlain offers various garage door keypad models, and programming steps may vary slightly between them. Refer to the user manual that came with your keypad for specific instructions tailored to your model.

2. Locate the Learn Button on the Opener: To program the keypad, you’ll need to find the “Learn” button on your Chamberlain garage door opener. This button is typically located on the motor unit and may be colored. Consult your garage door opener manual if you’re unsure about the location.

3. Clear Existing Codes (Optional): If you are setting up a new keypad or want to reset the existing codes, you can clear the memory on the garage door opener. Press and hold the “Learn” button until the indicator light on the opener blinks, indicating that the memory is cleared.

4. Open the Keypad Cover: Open the cover of your Chamberlain garage door keypad to reveal the programming buttons. This may involve sliding the cover up, down, or to the side, depending on your keypad model.

5. Locate the Program/Set Button: Inside the keypad, you’ll find a “Program” or “Set” button. Press and release this button to initiate the programming mode.

6. Enter a PIN Code: Using the keypad, enter a PIN code of your choice. The PIN code is typically a 4-digit number. Make sure to choose a code that is easy for you to remember but not easily guessable.

7. Press the Learn Button on the Opener: After entering the PIN code, go to your Chamberlain garage door opener motor unit and press the “Learn” button. You need to do this step within 30 seconds of entering the PIN on the keypad. The indicator light on the opener will begin to blink.

8. Confirm the Programming: Return to the keypad and enter the PIN code you chose. Press the “Enter” or “Send” button to confirm the programming. The garage door opener’s indicator light should stop blinking, indicating that the keypad is successfully programmed.

9. Test the Keypad: Close the keypad cover and test the programmed PIN by entering it and pressing the “Enter” or “Send” button. The garage door should respond by opening or closing. If it doesn’t, repeat the programming steps.

10. Program Additional Features (Optional): Depending on your Chamberlain keypad model, there may be additional features to program, such as setting a temporary PIN code or adjusting the backlight. Refer to your user manual for instructions on these optional features.

11. Change the PIN Code (Optional): For added security, you may want to change the PIN code periodically. Consult your user manual for instructions on changing the PIN code for your specific Chamberlain keypad model.

12. Troubleshooting: If you encounter any issues during the programming process or if the keypad doesn’t function as expected, refer to the troubleshooting section in your user manual. Common issues may include incorrect programming steps or interference.

13. Final Checks: Perform a final check to ensure that the Chamberlain garage door keypad operates smoothly. Test the keypad from various distances and angles to confirm consistent performance.

In conclusion, programming a Chamberlain Garage Door Repair Long Beach CA is a user-friendly process that enhances the convenience and security of your garage door access. While this guide provides a general overview, it’s crucial to consult your Chamberlain keypad manual for precise instructions tailored to your specific model. If challenges persist, consider reaching out to Chamberlain’s customer support for expert assistance. With patience and attention to detail, you’ll have your Chamberlain garage door keypad programmed for secure and convenient use.

Denzel Garage Door of Long Beach

1635 Cedar Ave, Long Beach, CA 90813, United States

1-562-337-3432

How To Change Battery In Garage Door Opener – A 24 Hour Door Service

Garage Door Repair Madison MS are convenient devices that make our lives easier. However, like any electronic device, they rely on batteries to function properly.

If you’ve noticed a decrease in performance or your garage door opener is not working as efficiently as it used to, it might be time to change the battery. Follow this step-by-step guide to ensure a smooth and successful battery replacement.

: Identify the Type of Battery

Before you begin, it’s crucial to identify the type of battery your garage door opener uses. Most garage door openers use a 12-volt battery, but it’s always best to consult your opener’s user manual for specific information. Once you know the battery type, purchase a replacement battery from a reliable source.

: Gather Necessary Tools

To change the battery, you’ll need a few tools. These typically include a screwdriver (either Phillips or flathead, depending on your opener), safety gloves, and safety glasses. Ensure that you have these tools on hand before starting the process.

: Disconnect Power

Safety first! Before you begin any work on your garage door opener, disconnect power to avoid any electrical hazards. Locate the power source for your garage door opener and unplug it from the electrical outlet. If your opener is hardwired, turn off the circuit breaker connected to the opener.

: Access the Battery Compartment

Locate the battery compartment on your garage door opener. This is usually on the back or side of the unit. Use the screwdriver to remove the screws securing the compartment cover. Carefully set the screws aside, ensuring you don’t lose them.

: Remove the Old Battery

Once the battery compartment is accessible, locate the old battery. Depending on the design of your opener, the battery may be in a slot or held in place with a clip. Carefully remove the old battery, taking note of its orientation. Pay attention to positive (+) and negative (-) markings on the battery and make a mental note of how it is positioned.

: Dispose of the Old Battery Properly

Batteries contain hazardous materials and should be disposed of properly. Check with your local recycling center or follow any guidelines provided by the battery manufacturer for safe disposal.

: Insert the New Battery

Take your new battery and insert it into the battery compartment, ensuring it is oriented correctly based on the markings for positive and negative. Some batteries have a specific direction for insertion, so consult the user manual if you’re unsure.

: Secure the Battery Compartment Cover

With the new battery in place, secure the battery compartment cover back onto the garage door opener using the screws you removed earlier. Tighten the screws securely but avoid over-tightening, as it could damage the cover.

: Reconnect Power

Now that the new battery is installed and the compartment securely closed, it’s time to reconnect power to your garage door opener. Plug it back into the electrical outlet or turn the circuit breaker back on if it was hardwired.

: Test the Garage Door Opener

To ensure that the battery replacement was successful, test your garage door opener. Press the remote control or wall-mounted button to open and close the garage door. If the door operates smoothly and without issues, congratulations – you’ve successfully changed the battery!

Conclusion:

Regular maintenance, including battery replacement, is essential for keeping your Garage Door Repair Madison MS in optimal condition. By following these step-by-step instructions, you’ve taken a proactive step in ensuring the continued reliability and functionality of your garage door opener. If you encounter any difficulties or have specific questions, consult your opener’s user manual or seek professional assistance.

A 24 Hour Door Service

417 Post Oak Cove, Madison, MS 39110, United States

1-601-664-8935

How Do I Program A Clicker Garage Door Keypad – Denzel Garage Door Repair


Programming a Garage Door Repair Victorville CA is a straightforward process that involves a series of steps to synchronize the keypad with your garage door opener.

Follow these detailed instructions to ensure a successful programming experience.

Locate the Learn Button:

Begin by finding the “Learn” button on your garage door opener. This button is typically located on the motor unit, usually mounted on the ceiling of your garage. The Learn button is crucial for establishing communication between the keypad and the opener.

Clear Existing Codes:

To start fresh, it’s recommended to clear any existing codes from the opener’s memory. Press and hold the “Learn” button until the indicator light on the opener blinks or goes out. This ensures that previous codes are erased, providing a clean slate for programming.

Choose a Personal Identification Number (PIN):

Select a 4-digit PIN that you will use to operate the garage door. Choose a code that is easy for you to remember but not easily guessable for security reasons.

Enter Programming Mode:

On your Clicker keypad, locate the programming button. This button is often situated on the bottom or back of the keypad. Press and release the programming button to enter programming mode. The keypad’s light should respond by flashing or turning on, indicating that it is ready for programming.

Enter Your PIN:

Once in programming mode, enter your chosen PIN on the keypad. Ensure that you input the code within a specific time frame to guarantee successful programming. The keypad’s light should flash or remain on, confirming that it is in programming mode.

Press the Learn Button on the Opener:

Quickly move to the garage door opener motor unit and press the “Learn” button. You typically have around 30 seconds to complete this step. The indicator light on the opener should respond by illuminating, indicating that it is ready to receive the programming signal.

Test the Keypad:

Verify that the programming was successful by testing the keypad. Enter your PIN on the keypad, and the garage door should respond by either opening or closing. If the door does not operate as expected, repeat the programming steps to ensure accuracy.

Program Additional Features (Optional):

Depending on your Clicker keypad model, you may have the option to program additional features, such as controlling multiple garage doors. Refer to the keypad’s manual for specific instructions on these optional features, and follow the steps accordingly.

Secure the Keypad:

After successfully programming the keypad, secure it in a location that is easily accessible to you but not easily visible or accessible to others. This ensures both convenience and security for your garage access.

Troubleshooting:

If you encounter any issues during the programming process, consult the user manuals for both your garage door opener and Clicker keypad. These manuals often provide troubleshooting tips and additional instructions for specific models. If problems persist, consider reaching out to Clicker customer support for assistance.

In conclusion, programming your Garage Door Repair Victorville CA involves a systematic process that, when followed accurately, ensures a smooth and successful experience. Always refer to the user manuals for your specific models to guarantee precise programming instructions.

Denzel Garage Door Repair

12127 Mall Blvd SUITE A251, Victorville, CA 92392, United States

1-760-377-8735

Page 1 of 7

Powered by WordPress & Theme by Anders Norén