Local Services in Texas

Month: January 2023

How to Adjust a Garage Door – First Call Garage Doors

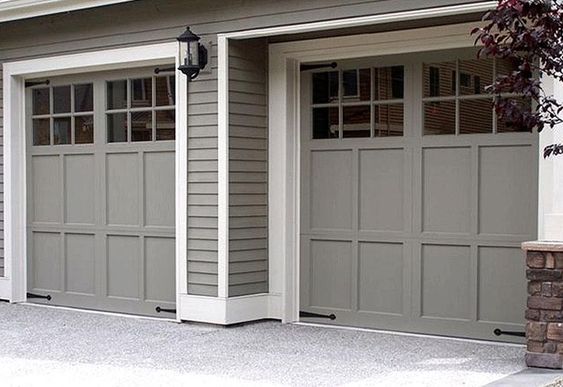
Adjusting a garage door is an essential maintenance task that can help ensure proper operation and extend the lifespan of the door. Whether your garage door is misaligned, making unusual noises, or not functioning smoothly, adjusting it can often resolve these issues.

To adjust a garage door, follow these steps from Garage Door Repair:

Step 1: Inspect the Door and Hardware First, I inspect the garage door and its hardware for any visible signs of damage or wear. This includes checking the tracks, bolts, rollers, and hinges. If I notice any issues, such as bent tracks or loose bolts, I address them before proceeding with the adjustments.

Step 2: Adjust the Tracks Next, I use a level to check the alignment of the tracks. If they are not plumb vertically or level horizontally, I loosen the bolts holding them in place. With gentle force, I make the necessary adjustments to align the tracks properly. Once they are aligned, I tighten the bolts securely.

Step 3: Align the Rollers I inspect the rollers to ensure they are properly seated in the track. If any of the rollers appear loose or wobbly, I tighten the bolts or screws that hold them in place. Lubricating the rollers with a silicone-based lubricant helps ensure smooth operation.

Step 4: Check and Adjust the Springs If the garage door has torsion springs, I exercise caution and consult a professional for any adjustments, as working with springs can be dangerous. However, for extension springs, I can make some adjustments myself. I carefully adjust the tension of the springs by moving the S-hook to a different hole on the track hanger, increasing or decreasing the tension as needed. I always make small adjustments and test the door’s balance before making further changes.

Step 5: Inspect and Adjust Cables and Pulleys I examine the lift cables and pulleys for any signs of fraying, wear, or damage. If I notice any issues, I replace the damaged cables. If the cables are intact but loose, I adjust the tension by tightening the adjustment bolts on the bottom brackets.

Step 6: Lubricate Moving Parts Proper lubrication is crucial for the smooth operation of a garage door. I apply a silicone-based lubricant to all moving parts, such as hinges, rollers, springs, and tracks. This helps reduce friction and ensures that the door operates smoothly.

Step 7: Test the Door’s Operation After making the necessary adjustments and lubricating the moving parts, I test the door’s operation. I open and close the door several times to check for any binding, unusual noises, or imbalances. If I notice any issues, I revisit the relevant adjustments and make further tweaks as needed.

Step 8: Seek Professional Help if Needed If I encounter any complex adjustments or if I’m unsure about any aspect of the process, I don’t hesitate to seek professional help. Garage doors can be heavy and potentially dangerous, so it’s important to prioritize safety and consult an expert when necessary.

By following these steps from Garage Door Repair and conducting regular maintenance, I can ensure that my garage door operates smoothly and remains in optimal condition. Regular inspections and adjustments help prevent problems and extend the lifespan of the door.

First Call Garage Doors

20527 FM1093 Unit B205, Richmond, TX 77407

713-248-2684

How to Reset LiftMaster Garage Door Opener – Brother’s Garage Door

Here’s my personal experience and step-by-step account from Garage Door Repair Services of how I reset my LiftMaster garage door opener:

  1. Disconnecting the power:
    • First, I made sure to disconnect the power to the garage door opener for safety. I located the power cord and unplugged it from the outlet or turned off the power switch connected to the opener unit.
  2. Locating the “Learn” button:
    • Next, I looked for the “Learn” button on the garage door opener unit. It was usually located near the antenna wire or on the back panel of the unit. The button was clearly labeled as “Learn” or had a similar designation.
  3. Pressing and holding the “Learn” button:
    • With the power disconnected, I pressed and held down the “Learn” button using my finger. This action activated the reset mode on the garage door opener.
  4. Reconnecting the power:
    • While continuing to hold down the “Learn” button, I reconnected the power to the garage door opener. I plugged the power cord back into the outlet or turned on the power switch. I made sure to keep holding the “Learn” button throughout this step.
  5. Releasing the “Learn” button:
    • After a few seconds, I released the “Learn” button. I noticed that the garage door opener unit emitted a beep sound or its indicator lights started flashing, indicating that the reset process had started.
  6. Waiting for the indicators to stop flashing:
    • I patiently waited for the indicator lights on the garage door opener to stop flashing. It usually took around 30 seconds to a minute for the lights to stabilize, signifying that the reset process was complete.
  7. Reprogramming the remote control:
    • To restore the functionality of my remote control, I followed the specific instructions provided by LiftMaster. Typically, this involved pressing the “Learn” button on the opener unit and then pressing the desired button on the remote control. The opener unit acknowledged the programming by flashing its indicator lights or emitting a beep sound.
  8. Testing the programming:
    • Once I had reprogrammed the remote control, I tested it by pressing the programmed button. I observed whether the garage door opened or closed as expected. If it didn’t work, I double-checked the programming steps and made sure I followed them correctly.
  9. Repeating for additional remotes or keypads:
    • If I had additional remotes or keypads that needed to be programmed, I repeated the previous step for each device. I referred to the specific instructions provided by LiftMaster for each device to ensure proper programming.
  10. Finalizing the reset process:
    • To complete the reset process, I referred to the user manual or visited the LiftMaster website for any additional steps or settings that needed to be adjusted. This included reprogramming any keypad access codes, adjusting travel limits, or setting other preferences specific to my LiftMaster garage door opener model.

Remember, the steps I described from Garage Door Repair Services are based on my personal experience, and the specific instructions may vary depending on your LiftMaster garage door opener model. Always consult the user manual or visit the LiftMaster website for detailed, model-specific instructions on how to reset your particular garage door opener.

Brother’s Garage Door

29522 Wentworth St. Livonia, MI 48154

734-292-0971

How to Program Chamberlain Garage Door Opener – Affordable Garage Door Repairs of Indianapolis, LLC

When I purchased my Chamberlain garage door opener, I needed to program it to work with my remote control.

Here’s a step-by-step account of how I successfully programmed it based from Garage Door Repair:

  1. Clearing the memory: To start fresh, I cleared the existing memory of the opener. I located the “Learn” button on the opener motor unit, which was near the hanging antenna wire. I pressed and held this button for about 10 seconds until the indicator light turned off, indicating that the memory had been cleared.
  2. Choosing the remote control: I made sure to select the remote control that I wanted to program. I checked that it had fresh batteries to ensure a smooth programming process.
  3. Accessing programming mode: I followed the instructions in the Chamberlain opener’s manual to access the programming mode. On my model, I needed to press and release the “Learn” button on the motor unit within 30 seconds of clearing the memory. The indicator light on the motor unit started blinking, indicating that it was in programming mode.
  4. Programming the remote control: With the opener in programming mode, I programmed the remote control by following these steps:
    • I held the remote control close to the opener motor unit and pressed the specific button I wanted to program on the remote. This could be the “Open” or “Close” button, depending on my preference.
    • As soon as I pressed the button on the remote, the indicator light on the motor unit flashed or clicked, indicating that the programming was successful.
  5. Testing the remote control: After programming the remote control, I tested it to ensure that it worked correctly. I stood within range of the opener and pressed the programmed button on the remote. The garage door responded by either opening or closing, confirming that the programming was successful.
  6. Programming additional remotes: If I had additional remotes to program, I repeated the same steps for each remote within the limited time frame provided by the opener. This ensured that all my remotes were programmed and synchronized with the opener.
  7. Optional: Programming additional features: Depending on the model of the Chamberlain opener, there might be additional features to program, such as wireless keypads or smartphone control. I referred to the opener’s manual for specific instructions on programming these features and followed the steps provided.
  8. Finalizing the programming: Once I had finished programming all the remotes and additional features, I exited the programming mode. I pressed the “Learn” button on the opener motor unit again, and the indicator light stopped flashing, indicating that the programming mode had ended.

Overall, as stated in Garage Door Repair, programming my Chamberlain garage door opener was a straightforward process that allowed me to easily connect my remote control and other features to the opener. By following the instructions provided in the manual and paying attention to the indicator lights and programming sequences, I was able to set up my opener in no time.

Affordable Garage Door Repairs of Indianapolis, LLC

Indianapolis, IN

317-372-5337

How to Reset Your Liftmaster Garage Door Opener-Arnold’s Garage Door Service

Resetting a LiftMaster Arnold’s Garage Door Repair opener is a relatively straightforward process that can be done by following a few simple steps.

Before attempting to reset your opener, it is important to understand that the specific instructions may vary depending on the model of your LiftMaster opener. The following guidelines provide a general overview of how to reset a LiftMaster garage door opener.

  1. Locate the “Learn” button: The first step is to find the “Learn” button on your LiftMaster opener. The location of this button may vary depending on the model but is typically found on the back or side of the opener unit.
  2. Clear the opener’s memory: To reset the opener, you need to clear its memory by pressing and holding the “Learn” button for approximately 6-10 seconds. During this time, you may see an indicator light or hear a beep, indicating that the memory has been cleared.
  3. Release the “Learn” button: Once the memory has been cleared, release the “Learn” button. The indicator light may turn off or blink to confirm that the memory has been successfully cleared.
  4. Reprogram the remote control: After clearing the memory, you will need to reprogram your remote control(s) to the opener. Start by pressing the “Learn” button on the opener once, and then release it. The indicator light should turn on or start blinking, indicating that the opener is in programming mode.
  5. Program the remote control: With the opener in programming mode, press the button on your remote control that you want to use to operate the garage door. Hold the button down until the opener’s indicator light blinks or turns off, indicating that the programming was successful. Repeat this step for each remote control you want to program.
  6. Test the remote controls: After programming the remote controls, test them by pressing the programmed buttons. The garage door should respond by opening or closing. If the door doesn’t operate as expected, repeat the programming process from step 4.
  7. Resetting keyless entry systems: If you have a keyless entry system, such as a keypad or fingerprint scanner, you may also need to reset and reprogram it. Look for the “Learn” button on the opener and follow the manufacturer’s instructions to reset and reprogram the keyless entry system.
  8. Test the keyless entry system: Once the keyless entry system is reprogrammed, test it by entering the programmed code or using the provided credentials. The garage door should respond by opening or closing.
  9. Additional considerations: It is worth noting that while the steps outlined above provide a general guide for resetting a LiftMaster garage door opener, some models may have additional or slightly different instructions. Consult your opener’s user manual or the manufacturer’s website for specific instructions related to your model.

In conclusion, resetting a LiftMaster Arnold’s Garage Door Repair opener involves clearing the memory, reprogramming the remote control(s), and, if applicable, resetting and reprogramming the keyless entry system. Following the steps outlined above should help you reset your opener and regain control over your garage door.

Arnold’s Garage Door Service

Fort Worth, Texas

1-682-261-6268

Powered by WordPress & Theme by Anders Norén