Local Services in Texas

Month: December 2023

Martin Garage Doors: Custom Craftsmanship Tailored to Your Home – Tarrant County Door & Gate

In the world of home improvement, finding the perfect garage door goes beyond mere functionality; it’s an opportunity to make a statement, to enhance curb appeal, and to tailor a crucial aspect of your home to reflect your unique style. Martin Garage Doors, a name synonymous with quality and innovation, stands at the forefront of this transformative experience.

With a commitment to custom craftsmanship, Martin Garage Doors takes the concept of a garage door beyond utility, creating a personalized masterpiece that seamlessly integrates with your home’s architecture by following Garage Door Repair.

A Symphony of Craftsmanship and Customization

The journey with Martin Garage Doors begins with an appreciation for the artistry that goes into each door. As I explore the diverse range of styles and materials offered by Martin, it becomes evident that this is not just about garage doors; it’s about elevating the aesthetics of your home.

What sets Martin Garage Doors apart is its unwavering dedication to custom craftsmanship. The doors are not mass-produced; they are meticulously crafted to meet the unique specifications and preferences of each homeowner. This level of customization transforms the garage door from a standard feature to a bespoke element that adds character and charm to your home.

Materials that Define Excellence

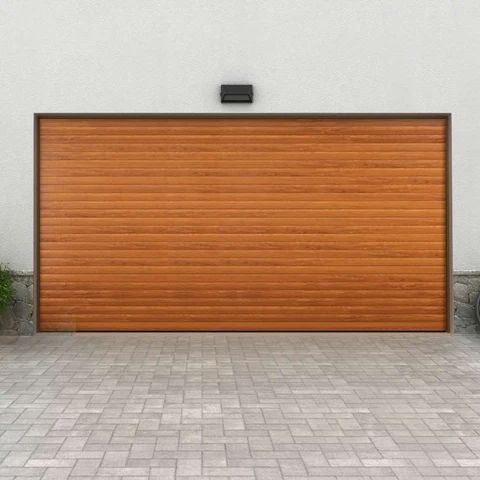
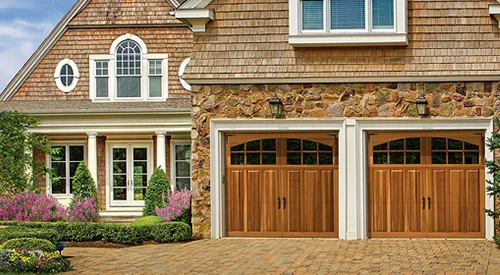
One of the pillars of Martin Garage Doors’ commitment to quality is the selection of materials. From the rich warmth of natural wood to the sleek, modern appeal of aluminum and glass combinations, Martin ensures that each material not only meets but exceeds the expectations of discerning homeowners.

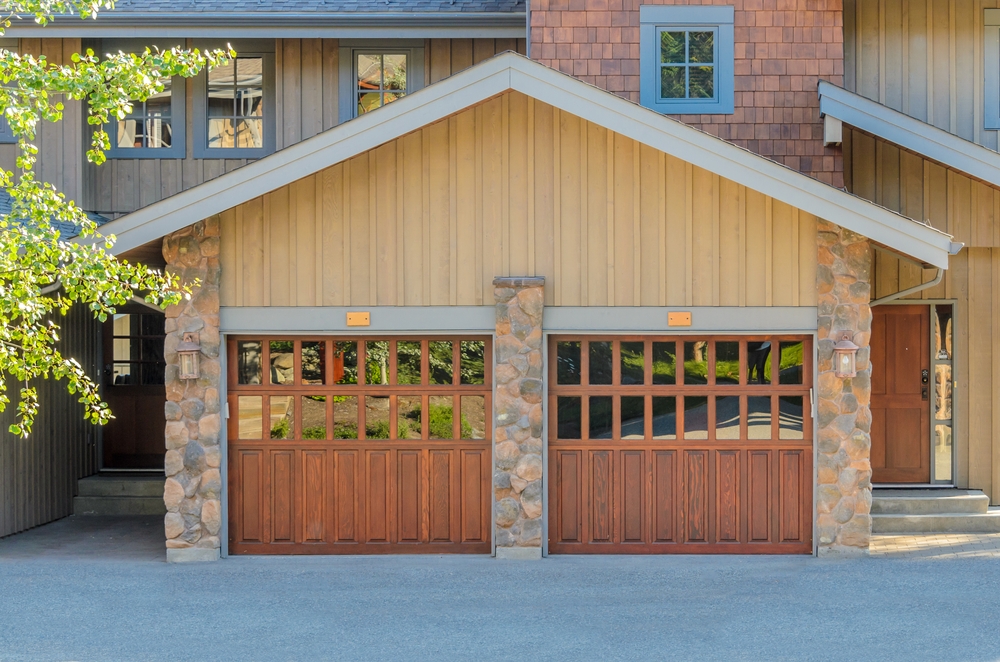
For those seeking timeless elegance, the wooden doors from Martin Garage Doors are a testament to the brand’s dedication to authentic craftsmanship. The wood, sourced from sustainable forests, undergoes a meticulous process to enhance its natural beauty and durability. The result is a garage door that not only stands as a functional barrier but also serves as a work of art.

Aluminum and glass combinations, on the other hand, speak to a more contemporary aesthetic. Martin’s innovative designs in this category showcase the brand’s ability to marry modernity with functionality. The use of high-quality aluminum ensures longevity, while the strategic integration of glass allows for an infusion of natural light, turning your garage into a welcoming space.

Tailoring Style to Your Home’s Architecture

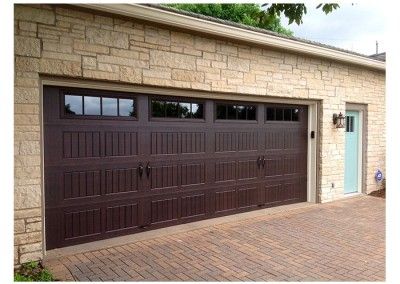
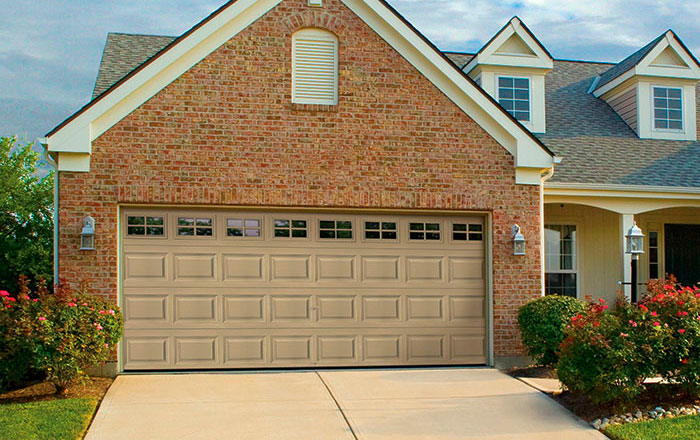
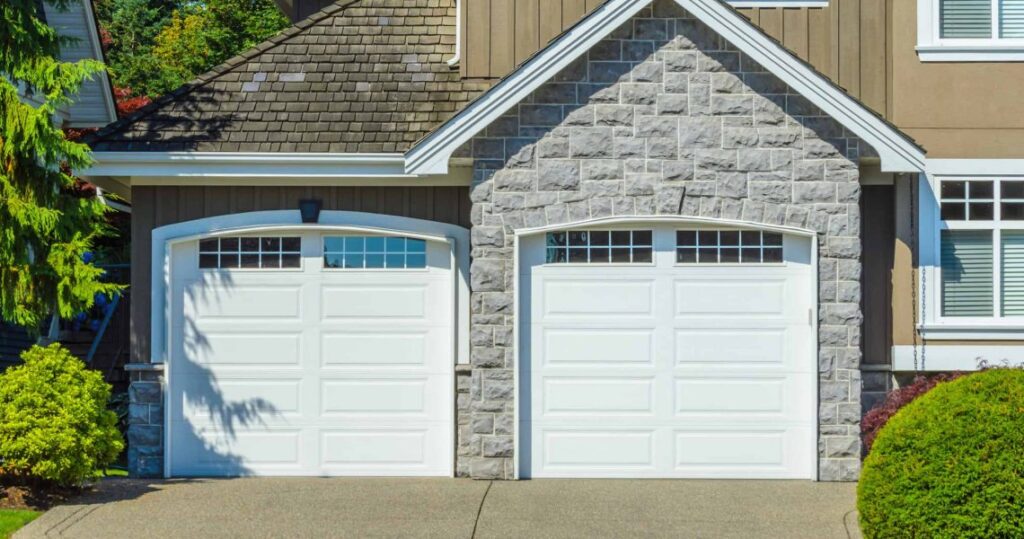
One of the defining features of Martin Garage Doors is the brand’s understanding that every home is unique. As I delve into the customization options, it becomes clear that Martin aims to complement and enhance the existing architecture rather than overshadow it.

Whether your home exudes a classic charm, a rustic appeal, or a sleek modernity, Martin Garage Doors offers a style that seamlessly integrates with your property. The array of panel designs, window configurations, and decorative hardware options allows homeowners to play a role in the creative process, ensuring that the final product is not just a door but an extension of their personal style.

Innovation Beyond Expectations

Martin Garage Doors not only honors tradition with its wooden masterpieces but also embraces innovation with cutting-edge designs. The brand’s commitment to staying at the forefront of garage door technology is evident in its use of advanced materials, insulation techniques, and smart technology integration.

Energy efficiency is a key consideration in modern home design, and Martin Garage Doors addresses this with doors designed to minimize heat transfer. The insulation options available cater to different climates, ensuring that your garage remains comfortable year-round. Moreover, Martin’s commitment to sustainability is reflected in its use of eco-friendly materials and energy-efficient practices.

Smart technology integration is another realm where Martin Garage Doors excels. The brand offers a range of smart garage door openers and connectivity options that provide homeowners with convenience, security, and peace of mind. Whether you’re at home or away, the ability to monitor and control your garage door adds an extra layer of functionality to your daily life.

The Personal Touch of Professional Installation

Custom craftsmanship doesn’t end with the creation of the door; it extends to the installation process. Martin Garage Doors collaborates with a network of professional installers who understand the intricacies of each door’s design. This ensures that the final product is not just aesthetically pleasing but also functions seamlessly.

The installation team pays attention to every detail, from aligning panels to securing hardware, ensuring that the door operates smoothly and enhances the overall look of your home. The professionalism and expertise of the installers contribute to the longevity and performance of the garage door.

A Lasting Impression: The Martin Garage Doors Experience

As I reflect on the journey with Martin Garage Doors, it’s evident that the brand offers more than just garage doors; it delivers an experience. The process of selecting, customizing, and installing a Martin door is a collaborative venture between the homeowner and a brand that values craftsmanship, innovation, and personalization.

The lasting impression of Martin Garage Doors extends beyond the initial installation. The durability of the doors ensures that they stand the test of time, maintaining their elegance and functionality through changing seasons and evolving trends. This longevity not only enhances the value of your home but also contributes to a sense of pride in ownership.

Conclusion: Your Door, Your Statement

By following Garage Door Repair, in the realm of garage doors, Martin Garage Doors stands as a beacon of custom craftsmanship, where each door tells a unique story. The brand’s dedication to elevating homes through personalized designs, premium materials, and innovative technology sets it apart in the industry. When you choose a Martin Garage Door, you’re not just selecting a functional element for your home; you’re making a statement about your style, your values, and your commitment to quality. Welcome to a world where craftsmanship meets customization, and your garage door becomes a reflection of you.

Tarrant County Door & Gate

6408 Marlette Court, North Richland Hills, TX

817-456-2958

Signs of a Failing Garage Door Opener Motor – Martin Garage Door

As a proud homeowner with a penchant for the timeless elegance of a wooden garage door, I embarked on a journey to understand the nuances of wooden door maintenance. In this article, I share my personal insights and practical tips on preventing rot and decay, ensuring the longevity and enduring beauty of a wooden garage door.

Join me as we explore the delicate balance of preserving the natural charm of wood while safeguarding it against the elements by following Garage Door Repair.

Introduction: Wooden Splendor

A wooden garage door stands as a symbol of craftsmanship, lending a touch of warmth and sophistication to any home. However, as someone who cherishes this classic aesthetic, I realized that the enchanting allure of wood requires dedicated care to protect it from the challenges of weather, moisture, and time. This guide aims to unravel the secrets of maintaining wooden garage doors, providing homeowners with the tools to prevent rot and decay and uphold the splendor of this timeless material.

1. Understanding Wooden Vulnerabilities: The Foundation of Care

Insights:

Wood is a natural material susceptible to environmental factors, making it prone to rot and decay. Understanding the vulnerabilities of wood lays the foundation for effective maintenance.

Practical Tips:

Educate homeowners about the characteristics of wood, such as its porous nature and susceptibility to moisture. Stress the importance of proactive measures to shield wooden garage doors from the elements.

2. Regular Cleaning: The Gentle Touch

Insights:

Dust, dirt, and airborne pollutants can gradually take a toll on the surface of wooden garage doors, accelerating wear and decay. Regular cleaning is a fundamental step in preserving the wood’s integrity.

Practical Tips:

Guide homeowners on the gentle cleaning of their wooden garage doors. Using a mild detergent or specialized wood cleaner and a soft brush, they can remove accumulated grime and protect the wood’s finish.

3. Inspection for Damage: The Vigilant Eye

Insights:

Regular inspections allow homeowners to catch early signs of damage, such as cracks, splits, or areas where the finish may be compromised. Addressing these issues promptly can prevent further deterioration.

Practical Tips:

Empower homeowners to conduct visual inspections routinely. Encourage them to look for any signs of damage, paying attention to corners, edges, and areas exposed to direct sunlight or harsh weather conditions.

4. Sealant and Finish: The Protective Coat

Insights:

Applying a quality sealant or finish serves as a protective shield, safeguarding the wood from moisture, UV rays, and temperature fluctuations. This not only enhances the aesthetic appeal but also extends the lifespan of the wooden garage door.

Practical Tips:

Guide homeowners on selecting an appropriate sealant or finish for their wooden garage door. Emphasize the importance of even application and thorough coverage to create a robust protective layer.

5. Moisture Management: The Arch-Nemesis

Insights:

Excess moisture is a primary contributor to wood decay. Proper moisture management is crucial to prevent rot and maintain the structural integrity of wooden garage doors.

Practical Tips:

Educate homeowners on measures to control moisture. This may include ensuring proper drainage around the garage, addressing leaks promptly, and installing a dehumidifier in humid climates.

6. Repairs and Refinishing: The Renewal Process

Insights:

When damage does occur, swift repairs and refinishing are essential to prevent the issue from escalating. Repairing small cracks or chips and refinishing the affected area can revitalize the wooden surface.

Practical Tips:

Provide guidance on DIY repairs for minor damage, such as using wood filler for small cracks. For larger issues, recommend consulting a professional to ensure comprehensive and effective repairs.

7. Seasonal Attention: The Cyclical Approach

Insights:

Wooden garage doors face different challenges in each season. Tailoring maintenance efforts to the specific demands of each season ensures comprehensive care throughout the year.

Practical Tips:

Advise homeowners to adjust their maintenance routine based on seasonal variations. For example, winter may require extra attention to snow and ice removal, while summer may involve additional protection against UV rays.

8. Pest Prevention: The Wood’s Guardians

Insights:

Wood-boring insects and pests can pose a significant threat to wooden garage doors. Implementing preventive measures can safeguard against infestations and potential structural damage.

Practical Tips:

Educate homeowners about the signs of pest infestations and the importance of proactive measures. Applying a wood preservative with insect-repelling properties can serve as a deterrent.

Conclusion: A Timeless Legacy

Overall, based from Garage Door Repair, maintaining a wooden garage door is more than a routine; it’s a commitment to preserving a timeless legacy of craftsmanship and elegance. As a homeowner who embarked on this journey of care and preservation, I can attest to the enduring beauty that results from thoughtful maintenance. By understanding wooden vulnerabilities, regularly cleaning, inspecting for damage, applying sealant and finish, managing moisture, performing repairs and refinishing, giving seasonal attention, and preventing pests, homeowners can nurture the splendor of their wooden garage doors for generations to come.

In the landscape of 2023, where homeowners seek not only functional durability but also aesthetic longevity, this guide serves as a companion for those embracing the responsibility of wooden garage door ownership. After all, in the world of home maintenance, the care bestowed upon a wooden garage door transcends time, creating a legacy of enduring beauty.

Martin Garage Door

10411 S Parker Rd, Parker, CO 80134, United States

303-663-1310

Addressing Garage Door Warping: Solutions – First Call Garage Doors

As a homeowner who has grappled with the frustrating issue of garage door warping, I understand the impact it can have on both functionality and aesthetics.

In reference to Garage Door Repair, I share my journey of discovering the causes behind garage door warping and the practical solutions that not only rectified the problem but also prevented its recurrence. If you’ve ever faced the challenge of a warped garage door, this guide is your roadmap to restoring both form and function to this essential home component.

Introduction: The Unsettling Twist of Garage Door Warping

The garage door, often seen as a seamless gateway to our homes, can take an unexpected turn when warping becomes a reality. As a homeowner, the realization that my once-pristine door was succumbing to the forces of nature prompted a quest for understanding and, ultimately, solutions. In this article, I share insights into the causes of garage door warping and practical steps to address and prevent it.

1. Understanding the Causes: Unveiling the Culprits Behind Warping

Insights:

Warping occurs when the garage door material undergoes changes due to environmental factors. Exposure to fluctuating temperatures, humidity, and moisture can lead to the deformation of the door, causing it to twist, bow, or buckle.

Practical Tips:

Educate homeowners on the environmental factors that contribute to garage door warping. Emphasize the impact of direct sunlight, extreme temperatures, and moisture infiltration. Awareness is the first step toward effective prevention.

2. Moisture Management: Shielding Against the Silent Invader

Insights:

Moisture is a primary antagonist in the warping saga. It infiltrates the door material, leading to expansion and contraction, especially in wooden doors. Proper moisture management is essential to prevent warping.

Practical Tips:

Guide homeowners on sealing and weatherproofing their garage doors. This includes applying a protective finish on wooden doors, installing weatherstripping, and ensuring that the door is properly sealed at all edges. Regular inspections and maintenance routines can safeguard against moisture infiltration.

3. Material Matters: Choosing the Right Foundation

Insights:

The choice of material significantly influences a garage door’s susceptibility to warping. Wood, while aesthetically pleasing, is more prone to warping than steel or aluminum. Selecting the right material is a crucial step in prevention.

Practical Tips:

Advise homeowners to consider the climate and environmental conditions when choosing a garage door material. While wood may require more maintenance, steel and aluminum doors offer durability and resistance to warping. Matching the material to the local climate is key.

4. Regular Maintenance: Nurturing the Door’s Integrity

Insights:

Routine maintenance plays a pivotal role in preventing garage door warping. Regular inspections, cleaning, and minor repairs can address issues before they escalate and contribute to the door’s longevity.

Practical Tips:

Provide a maintenance checklist that includes inspecting for signs of warping, cleaning the door and its components, and addressing any minor damage promptly. Emphasize the importance of proactive measures in preserving the door’s structural integrity.

5. Temperature and Humidity Control: Creating a Stable Environment

Insights:

Extreme temperatures and humidity fluctuations contribute to the expansion and contraction of garage door materials, leading to warping. Creating a stable environment within the garage is essential for preventing these fluctuations.

Practical Tips:

Guide homeowners on insulating their garage to regulate temperature and humidity. This may involve adding insulation to walls and the garage door itself. Additionally, using a dehumidifier can help maintain optimal conditions, especially in regions prone to humidity.

6. Professional Inspection and Repairs: Timely Intervention Matters

Insights:

Sometimes, despite our best efforts, warping may occur. In such cases, seeking professional inspection and repairs becomes crucial. Professionals can assess the extent of the warping and recommend appropriate solutions.

Practical Tips:

Encourage homeowners to schedule regular professional inspections, especially if they notice any signs of warping. Professionals can provide expert advice on repairs, adjustments, or, if necessary, replacement. Timely intervention can prevent the issue from worsening.

Conclusion: Straightening the Path Ahead

According to Garage Door Repair and addressing garage door warping is not just about fixing a problem; it’s about ensuring the continued functionality and visual appeal of an integral part of our homes. By understanding the causes, managing moisture, choosing the right materials, performing regular maintenance, controlling temperature and humidity, and seeking professional assistance when needed, homeowners can navigate the challenges of garage door warping.

In the landscape of 2023, where homeowners seek both aesthetic satisfaction and practical functionality, this guide serves as a compass for those dealing with garage door warping. By implementing these practical solutions, we can reshape the narrative, ensuring that our garage doors stand strong and true against the forces of nature. Whether you’re safeguarding a wooden door from moisture or choosing a material suited to your local climate, the path to a warp-free garage door begins with awareness and proactive measures.

First Call Garage Doors

20527 Farm to Market 1093 Unit B205, Richmond, TX 77407, United States

713-248-2684

How To Repair Cracks In Garage Floor – The Garage Floor Company

Repairing cracks in a Garage Floor Lincoln NE is essential to maintain the structural integrity and appearance of the surface.

Cracks can result from various factors, including settling, freeze-thaw cycles, or simply the natural aging of the concrete. Here’s a detailed guide on how to effectively repair cracks in your garage floor:

: Gather Materials and Tools

Before starting the repair process, gather the necessary materials and tools. You’ll need a concrete patching compound, a trowel, a wire brush, a vacuum or compressed air, a concrete bonding agent, safety gear (gloves and eye protection), and possibly a putty knife.

: Clean the Crack

Begin by thoroughly cleaning the crack. Use a wire brush to remove any loose debris, dirt, or old filler from the crack. After brushing, vacuum or use compressed air to ensure the crack is clean and free of loose particles.

: Prepare the Crack

For better adhesion, dampen the crack slightly with water before applying the concrete patch. If the crack is deep, consider using a concrete bonding agent to enhance the bond between the existing concrete and the patching compound.

: Mix the Concrete Patching Compound

Follow the manufacturer’s instructions to mix the concrete patching compound. Typically, you’ll add water gradually and mix until you achieve a smooth, workable consistency. It’s crucial to mix only the amount you can apply within the product’s working time.

: Apply the Patching Compound

Using a trowel, apply the mixed patching compound to the crack, ensuring it fills the entire void. Smooth the surface with the trowel to create a level finish. For deeper cracks, apply the patching compound in layers, allowing each layer to dry before adding the next.

: Feather the Edges

Feather the edges of the patch to blend it seamlessly with the surrounding concrete. This will create a more natural appearance and help prevent tripping hazards.

: Let the Patch Cure

Allow the patching compound to cure according to the manufacturer’s instructions. This typically involves keeping the patched area moist for a specified time to promote proper curing.

: Sand the Patch

Once the patch is fully cured, use fine-grit sandpaper to smooth the surface. This step is especially important for achieving a uniform appearance and preventing the patch from standing out against the rest of the floor.

: Clean Up

Clean any tools, including the trowel and mixing container, promptly after completing the repair. The patching compound can harden quickly, making cleanup more challenging if delayed.

: Seal the Floor

Consider applying a concrete sealer to the entire garage floor to enhance its durability and protect against future cracks. Follow the sealer manufacturer’s instructions for proper application and drying times.

: Address Underlying Issues

While patching is a solution for visible cracks, it’s essential to address any underlying issues contributing to the cracking. Ensure proper drainage around the garage, address soil settlement, and take preventive measures to minimize future cracks.

: Regular Maintenance

Monitor your garage floor for any new cracks or signs of wear. Perform regular maintenance to address minor issues before they escalate. This proactive approach will help keep your garage floor in good condition over the long term.

Conclusion:

Repairing cracks in a Garage Floor Lincoln NE is a manageable DIY project that can significantly improve the overall appearance and functionality of the space. By following these step-by-step instructions and taking a proactive approach to maintenance, you can effectively address cracks and ensure the longevity of your garage floor.

The Garage Floor Company

1510 SW 30th St, Lincoln, NE 68522

1-402-795-8771

Garage Door Opener Features: What to Look for in a New System – CCM Overhead Doors

As a homeowner who values both convenience and security, the prospect of upgrading my garage door opener marked a journey into the realm of modern technology. The garage door, often the unsung hero of daily life, has evolved beyond its utilitarian roots, embracing a myriad of features that enhance functionality and elevate the overall homeowner experience.

In reference to Garage Door Repair, join me on this exploration of what to look for in a new garage door opener system – unraveling the key features that transform the simple act of opening and closing a garage door into a seamless and technologically advanced endeavor.

1. Smart Connectivity: Bringing the Garage into the Digital Age

One of the most transformative features in modern garage door openers is smart connectivity. Imagine being able to control and monitor your garage door from anywhere using your smartphone. Smart garage door openers allow for remote operation, providing the convenience of opening or closing the door with a simple tap on your mobile device. Look for openers that are compatible with popular smart home platforms like Google Assistant or Amazon Alexa for a fully integrated experience.

2. Remote Access and Monitoring: Control at Your Fingertips

Remote access and monitoring capabilities extend beyond smartphone control. Advanced garage door openers offer features like real-time monitoring and activity logs. This means you can receive notifications when the garage door is opened or closed, allowing you to keep track of who accesses your garage and when. Such features enhance security and provide valuable insights into daily usage patterns.

3. Security Features: Safeguarding Your Home

Security is a top priority for homeowners, and modern garage door openers come equipped with advanced features to enhance protection. Rolling code technology, for example, generates a new code each time the door is operated, preventing unauthorized access. Look for openers with encryption capabilities and multi-layer security protocols to safeguard against potential vulnerabilities.

4. Battery Backup: Ensuring Operation During Power Outages

Power outages can be inconvenient, especially when they render the garage door opener inoperable. A garage door opener with a battery backup feature ensures that the system remains functional even during power disruptions. This is particularly beneficial during emergencies or when immediate access to the garage is essential.

5. Quiet Operation: Embracing Silent Efficiency

Gone are the days of noisy garage door openers that disturb the peace of the neighborhood. Modern openers prioritize quiet operation, employing advanced technologies such as belt drives or DC motors with sound-dampening features. Look for openers with a quiet operation rating measured in decibels (dB) to ensure a peaceful coexistence with your neighbors.

6. Motion-Activated Lighting: Illuminating the Path

The convenience of motion-activated lighting is a feature often overlooked but highly appreciated. Garage door openers equipped with built-in lights that activate when motion is detected provide added safety and convenience during nighttime operations. The illuminated path not only enhances visibility but also acts as a deterrent to potential intruders.

7. Keyless Entry Systems: Streamlining Access

Say goodbye to traditional garage door keypads with fixed codes. Keyless entry systems with rolling codes and biometric features offer enhanced security and convenience. Some systems even allow temporary access codes for guests or service providers, eliminating the need for physical keys and enhancing overall control over access.

8. Horsepower Options: Matching Power to Door Size

Not all garage doors are created equal, and neither are their openers. Understanding the power requirements of your garage door is essential when choosing an opener. Horsepower (HP) options typically range from ½ HP to 1 ¼ HP, with higher HP suitable for larger and heavier doors. Matching the horsepower to your door size ensures optimal performance and longevity.

9. Wi-Fi Connectivity: Seamlessly Integrated Systems

In addition to smart connectivity, the integration of Wi-Fi capabilities further enhances the overall performance of a garage door opener. Wi-Fi connectivity allows for seamless integration with other smart home devices and enables firmware updates, ensuring that your opener stays up-to-date with the latest features and security patches.

10. Ease of Installation and Maintenance: DIY-Friendly Options

Modern garage door openers are designed with user-friendly installation in mind. Look for openers that come with clear instructions, online resources, and, if needed, customer support for installation assistance. Additionally, consider openers with self-diagnostic features that simplify maintenance by providing alerts or reminders for tasks like lubrication or sensor checks.

11. Compatibility with Garage Door Types: A Universal Approach

Garage doors come in various styles, materials, and configurations. Ensure that the opener you choose is compatible with your specific garage door type. Whether you have a sectional, roll-up, swing-up, or slide-to-the-side door, selecting an opener with versatile compatibility ensures a smooth and trouble-free installation process.

12. Smartphone Apps and User Interfaces: Intuitive Controls

The user interface and accompanying smartphone app play a significant role in the overall user experience. Look for openers with intuitive apps that provide easy navigation and clear controls. Some apps offer additional features like scheduling, user management, and integration with other smart home devices, allowing you to create a fully customized and automated system.

13. Energy Efficiency: Eco-Friendly Operation

Energy-efficient garage door openers contribute to both cost savings and environmental sustainability. Openers with standby modes, energy-efficient motors, and LED lighting options are designed to minimize energy consumption. Choosing an energy-efficient opener aligns with the broader goal of creating a more sustainable and eco-friendly home.

14. Brand Reputation and Reviews: Navigating the Options

Before making a final decision, research the reputation of the garage door opener brand. Reading reviews from other homeowners who have installed the same opener provides valuable insights into real-world performance, durability, and customer satisfaction. Opt for brands with a positive track record and responsive customer support.

Conclusion: Elevating Garage Door Openers into the 21st Century

Based from Garage Door Repair, as I ventured into the realm of modern garage door openers, the plethora of features available transformed the mundane task of opening and closing my garage door into a streamlined and technologically advanced experience. Each feature, from smart connectivity to security enhancements, contributed to the overall efficiency and convenience of my daily routine. Here’s to a year of seamlessly navigating the evolving landscape of garage door openers, where features become personalized solutions, and homeowners embrace the future of home automation. Cheers to elevating garage door openers into the 21st century, where innovation meets practicality in the heart of our homes.

CCM Overhead Doors

1000 NW 80th St, Oklahoma City, OK 73114, United States

405-563-8982

How To Reset Garage Door Keypad Without Code Chamberlain – Martin Garage Door

Resetting a Chamberlain Garage Door Repair Castle Rock CO may seem like a puzzling task, but fear not—I’m here to walk you through the process in detail while staying within the limit.

Let’s break it down step by step.

1. Locate the Learn Button: Begin by identifying the “Learn” button on your Chamberlain garage door opener. Typically found on the motor unit, which is usually mounted on the ceiling, this button may have a distinct color, and there might be an LED indicator nearby.

2. Access the Keypad Battery Compartment: Open the battery compartment of your garage door keypad. This is often achieved by sliding or lifting a cover. Inside, you’ll find the batteries that power the keypad.

3. Remove Keypad Batteries: Carefully remove the batteries from the keypad. This step ensures the keypad is temporarily inactive, setting the stage for a successful reset.

4. Press and Hold the Learn Button: Stand within a few feet of the garage door opener motor unit. Now, press and hold the “Learn” button for approximately 30 seconds. Keep a close eye on any LED next to the button; it may change its status during this time.

5. Release the Learn Button: After patiently holding the “Learn” button for 30 seconds, release it. The LED should respond by turning off or displaying a different status. This signals that the garage door opener is now in programming mode, ready to accept a new code.

6. Wait for Confirmation: Exercise a bit more patience. Allow the garage door opener about 30 seconds to a minute to complete the reset process. This short interval allows the system to reconfigure itself for the upcoming changes.

7. Insert Keypad Batteries: Return to the keypad and reinsert the batteries. Ensure they fit snugly into their respective slots, respecting the correct polarity.

8. Test the Keypad: Now comes the moment of truth. Enter a new PIN on the keypad and press the “Enter” or “Send” button. Keep a keen eye on your garage door—success is indicated by its responsive movement.

9. Reprogram Remote Controls (if necessary): If your garage door system includes remote controls, they might need reprogramming to synchronize with the new keypad code. Refer to your garage door opener manual for specific instructions tailored to your system.

10. Adjust Settings (if necessary): Thoroughly inspect both the keypad and garage door opener for any additional settings that might need tweaking. This could include operating modes or the number of digits in the PIN.

Additional Tips:

  • Factory Reset (if applicable): Some keypads feature a small reset button, often requiring a paperclip or a similar tool. Consult your keypad’s manual to determine if this option is available and how to utilize it.
  • Contact Chamberlain Support: If you find yourself in unfamiliar territory or have a unique model, don’t hesitate to reach out to Chamberlain’s customer support. They can provide personalized guidance based on your specific circumstances.
  • Security Considerations: Always prioritize the security of your home. If there are concerns about the old code being compromised, consider changing it not only on the keypad but also on other devices to ensure comprehensive protection.

Remember, these instructions offer a general roadmap. For model-specific nuances and details, consult your Chamberlain Garage Door Repair Castle Rock CO and keypad manuals. May your garage door keypad reset be a seamless and triumphant endeavor

Martin Garage Door

10411 S Parker Rd, Parker, CO 80134, United States

1-303-663-1310

How To Install Garage Door Spring – Atlas Door Company

Installing a Garage Door Repair Joshua TX is a task that requires precision and adherence to safety guidelines.

The springs play a crucial role in counterbalancing the weight of the garage door, making it easier to open and close. Follow this comprehensive guide, broken down into detailed steps, to successfully install a garage door spring.

: Gather Necessary Tools and Materials

Before you begin the installation process, gather the necessary tools and materials for the project. You’ll need winding bars, a socket set, pliers, a level, a tape measure, safety glasses, and gloves. Additionally, ensure you have the correct type and size of garage door spring for your door.

: Identify the Type of Springs

Garage doors typically use either torsion springs or extension springs. Torsion springs are mounted above the door, while extension springs are mounted on the sides. Identify the type of springs your garage door uses before proceeding with the installation.

: Release Tension on Existing Springs (if applicable)

If you are replacing an existing spring, release the tension from the old spring before attempting removal. Use winding bars to unwind the tension on the torsion springs. Follow the manufacturer’s guidelines or consult a professional if you are unsure about this process.

: Measure and Order the Correct Springs

Measure the length of the existing springs or refer to the garage door manufacturer’s specifications to determine the correct size for replacement springs. Order the springs from a reputable supplier, ensuring they match the specifications of your garage door.

: Prepare the Garage Door

Before installing the new springs, ensure that the garage door is closed and secured. Use locking pliers or other safety measures to prevent the door from accidentally opening during the installation process.

: Install Torsion Springs

For torsion springs, start by securing the spring anchor bracket to the header above the door. Slide the torsion tube through the bracket and insert the spring into the bracket’s stationary cone. Use winding bars to wind the spring, following the recommended number of turns specified by the manufacturer. Insert the other end of the torsion spring into the bracket’s winding cone.

: Wind the Springs

Use winding bars to wind the torsion springs according to the manufacturer’s recommendations. This step requires caution, as torsion springs are under significant tension. Follow safety guidelines and use the correct winding bars to prevent accidents.

: Secure the Springs

Once the torsion springs are wound to the appropriate tension, secure them in place using set screws on the winding cone. Ensure that the set screws are tightened securely, preventing any movement of the springs.

: Test the Door’s Balance

After installing and securing the torsion springs, test the balance of the garage door. The door should open and close smoothly without any jerky movements or uneven lifting. If adjustments are needed, consult the manufacturer’s guidelines or seek professional assistance.

: Install Extension Springs

For extension springs, start by attaching the safety cables to the garage door track on each side. This is a crucial safety measure to prevent injury in case the extension spring breaks. Connect one end of each spring to the bracket on the track hanger and the other end to the pulley system.

: Adjust and Secure Extension Springs

Adjust the tension on the extension springs using the adjustable clip on the pulley system. Ensure that the tension is evenly distributed on both sides of the garage door. Once adjusted, secure the extension springs in place, ensuring that all components are properly connected.

: Test the Door’s Balance

After installing and securing the extension springs, test the balance of the garage door. Similar to torsion springs, the door should open and close smoothly without any issues. If adjustments are needed, consult the manufacturer’s guidelines or seek professional assistance.

: Perform Safety Checks

Regardless of the type of springs installed, perform safety checks to ensure that the garage door operates safely. Test the automatic reversal feature (if applicable) and ensure that all safety measures are in place.

: Consult Professional Assistance (if needed)

If you have any concerns about the installation process, lack experience with garage door springs, or encounter difficulties, it’s advisable to consult with a professional garage door installer. Working with garage door springs involves significant tension, and safety should always be a top priority.

: Regular Maintenance

To ensure the longevity and reliable operation of your garage door springs, perform regular maintenance tasks. This may include lubricating moving parts, checking for signs of wear or damage, and testing the balance of the garage door.

By following these detailed steps, you’ve successfully installed Garage Door Repair Joshua TX. Proper installation and maintenance contribute to the efficient and safe operation of your garage door. If you have any uncertainties or specific requirements, consulting with a professional installer is always a prudent option.

Atlas Door Company

6817 Sundance Cir W, Joshua, TX 76058, United States

1-817-295-3660

How To Frame For A Garage Door Opening – EDM Garage Doors, LLC

Framing a Garage Door Repair Volo IL is a crucial step in the construction process, as it provides structural support for the door and ensures proper installation.

Whether you’re building a new garage or replacing an existing door, follow this comprehensive guide for step-by-step instructions on how to frame for a garage door opening.

1. Gather Necessary Tools and Materials:

  • Before you begin, gather the tools and materials you’ll need for framing. This may include a circular saw, framing square, level, hammer, nails, screws, and pressure-treated lumber.

2. Measure and Mark the Opening:

  • Measure the width and height of the garage door, taking into account the manufacturer’s specifications and recommendations for the rough opening size. Mark the centerline of the garage door on the header.

3. Determine Header Size:

  • The header is a critical component that provides support above the garage door opening. Consult the garage door manufacturer’s specifications for the recommended header size based on the door width and any additional load requirements.

4. Mark the Header Location:

  • Use a framing square to mark the location of the header above the garage door opening. Make sure it is level and centered based on the centerline mark.

5. Install the King and Jack Studs:

  • The king studs are vertical framing members on either side of the garage door opening, while the jack studs support the header. Cut the king studs to the height of the rough opening and secure them on either side of the opening. Install the jack studs inside the king studs, leaving space for the header.

6. Cut and Install the Header:

  • Cut the header to the width of the rough opening and install it between the jack studs. Ensure it is level, using shims if necessary. Nail or screw the header to the king and jack studs.

7. Install the King and Jack Studs on the Opposite Side:

  • Repeat the process on the opposite side of the garage door opening, installing king and jack studs to provide symmetrical support.

8. Add Support for the Header:

  • Depending on the size of the garage door and header, additional support may be required. Install cripple studs between the header and the top plate to add stability.

9. Install the Sole Plate:

  • The sole plate is the bottom horizontal member of the framing. Install it on the garage floor, securing it with anchors or fasteners. Ensure it is level and aligns with the marks for the rough opening.

10. Check for Square:

  • Use a framing square to check that the corners are square. Adjust as needed by tapping the framing members with a hammer.

11. Frame the Sides of the Opening:

  • Install additional studs on each side of the garage door opening to complete the framing. These vertical members, known as the king and jack studs, provide support for the door tracks and framing around the door.

12. Install Horizontal Blocking:

  • Install horizontal blocking between the studs to add stability and provide attachment points for the garage door tracks.

13. Check for Plumb and Level:

  • Use a level to ensure that all framing members are plumb and level. Make any necessary adjustments to achieve proper alignment.

14. Add Additional Support if Needed:

  • Depending on the design and load requirements, you may need to add additional framing elements, such as headers or braces, for stability and support.

15. Consider Insulation:

  • If your garage door opening requires insulation, you can install it between the framing members before attaching the exterior materials.

16. Secure the Framing:

  • Secure all framing members with nails or screws, following local building codes and manufacturer recommendations. Use appropriate fasteners for the type of lumber used.

17. Verify with Local Building Codes:

  • Before proceeding, check with local building authorities to ensure that your framing meets all applicable codes and regulations. Obtain necessary permits if required.

18. Install Additional Structural Elements:

  • Depending on the design and load requirements, you may need to install additional structural elements, such as headers, braces, or other framing components.

19. Install Exterior Materials:

  • Once the framing is complete and verified, you can proceed to install the exterior materials, such as sheathing and siding, around the garage door opening.

20. Install the Garage Door:

  • With the framing in place, you can now proceed to install the garage door according to the manufacturer’s instructions. Follow proper procedures for attaching tracks, springs, and other components.

21. Consider Professional Assistance:

  • If you’re unsure about any aspect of framing a garage door opening or if your project requires advanced framing techniques, consider seeking professional assistance. Experienced contractors or carpenters can provide expertise and ensure a structurally sound result.

Conclusion:

Framing a Garage Door Repair Volo IL requires careful planning and precise execution to ensure proper support and alignment. By following these step-by-step instructions, you can frame a garage door opening effectively. Always adhere to local building codes, manufacturer recommendations, and safety guidelines throughout the framing process. If you’re uncertain or if your project involves complex structural elements, consider consulting with a professional contractor or carpenter for guidance.

EDM Garage Doors, LLC

596 Richard Brown Blvd, Volo, IL 60073, United States

1-847-416-3036

How To Program Your Car Garage Door Opener – Brothers Garage Door Service

Programming your car’s Garage Door Repair Livonia MI allows you to conveniently open and close your garage door without the need for a separate remote control.

The process may vary depending on your car’s make and model, as well as the type of garage door opener you have. Follow this comprehensive guide, broken down into detailed steps, to program your car’s garage door opener successfully.

: Identify Compatibility

Before attempting to program your car’s garage door opener, ensure that your vehicle is equipped with a built-in garage door opener system. Many modern cars come with this feature, often referred to as HomeLink, Car2U, or a similar name.

: Gather Information

Collect essential information about your garage door opener, including the brand and model. You may find this information in the user manual of your garage door opener or on the motor unit itself.

: Locate the Garage Door Opener “Learn” Button

If your garage door opener has a “Learn” button, locate it on the motor unit. The “Learn” button is typically near the antenna wire and may be labeled as such.

: Clear Existing Codes (if necessary)

If you are programming your car’s garage door opener for the first time or want to reset existing codes, clear any existing programming by holding down the appropriate buttons on the car’s built-in opener system. Refer to your car’s user manual for instructions.

: Put Your Garage Door Opener in “Learn” Mode

Refer to your garage door opener’s user manual to put it in programming or “learn” mode. This often involves pressing a “Learn” or “Program” button on the garage door opener motor unit.

: Access the Car’s Garage Door Opener Controls

In your car, locate the built-in garage door opener controls. These are often found on the rearview mirror or overhead console. The number of buttons may vary depending on your vehicle model.

: Press and Hold the Appropriate Button

Press and hold the button on your car’s garage door opener controls that you want to program. Simultaneously, press and release the “Learn” or “Program” button on the garage door opener motor unit.

: Wait for Confirmation

While continuing to hold the button on your car’s controls, wait for the garage door opener to confirm the programming. This may involve the car’s lights flashing, a beep, or another indicator.

: Test the Garage Door Opener

After programming, test the functionality by pressing the programmed button in your car. The garage door should respond by opening or closing. If it doesn’t, repeat the programming process.

: Program Additional Buttons (if needed)

If your car’s garage door opener controls have multiple buttons and you want to control multiple garage doors or devices, repeat the programming process for each additional button. Make sure to program each button to the corresponding device.

: Set Up Smart Home Integration (optional)

If your garage door opener supports smart home integration, explore additional features such as connecting it to a smart home hub or using voice commands with compatible virtual assistants.

: Secure Your Car’s Controls

Once you have successfully programmed the garage door opener controls in your car, secure them in a convenient and accessible location. Avoid placing them where they may accidentally activate or interfere with other controls.

: Write Down or Document the Codes

Keep a record of the codes programmed into your car’s garage door opener controls, especially if you have multiple cars or devices. This documentation will be useful for future reference or if you need to reprogram the controls.

: Regular Maintenance and Troubleshooting

Periodically check the functionality of your car’s garage door opener controls and reprogram them if necessary. If you encounter issues, consult your car’s user manual for troubleshooting tips.

: Consult Your Car and Garage Door Opener Manuals

If you encounter difficulties during the programming process or have specific questions about your car’s garage door opener controls or the garage door opener itself, consult the respective user manuals for detailed instructions and troubleshooting tips.

By following these detailed steps, you’ve successfully programmed your car’s Garage Door Repair Livonia MI. Remember to refer to the specific instructions provided by your car’s manufacturer for accurate and model-specific guidance.

Brothers Garage Door Service

29522 Wentworth St, Livonia, MI 48154, United States

1-734-292-0971

Belt-Drive vs. Chain-Drive Garage Door Openers: Pros and Cons – A 24 Hour Door Service

As I reflect on my first year as a homeowner, the garage door opener emerged as a silent hero, orchestrating the daily symphony of entries and exits with precision. Yet, as I delved into the world of garage door openers, a critical decision loomed on the horizon—choosing between a belt-drive and a chain-drive system.

In this exploration referenced to Garage Door Repair, let’s unravel the pros and cons of these two stalwart contenders in the garage door opener arena, each with its own set of attributes and considerations.

Belt-Drive Garage Door Openers: The Elegance of Whispering Tension

As I contemplated the prospect of a belt-drive garage door opener, the promise of a whisper-quiet operation captured my attention. Here are the pros and cons that unfolded in my journey of exploring this sophisticated contender:

Pros:

  1. Silent Symphony: Belt-drive openers are renowned for their near-silent operation. The absence of the metallic clatter associated with chain-drive systems makes them an excellent choice for homes where noise pollution is a concern.
  2. Smooth Movements: The belt’s smooth and flexible composition allows for seamless movements. The absence of jerks or vibrations contributes to a refined and gentle operation, ensuring that the garage door glides open and closed with grace.
  3. Low Maintenance: Belt-drive systems require minimal maintenance compared to their chain-drive counterparts. The absence of metal-on-metal contact reduces wear and tear, resulting in a longer lifespan for both the belt and the opener.
  4. Enhanced Aesthetics: The sleek and slender profile of a belt-drive system adds a touch of modern elegance. The absence of a bulky chain enhances the overall aesthetics, making it a preferred choice for homeowners who prioritize a clean and unobtrusive look.

Cons:

  1. Higher Cost: The refinement and quiet operation of belt-drive openers come at a cost. They tend to be more expensive upfront compared to chain-drive systems. However, many homeowners find the long-term benefits and reduced maintenance costs justify the initial investment.
  2. Weather Sensitivity: Belt-drive systems may be more sensitive to extreme temperatures and weather conditions. In areas with harsh climates, the belt material may expand or contract, potentially affecting the performance. However, advancements in technology have mitigated this concern to a large extent.
  3. Lower Lifting Capacity: Belt-drive openers may have a slightly lower lifting capacity compared to their chain-drive counterparts. While this may not be an issue for standard residential garage doors, it’s worth considering if you have a particularly heavy or oversized door.

Chain-Drive Garage Door Openers: The Resilience of Industrial Might

As I pivoted my attention to the chain-drive garage door opener, a sense of industrial strength and reliability emanated from its rugged profile. Here are the pros and cons that unfolded in my exploration of this robust contender:

Pros:

  1. Cost-Effective Strength: Chain-drive openers are known for their robust and cost-effective design. They are generally more affordable upfront, making them an attractive option for homeowners who prioritize budget-friendly solutions without compromising on performance.
  2. Durability in the Face of Adversity: The chain mechanism, typically made of sturdy metal, imparts a high level of durability to chain-drive openers. They can withstand challenging weather conditions and temperature fluctuations, making them a reliable choice for various climates.
  3. Versatility in Lifting Capacity: Chain-drive openers are renowned for their high lifting capacity. If you have a heavy or oversized garage door, a chain-drive system might be better suited to handle the load, providing consistent and reliable performance.
  4. Proven Track Record: Chain-drive openers have been a staple in the garage door industry for decades. Their time-tested design and reliability have earned them a solid reputation among homeowners seeking a dependable and resilient garage door opener.

Cons:

  1. Audible Presence: The most notable drawback of chain-drive openers is the audible noise during operation. The characteristic clinking sound of the chain moving along the rail may be disruptive, especially in homes where noise sensitivity is a concern.
  2. Regular Maintenance Required: The metal-on-metal contact inherent in chain-drive systems leads to more significant wear and tear over time. Regular maintenance, including lubrication of the chain, is essential to prevent excessive noise and ensure smooth operation.
  3. Bulkier Design: Chain-drive openers typically have a bulkier and more industrial appearance compared to their belt-drive counterparts. For homeowners who prioritize a sleek and unobtrusive aesthetic, the visible chain may be a drawback.

Choosing the Right Overture for Your Home: A Symphony of Considerations

As I stood at the crossroads of choosing between a belt-drive and a chain-drive garage door opener, I realized that the decision is a symphony of personal preferences, priorities, and practical considerations. Here are some key factors to weigh in the orchestra of decision-making:

1. Noise Tolerance: If a serene and quiet operation is paramount, especially in close residential quarters, a belt-drive opener may be the preferred choice. However, if noise is less of a concern or if the garage is detached, a chain-drive system offers robust performance with a trade-off in noise.

2. Budget Constraints: Consider your budget constraints and the long-term cost implications. While belt-drive systems may have a higher upfront cost, they often require less maintenance, potentially balancing out the overall cost over time.

3. Climate Considerations: Assess the climate of your region. If you live in an area with extreme temperatures or significant weather fluctuations, the weather sensitivity of a belt-drive system might influence your decision. Chain-drive openers, with their durability, can be better suited for such conditions.

4. Garage Door Weight: The weight and size of your garage door play a crucial role in the decision-making process. If you have a heavy or oversized door, a chain-drive system’s higher lifting capacity might be an essential factor to consider.

5. Aesthetic Preferences: Consider the aesthetics that align with your vision for your home. If you prioritize a modern and sleek look, a belt-drive system might be more appealing. On the other hand, if a robust and industrial appearance fits your style, a chain-drive opener could be the ideal choice.

Conclusion: The Harmony of Choice

Overall, based from Garage Door Repair and as I navigated the pros and cons of belt-drive and chain-drive garage door openers, I realized that the ultimate choice is a personalized harmony, blending the practicalities of operation with individual preferences. Whether you opt for the silent elegance of a belt-drive system or the resilient might of a chain-drive counterpart, both contenders have proven themselves as reliable conductors in the symphony of garage door automation. Here’s to a year of seamless garage door openings, orchestrated by the resonance of a well-chosen opener that aligns with the unique cadence of your home. Cheers to the symphony of choice that ensures every entry and exit is a harmonious experience, guided by the tension and resilience of your chosen garage door opener.

A 24 Hour Door Service

417 Post Oak Cove, Madison, MS 39110, United States

601-664-8935

Powered by WordPress & Theme by Anders Norén