Local Services in Texas

Month: January 2024 Page 1 of 2

How Much Space Between Garage Doors – Circle B Overhead Door

Determining the ideal spacing between Garage Door Repair Bryan TX involves various factors, including the number of doors, their size, the architectural design, and local building codes.

In this comprehensive guide, I will explore considerations for spacing between garage doors, providing insights into the factors that influence this spacing and offering recommendations for optimal design and functionality.

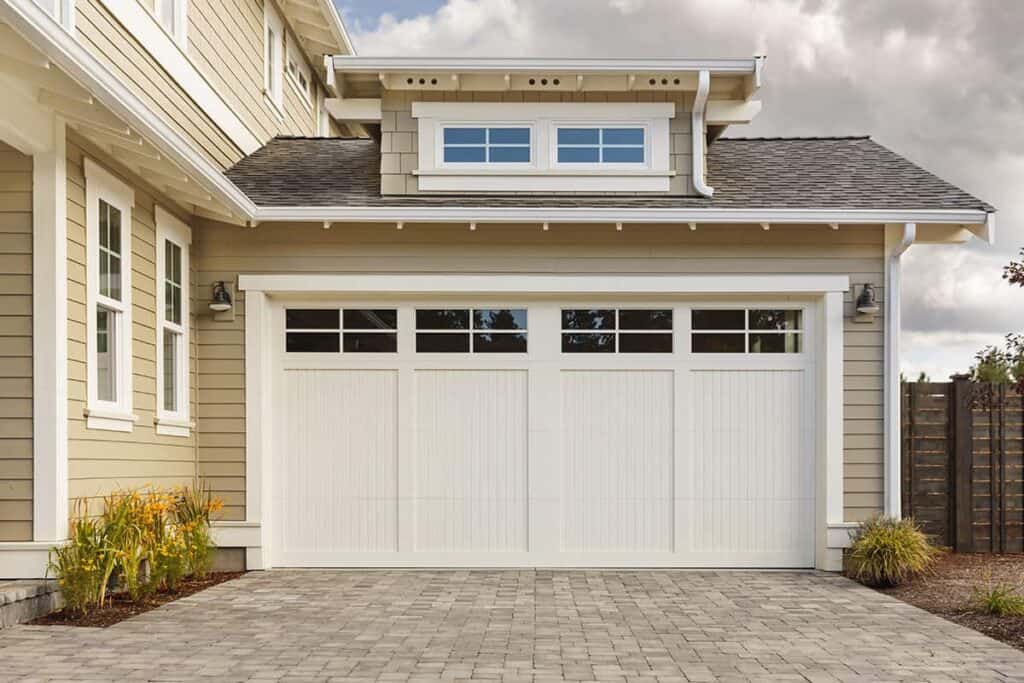
1. Number of Garage Doors:

The number of garage doors directly influences the spacing between them. In many residential buildings, there are either single-car or double-car garage doors. The spacing between multiple doors is typically influenced by aesthetic considerations and architectural design principles.

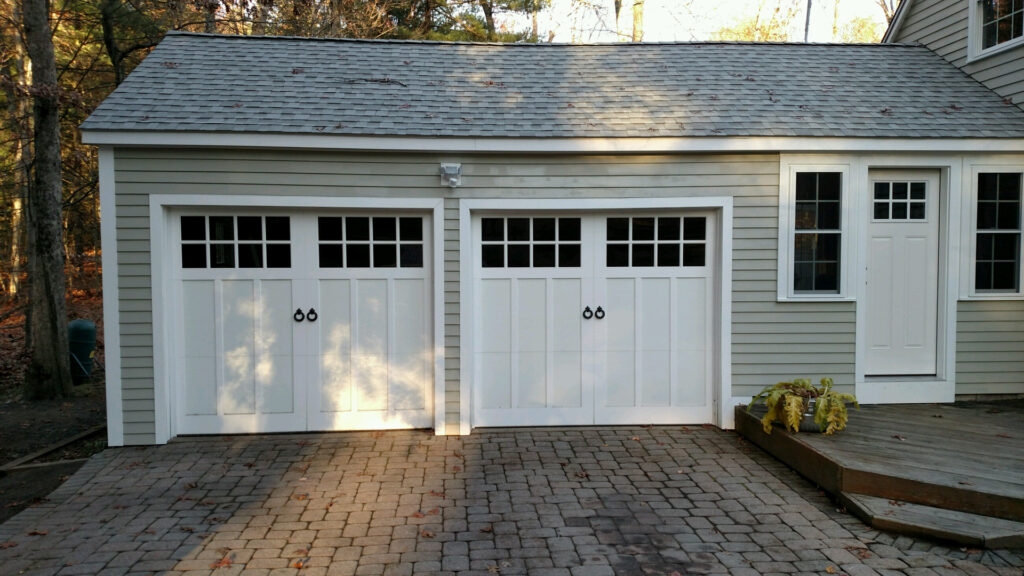
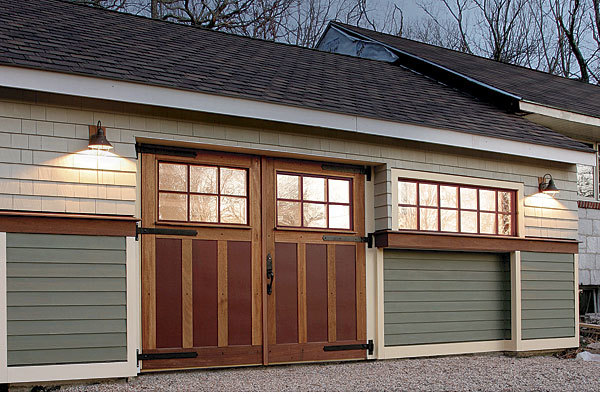
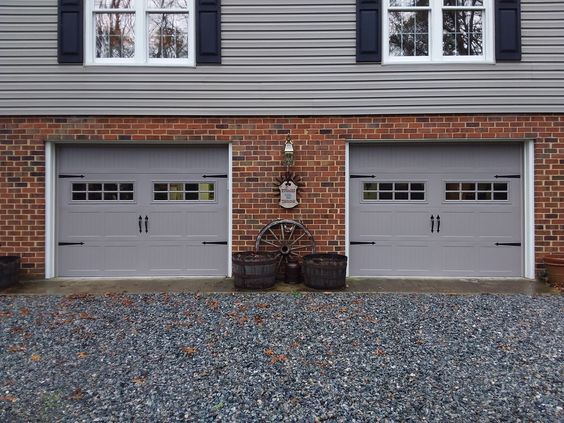
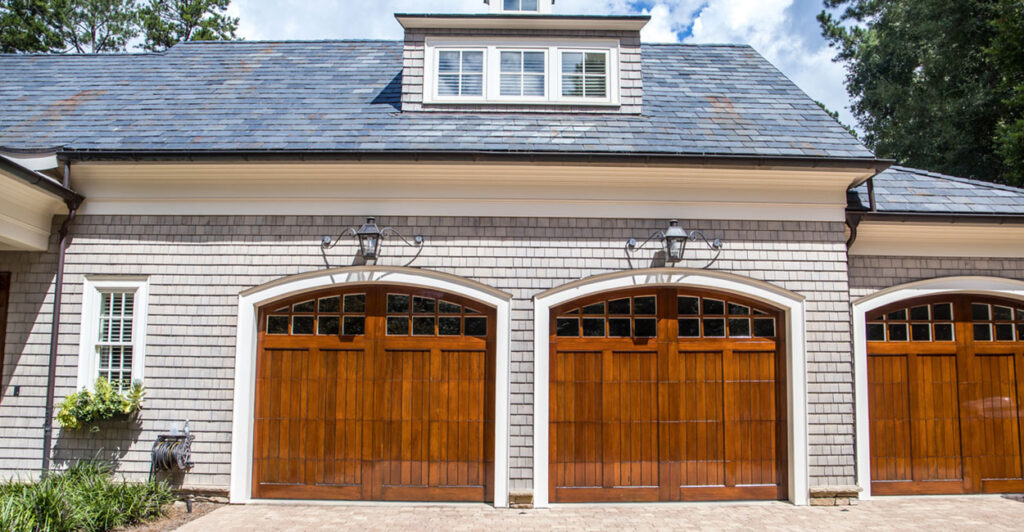
  • Single-Car Garage Doors: For homes with multiple single-car garage doors, the spacing is often determined by the overall width of the garage structure and the desired visual balance. Commonly, a small gap or no gap at all is preferred for a cohesive appearance.
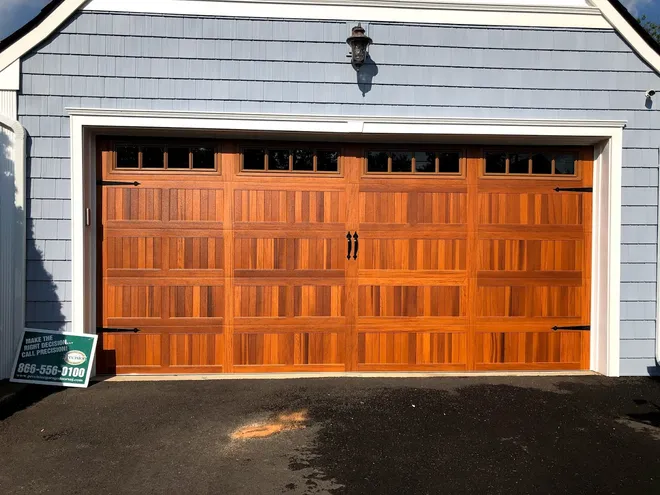
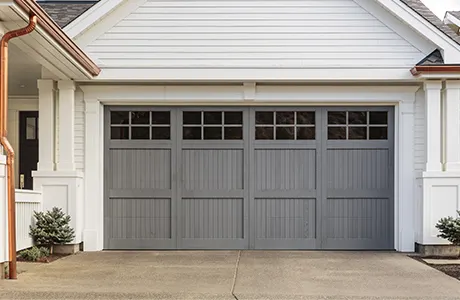
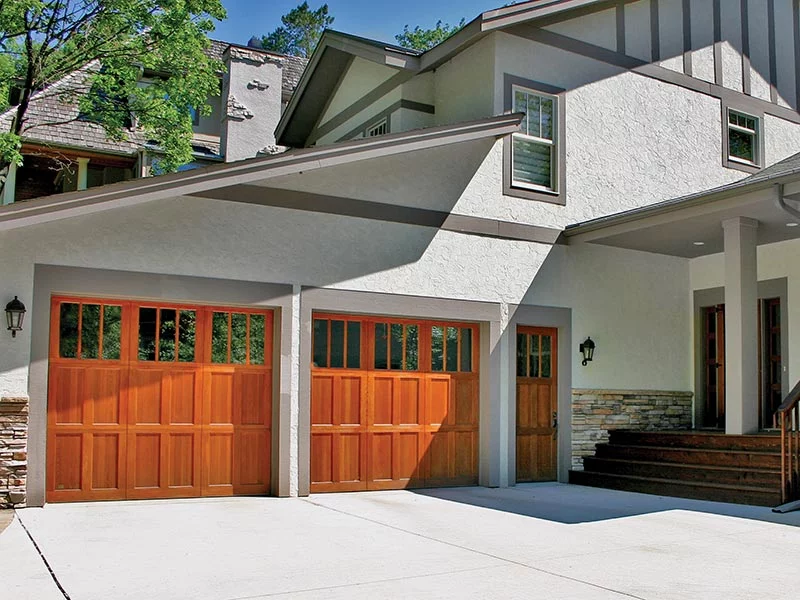
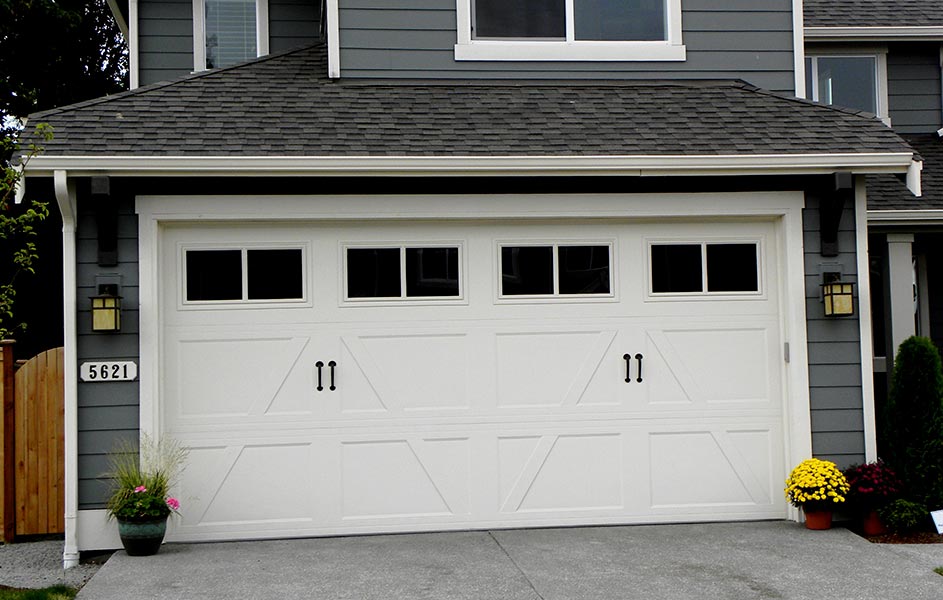
  • Double-Car Garage Doors: When dealing with a double-car garage door, the spacing is influenced by the design intent and the available width of the garage opening. A balanced and visually pleasing arrangement is usually sought.

2. Aesthetic Considerations:

Aesthetics play a crucial role in determining the spacing between garage doors. The goal is to achieve a harmonious and balanced appearance that complements the overall design of the home. Some considerations include:

  • Symmetry: Symmetrical spacing is often preferred for a balanced and visually appealing look. This is particularly important when dealing with multiple garage doors.
  • Architectural Style: The architectural style of the home may influence the spacing. For example, modern designs may incorporate larger expanses of glass or other architectural features that impact the spacing between doors.
  • Visual Balance: Achieving a sense of visual balance is essential. The spacing should look intentional and contribute to the overall curb appeal of the home.

3. Size of Garage Doors:

The size of the garage doors plays a significant role in determining the spacing between them. Larger doors may require more space to operate smoothly, impacting the overall design and spacing considerations.

  • Width of Doors: The width of each garage door and the total width of the garage opening will influence the spacing. Doors that are too close together may restrict movement, while doors spaced too far apart can create an awkward appearance.
  • Height of Doors: The height of the garage doors also affects the overall design. Taller doors may impact the vertical spacing between doors and other architectural elements.

4. Functionality and Access:

Practical considerations related to functionality and access are crucial when determining the spacing between garage doors:

  • Driveway Clearance: The spacing between garage doors should allow for sufficient clearance in the driveway for vehicles. This ensures smooth entry and exit without obstruction.
  • Maneuverability: Consider the maneuverability of larger vehicles, such as SUVs or trucks, when determining the spacing. Doors that are too close together may limit access for larger vehicles.

5. Local Building Codes:

Local building codes and regulations may stipulate specific requirements for the spacing between garage doors. These codes often address safety, accessibility, and structural considerations. It is essential to check with local authorities or consult a professional to ensure compliance with applicable codes.

6. Customization and Design Flexibility:

The ideal spacing between garage doors is not a one-size-fits-all concept. Homeowners and designers often have the flexibility to customize the spacing based on their preferences and the unique characteristics of the property.

  • Custom Designs: Custom-designed homes or those with unique architectural features may require a more tailored approach to spacing between garage doors.
  • Landscaping and Surroundings: Consider the landscaping and surroundings of the property. The placement of doors in relation to windows, entryways, and landscaping elements can impact the overall visual appeal.

7. Professional Consultation:

When in doubt or dealing with complex design considerations, it’s advisable to seek the expertise of a professional architect, designer, or garage door specialist. Professionals can provide insights based on local regulations, architectural principles, and design aesthetics.

8. Conclusion:

The spacing between Garage Door Repair Bryan TX is a crucial aspect of overall design, functionality, and safety. Considerations such as the number of doors, their size, aesthetic preferences, functionality, and adherence to local building codes all play a role in determining the ideal spacing. Striking a balance between visual appeal and practicality ensures that the garage doors contribute positively to the overall curb appeal and functionality of the home.

Circle B Overhead Door

1818 Drillers Dr, Bryan, TX 77808, United States

1-979-324-6733

How Can Mold Testing Benefit Homebuyers In The Houston Area? – Mold Testing Houston- North Loop

For homebuyers in the Houston area, understanding and addressing potential mold issues are paramount due to the region’s humid climate. Mold Testing Services Houston TX plays a crucial role in this process, offering numerous benefits that contribute to informed decision-making, property value preservation, and the creation of a healthy living environment.

This article explores how mold testing can significantly benefit homebuyers in the Houston real estate market.

I. Awareness of Houston’s Humid Climate:

  1. Understanding Mold Risks:
    • Homebuyers in Houston need to be aware of the increased risk of mold growth due to the region’s high humidity levels.
    • Mold testing provides a proactive approach to identifying potential issues and mitigating risks.
  2. Educated Decision-Making:
    • Mold testing empowers homebuyers with information about the property’s mold status.
    • Armed with this knowledge, buyers can make educated decisions and negotiate effectively during the purchasing process.

II. Health and Safety Considerations:

  1. Respiratory Health Impact:
    • Mold can negatively impact indoor air quality, potentially leading to respiratory issues.
    • Mold testing helps assess the presence of mold spores, allowing homebuyers to gauge potential health risks.
  2. Allergies and Sensitivities:
    • Individuals with allergies or sensitivities may be more susceptible to mold-related health issues.
    • Mold testing helps identify specific mold types, enabling buyers to assess potential allergens and make decisions accordingly.
  3. Peace of Mind:
    • A clean bill of health from mold testing provides homebuyers with peace of mind.
    • Knowing that the property has been thoroughly assessed for mold reduces anxiety about potential health hazards.

III. Protection of Property Investment:

  1. Preserving Property Value:
    • Mold issues can significantly impact the value of a property.
    • Early detection through mold testing allows buyers to address potential problems before they escalate, preserving the property’s value.
  2. Negotiation Leverage:
    • Mold testing results can be used as negotiation leverage during the homebuying process.
    • Buyers armed with testing data may negotiate for remediation or price adjustments based on the property’s mold status.
  3. Avoiding Hidden Costs:
    • Unaddressed mold issues can lead to hidden costs for buyers after the purchase.
    • Mold testing helps uncover potential problems, allowing buyers to factor in necessary remediation costs or negotiate repairs before closing the deal.
  4. Safeguarding Against Future Liabilities:
    • By conducting mold testing, homebuyers safeguard themselves against potential legal liabilities.
    • Proactive disclosure and remediation efforts protect buyers from future disputes related to undisclosed mold problems.

IV. Identifying Hidden Mold Issues:

  1. Behind-Wall Detection:
    • Mold growth behind walls can go unnoticed during a visual inspection.
    • Mold testing, especially with the use of infrared cameras, can identify hidden moisture issues that may lead to mold growth.
  2. Comprehensive Assessment:
    • Mold testing involves comprehensive assessments, including air and surface sampling.
    • This multi-faceted approach helps identify hidden mold issues that may not be visible during a routine walkthrough.
  3. HVAC System Evaluation:
    • Mold can circulate through HVAC systems, contributing to indoor air quality problems.
    • Specialized HVAC mold testing can identify potential mold dispersal through the air ducts, allowing buyers to address issues before moving in.

V. Informed Decision-Making During the Homebuying Process:

  1. Customized Inspection Plans:
    • Mold testing services can create customized inspection plans tailored to the homebuying process.
    • These plans may include pre-purchase mold inspections, post-remediation verification, or rapid response services to accommodate tight timelines.
  2. Transaction-Specific Reporting:
    • Mold testing services generate reports specifically designed for real estate transactions.
    • These reports provide clear and concise information that aids homebuyers in understanding the property’s mold status.
  3. Guidance for Negotiations:
    • Armed with mold testing results, homebuyers gain insights that can be used during negotiations.
    • Buyers can work with sellers to address mold issues, potentially leading to favorable outcomes in terms of price adjustments or remediation efforts.

VI. Professional Expertise and Guidance:

  1. Collaboration with Realtors:
    • Mold testing services often collaborate with real estate professionals, including realtors.
    • This collaboration ensures that the mold testing process seamlessly integrates into the overall property assessment.
  2. Guidance from Mold Testing Experts:
    • Homebuyers benefit from the expertise of mold testing professionals who can provide guidance on the significance of findings and recommended actions.
    • Professionals can also educate buyers about preventive measures for maintaining a mold-free home.

VII. Future-Proofing Against Mold Issues:

  1. Preventive Measures:
    • Mold testing not only identifies existing mold issues but also guides homebuyers in implementing preventive measures.
    • Recommendations may include proper ventilation, moisture control, and the use of mold-resistant materials.
  2. Regular Monitoring:
    • Homebuyers armed with knowledge from mold testing are more likely to engage in regular monitoring of potential mold-prone areas.
    • This proactive approach helps prevent future mold growth and ensures a healthy living environment.
  3. Long-Term Health and Well-Being:
    • Investing in mold testing contributes to the long-term health and well-being of homebuyers and their families.
    • A mold-free home provides a safe and comfortable living space, promoting overall quality of life.

VIII. Conclusion:

For homebuyers in the Houston area, Mold Testing Services Houston TX is not just a precautionary measure; it is a strategic investment in the integrity and safety of their future homes. Beyond addressing immediate health concerns, mold testing empowers buyers with valuable information for negotiating transactions, preserving property value, and making informed decisions. Collaborating with mold testing professionals and real estate experts ensures a seamless integration of mold testing into the homebuying process. By prioritizing mold testing, homebuyers in Houston create a foundation for a healthy and mold-free living environment, ensuring the longevity and well-being of their investment.

Mold Testing Houston- North Loop

2950 N Loop W #500, Houston, TX 77092

1-832-409-2125

What Are The Key Considerations When Purchasing A Garage Door Opener – CCM Overhead Doors

Selecting the right Garage Door Opener Oklahoma City OK is a crucial decision that directly impacts the convenience, security, and functionality of your home.

With various options available in the market, understanding key considerations can help you make an informed choice that aligns with your specific needs and preferences. In this article, we’ll explore essential factors to think about when purchasing a garage door opener.

1. Drive System:

The drive system of a garage door opener determines how the door is lifted and lowered. There are three main types: chain-drive, belt-drive, and screw-drive.

Chain-Drive: Affordable and durable but can be noisy.

Belt-Drive: Offers smooth and quiet operation, making it ideal for attached garages.

Screw-Drive: Low-maintenance with a simple design.

Consider the noise level, maintenance requirements, and your living situation when choosing the drive system that suits your needs.

2. Horsepower (HP):

The horsepower of a garage door opener determines its lifting capacity. Common options are 1/2 HP, 3/4 HP, and 1 HP.

1/2 HP: Suitable for single-car garage doors.

3/4 HP: Ideal for standard two-car garage doors.

1 HP: Recommended for heavy or oversized doors.

Select the appropriate horsepower based on the weight and size of your garage door for efficient and reliable operation.

3. Security Features:

Security is a paramount consideration when choosing a garage door opener. Look for models with advanced security features, including rolling code technology, which changes the access code with each use to prevent unauthorized access.

Rolling Code Technology: Enhances security by preventing code theft.

Automatic Locking: Adds an extra layer of security by engaging a lock when the door is closed.

Vacation Mode: Temporarily disables remote control access for extended absences.

Prioritize openers with robust security features to safeguard your home and belongings.

4. Smart Technology Integration:

In the era of smart homes, many garage door openers offer advanced features for remote operation and monitoring through smartphone apps or integration with smart home platforms.

Wi-Fi Connectivity: Enables remote operation and monitoring.

Smartphone Apps: Allow you to control your garage door from anywhere.

Integration with Virtual Assistants: Works with popular virtual assistants for voice control.

Consider the convenience and connectivity options that align with your lifestyle when choosing a garage door opener.

5. Noise Level:

The noise produced by a garage door opener can impact your living space. If your garage is attached to your home or located near bedrooms, consider a quieter option.

Chain-Drive: Can be noisy during operation.

Belt-Drive: Offers a quieter alternative.

Screw-Drive: Generally quieter than chain-drive openers.

Choose an opener with a noise level that suits your living situation and preferences.

6. Battery Backup:

Power outages can leave you stranded if your garage door opener relies solely on electricity. Opting for an opener with a battery backup ensures that you can still operate your garage door during power failures.

Battery Backup System: Provides uninterrupted operation during power outages.

Automatic Recharge: Ensures the backup battery remains charged.

Consider the frequency and duration of power outages in your area when deciding on the importance of a battery backup.

7. Remote Control Options:

Most garage door openers come with remote controls for convenient operation. Consider the number of remotes provided and whether the opener is compatible with additional accessories.

Number of Remote Controls: Ensure you have enough for your household.

Compatibility with Keypads and Additional Remotes: Allows for flexible access options.

Evaluate the remote control options that best suit your needs and preferences.

8. Cost and Value:

While price is a factor, consider the overall value of the garage door opener. Higher-quality models with advanced features and durable construction may have a higher initial cost but offer long-term value and reliability.

Initial Cost: Consider your budget.

Long-Term Value: Assess the durability, features, and potential savings in maintenance.

Balance the initial cost with the long-term value to make an informed investment in a reliable garage door opener.

9. Professional Installation:

While some homeowners may choose to install their garage door opener, professional installation ensures proper setup, adjustment, and adherence to safety standards.

Warranty Considerations: Some manufacturers require professional installation for warranty validity.

Expertise: Professional installers have the experience to address potential challenges.

Consider the benefits of professional installation to ensure the optimal performance and safety of your garage door opener.

10. Manufacturer Reputation and Reviews:

Researching the reputation of the manufacturer and reading customer reviews provides valuable insights into the reliability, customer satisfaction, and performance of the garage door opener.

Manufacturer Reputation: Look for well-established and reputable brands.

Customer Reviews: Consider both positive and negative feedback for a comprehensive understanding.

Gathering information from reviews and assessing the reputation of the manufacturer aids in making an informed decision.

Conclusion:

Purchasing a Garage Door Opener Oklahoma City OK requires careful consideration of various factors, from the drive system and horsepower to security features, smart technology integration, noise level, and overall value. By evaluating your specific needs and preferences in conjunction with these key considerations, you can select a garage door opener that not only meets your immediate requirements but also provides long-term reliability and convenience for your home.

CCM Overhead Doors

1000 NW 80th St, Oklahoma City, OK 73114, United States

1-405-563-8982

What Steps Should Be Taken When Seeking Appropriate Garage Door Repair Services? – Atlas Door Company

Your Garage Door Repair Joshua TX is a crucial component of your home’s functionality, providing security, convenience, and curb appeal. However, like any other mechanical system, garage doors are subject to wear and tear, and issues may arise over time.

When facing garage door problems, choosing appropriate repair services is essential to ensure the efficient and safe operation of your door. In this comprehensive guide, we’ll explore the key considerations and steps to take when seeking garage door repair services.

1. Identify the Issue:

Before contacting a garage door repair service, it’s crucial to identify and understand the issue you’re facing. Take note of any symptoms, such as unusual noises, difficulty in opening or closing, or visible damage. Understanding the nature of the problem will help you communicate effectively with the repair technician and ensure a more accurate diagnosis.

Action Steps:

Observe the garage door during operation to pinpoint specific issues.

Listen for unusual noises, assess the balance and alignment, and inspect hardware components.

Note any visible damage or signs of wear on panels, springs, rollers, and other parts.

2. Research Reputable Repair Services:

Research is key when selecting a garage door repair service. Look for reputable and well-established companies with positive reviews and a track record of customer satisfaction. Online reviews, testimonials, and recommendations from friends or neighbors can provide valuable insights into the reliability and professionalism of a repair service.

Research Tips:

Check online reviews on platforms like Google, Yelp, or the company’s website.

Ask friends, family, or neighbors for recommendations based on their experiences.

Look for repair services with a proven track record of quality workmanship and customer satisfaction.

3. Verify Licensing and Insurance:

Ensure that the garage door repair service you choose is licensed and insured. Licensing indicates that the company meets specific industry standards, and insurance provides protection in case of accidents or damage during the repair process. Verifying these credentials ensures that you’re working with a legitimate and responsible service provider.

Verification Steps:

Check the repair service’s website or contact them directly to inquire about their licensing.

Ask for proof of insurance to confirm coverage for potential accidents or damage during repairs.

4. Obtain Multiple Quotes:

To make an informed decision, obtain quotes from multiple garage door repair services. Compare the estimates, taking into consideration the scope of work, materials, and any additional charges. Keep in mind that the lowest quote may not always be the best choice; consider the overall value and reputation of the service provider.

Quote Comparison Tips:

Request detailed written quotes that outline the scope of work and associated costs.

Inquire about any potential additional charges or fees.

Consider the reputation and customer reviews of each service provider when evaluating quotes.

5. Inquire About Warranties:

A reputable garage door repair service should offer warranties on both parts and labor. Inquire about the warranties provided for the specific repairs or replacements they propose. A warranty demonstrates the service provider’s confidence in their work and provides you with peace of mind regarding the longevity of the repairs.

Warranty Considerations:

Ask about the duration and coverage of warranties for parts and labor.

Choose a repair service that stands behind its work with a comprehensive warranty.

Clarify the process for addressing issues covered by the warranty if they arise.

6. Check for Emergency Services:

Garage door issues can sometimes occur outside regular business hours, posing security and convenience concerns. Consider choosing a repair service that offers emergency services for urgent situations. Knowing that you have access to assistance during off-hours can be reassuring, especially in cases of unexpected garage door malfunctions.

Emergency Service Considerations:

Inquire about the availability of emergency repair services.

Ask about the response time and procedures for emergency calls.

Consider the accessibility and responsiveness of the repair service during non-business hours.

7. Communicate Clearly:

Effective communication with the garage door repair service is crucial for a successful and satisfactory repair experience. Convey the issues you’re facing, ask questions about the proposed solutions, and discuss any concerns or preferences you may have. Open communication ensures that both parties are on the same page, leading to better outcomes.

Communication Guidelines:

Provide a detailed description of the garage door issues during initial contact.

Ask questions about the proposed repairs, including the use of specific parts or materials.

Communicate any preferences or concerns you may have regarding the repair process.

8. Evaluate Professionalism and Customer Service:

The professionalism and customer service of a repair service are indicative of the overall quality of their work. Assess how the company handles inquiries, whether they provide clear and detailed information, and if they prioritize customer satisfaction. A service provider that values professionalism and customer service is likely to deliver a positive repair experience.

Evaluation Criteria:

Assess the responsiveness and courtesy of the repair service when communicating.

Consider the level of detail and transparency in the information provided.

Look for signs of professionalism, such as punctuality, clear communication, and a focus on customer satisfaction.

Conclusion:

Taking appropriate Garage Door Repair Joshua TX involves thorough research, clear communication, and careful consideration of various factors. By identifying the issue, researching reputable services, verifying credentials, obtaining multiple quotes, inquiring about warranties, checking for emergency services, communicating effectively, and evaluating professionalism, you can make informed decisions that lead to efficient and satisfactory garage door repairs. Prioritize the longevity and optimal functionality of your garage door by choosing a repair service that aligns with your needs and expectations.

Atlas Door Company

6817 Sundance Cir W, Joshua, TX 76058, United States

1-817-295-3660

How To Manually Open Garage Door When Spring Breaks – All American Doors

Opening a Garage Door Repair Miami FL when the spring breaks is a task that requires caution and proper technique.

Before attempting to open the garage door, it’s important to ensure safety and follow the steps carefully. Here’s a detailed guide with step-by-step instructions:

: Disengage the Garage Door Opener

The first step is to disengage the automatic garage door opener. Locate the emergency release cord, usually a red rope hanging from the opener track. Pull down on this cord, releasing the garage door from the automatic opener carriage. This allows you to operate the door manually.

: Close the Door Fully

If the garage door is not fully closed, carefully push it down until it reaches the closed position. Make sure it is secure in the closed position before proceeding to the next steps.

: Secure the Door in Place

To prevent the door from unexpectedly falling while you work on it, use locking pliers or a vise grip to secure the door to the track just above one of the rollers. This will act as a safety measure to keep the door in place.

: Locate the Broken Spring

Identify the broken spring or springs. Garage doors typically have either extension springs or torsion springs. Extension springs run along the horizontal tracks on either side of the garage door, while torsion springs are mounted on a metal rod above the door.

: Gather Necessary Tools

Before proceeding, gather the tools you’ll need, including a pair of vice grips or locking pliers, a ladder, and a winding bar. It’s crucial to use the right tools to ensure your safety during the process.

: Torsion Springs: Loosen the Set Screws

For doors with torsion springs, use a winding bar to loosen the set screws on the spring cone. This relieves the tension on the spring and allows you to remove it safely. Be cautious, as there may still be some residual tension in the spring.

: Extension Springs: Disconnect the Safety Cable

If your garage door has extension springs, locate the safety cable running through the spring. Disconnect it from the bracket on the wall or the track, allowing you to remove the broken spring.

: Remove the Broken Spring

Carefully remove the broken spring from its mounting brackets. If you’re dealing with torsion springs, slide it off the spring rod. For extension springs, detach it from the pulley system.

: Install a New Spring

If you have a replacement spring, carefully install it following the manufacturer’s instructions. Ensure it is properly secured and positioned in the mounting brackets.

: Reconnect the Safety Cable (For Extension Springs)

If your garage door uses extension springs, reconnect the safety cable through the spring and attach it securely to the bracket on the wall or track.

: Torsion Springs: Tighten the Set Screws

For doors with torsion springs, use the winding bar to tighten the set screws on the spring cone. This applies tension to the spring, restoring it to its functional state.

: Remove Securing Devices

Remove any locking pliers or vice grips that were used to secure the door in place.

: Test the Door

With the springs replaced or repaired, manually lift the door to ensure it moves smoothly. Check for any unusual noises or resistance. If everything seems normal, you can now operate the door manually.

Conclusion: Regular Maintenance

It’s essential to conduct regular maintenance on your Garage Door Repair Miami FL, including checking the condition of springs, lubricating moving parts, and ensuring the safety features are functional. If you’re uncomfortable or unsure about handling garage door repairs, it’s recommended to consult a professional technician to ensure the job is done safely and effectively.

All American Doors

8155 NW 93rd St, Medley, FL 33166, United States

1-305-885-8088

How To Install Brick Molding Around A Garage Door – Affordable Garage Door Repairs of Indianapolis, LLC


Installing Indianapolis Garage Door Repair not only enhances its aesthetic appeal but also provides a protective and finished look.

Brick molding serves as a frame for the garage door and helps seal gaps, providing insulation against weather elements. Here’s a step-by-step guide to help you install brick molding around a garage door:

: Gather Materials and Tools

Before starting the installation, gather all the necessary materials and tools. You’ll need brick molding, a saw, a level, screws, a drill, a tape measure, caulk, a caulking gun, and paint or stain (if desired).

: Measure and Cut the Brick Molding

Measure the height and width of the garage door opening to determine the required length of the brick molding. Use a saw to make accurate cuts at 45-degree angles for the corners. It’s crucial to cut the molding precisely for a professional finish.

: Prepare the Garage Door Frame

Ensure that the garage door frame is clean and free of any debris. Check for any protrusions or irregularities that may affect the installation. If necessary, use a scraper or sandpaper to smooth the surface.

: Position the Brick Molding

Start with the top piece of brick molding. Place it at the top of the garage door frame, ensuring that it overhangs slightly on each side. Use a level to make sure the molding is straight and adjust as needed. Once properly aligned, mark the installation points with a pencil.

: Pre-drill Holes

Using a drill, pre-drill holes into the garage door frame at the marked points. This step helps prevent the wood from splitting when you attach the molding. Be sure to choose a drill bit size that matches the diameter of your screws.

: Attach the Top Piece

Secure the top piece of brick molding to the garage door frame using screws. Drive the screws through the pre-drilled holes, ensuring a tight and secure fit. Repeat the process for the side pieces, aligning them with the top piece and ensuring they are level.

: Install the Side Pieces

Place the side pieces of brick molding against the garage door frame, aligning them with the top piece. Use a level to make sure they are plumb and adjust as needed. Pre-drill holes and attach the side pieces to the frame with screws.

: Cut and Install the Bottom Piece

Measure the width of the garage door opening between the installed side pieces. Cut the bottom piece of brick molding to fit and install it at the base of the opening. Ensure it aligns with the side pieces and is level. Pre-drill holes and secure it in place with screws.

: Fill Gaps and Caulk Seams

Inspect the seams and gaps between the brick molding and the garage door frame. Use caulk to fill any visible gaps, ensuring a weather-tight seal. Smooth the caulk with a caulking tool or your finger for a clean finish.

: Paint or Stain (Optional)

If desired, paint or stain the brick molding to match the color of your garage door or the overall exterior of your home. Allow sufficient drying time before proceeding.

: Final Inspection

Once the paint or stain is dry, perform a final inspection. Check for any loose screws, gaps, or imperfections. Make any necessary adjustments or touch-ups to ensure a polished and secure installation.

: Clean Up

Clean up the work area, removing any sawdust, debris, or excess caulk. Dispose of materials responsibly.

By following these detailed steps, you can successfully install brick molding around your Indianapolis Garage Door Repair. This not only adds a decorative touch but also contributes to the overall durability and energy efficiency of your garage. Always refer to the specific guidelines provided by the manufacturer and consider seeking professional assistance if needed.

Affordable Garage Door Repairs of Indianapolis, LLC

1-317-372-5337

How Much Is It To Replace A Garage Door Spring – A 24 Hour Door Service

The Garage Door Repair Madison MS is a crucial component that bears the weight of the garage door, enabling smooth and efficient opening and closing.

Over time, garage door springs can wear out, necessitating replacement. In this comprehensive guide, we’ll delve into the factors influencing the cost of replacing a garage door spring, providing valuable insights to homeowners considering this essential maintenance task.

Factors Impacting Garage Door Spring Replacement Costs

1. Type of Garage Door Spring

There are two main types of garage door springs: extension springs and torsion springs. The type of spring your garage door uses significantly impacts the replacement cost. Torsion springs, which are mounted above the door, are generally more expensive to replace than extension springs, which are located on either side of the door.

2. Size and Weight of the Garage Door

The size and weight of your garage door play a crucial role in determining the appropriate type and size of the springs needed. Larger and heavier doors require more robust springs, which can contribute to higher replacement costs.

3. Material and Quality of Springs

The material and quality of the springs also influence the replacement cost. High-quality springs made of durable materials may have a higher upfront cost but can offer better longevity and performance, reducing the need for frequent replacements.

4. Professional Labor Costs

While some homeowners may attempt to replace garage door springs as a DIY project, professional installation is highly recommended. Professional labor costs contribute to the overall replacement expense but ensure that the job is done safely and correctly.

5. Number of Springs Replaced

Garage doors may have either one or two springs, depending on the design and weight distribution. If both springs need replacement, the cost will naturally be higher than replacing a single spring.

Types of Garage Door Springs

1. Extension Springs

Extension springs are mounted on either side of the garage door and extend and contract to counterbalance the door’s weight. They are generally more affordable but may have a shorter lifespan compared to torsion springs.

2. Torsion Springs

Torsion springs are mounted above the garage door and twist to store and release energy. They are known for their efficiency and durability, making them a popular choice despite their higher replacement cost.

The Replacement Process

1. Assessment of Existing Springs

The replacement process begins with an assessment of the existing garage door springs. The technician evaluates their condition, identifying any signs of wear, damage, or imbalance that indicate the need for replacement.

2. Selection of Appropriate Springs

Based on the assessment, the technician determines the type, size, and weight capacity of the replacement springs needed. This step ensures that the new springs are suitable for the specific requirements of your garage door.

3. Removal of Old Springs

The old, worn-out springs are carefully removed, taking necessary precautions to release tension safely. Removal is a critical step to ensure a smooth transition to the new springs without compromising safety.

4. Installation of New Springs

The new springs are installed following professional guidelines and safety standards. Proper installation is crucial for the optimal performance and longevity of the replacement springs.

5. Balancing and Testing

After installation, the technician balances the garage door and tests its operation to ensure that the new springs effectively counterbalance the door’s weight. Adjustments are made as needed to achieve optimal performance.

Making an Informed Decision

1. Obtain Multiple Quotes

Before proceeding with garage door spring replacement, it’s advisable to obtain multiple quotes from reputable service providers. Comparing quotes allows you to assess the competitive pricing and choose a provider that fits your budget.

2. Consider Long-Term Benefits

Investing in high-quality replacement springs may have long-term benefits. While the upfront cost may be higher, durable springs can extend the time between replacements, offering better value in the long run.

3. Review Customer Feedback

Explore customer reviews and feedback related to garage door spring replacement services. Real-life experiences provide insights into the professionalism, reliability, and overall customer satisfaction of different service providers.

Conclusion:

In conclusion, the cost of replacing a Garage Door Repair Madison MS is influenced by various factors, including the type of spring, size and weight of the garage door, material quality, and professional labor costs. By understanding these elements and considering your specific needs, you can make an informed decision that ensures the safe and efficient operation of your garage door.

A 24 Hour Door Service

417 Post Oak Cove, Madison, MS 39110, United States

1-601-664-8935

Garage Door Weather Seal Installation: Keeping Elements Out – Veterans Garage Door

As a homeowner who takes pride in maintaining the integrity of my property, I understand the importance of safeguarding every aspect of my home against the elements. One area that often goes overlooked is the garage door. Proper weather sealing not only enhances the energy efficiency of your home but also protects against moisture, drafts, and pests.

In this comprehensive guide from Garage Door Repair Sarasota FL, I will share my firsthand experience and insights on garage door weather seal installation, empowering you to keep the elements out and maintain a comfortable, secure environment in your garage.

  1. Understanding the Importance of Weather Seals: Before delving into the installation process, it’s crucial to understand why weather seals are essential for your garage door. Weather seals act as a barrier between the outside elements and the interior of your garage, preventing moisture, dust, debris, and pests from infiltrating the space. Additionally, proper weather sealing helps maintain consistent temperatures inside the garage, reducing energy costs and enhancing overall comfort.
  2. Assessing the Condition of Existing Seals: Start by inspecting the current condition of the weather seals on your garage door. Over time, seals can become worn, cracked, or damaged, compromising their effectiveness. Look for signs of wear and tear, such as gaps, tears, or missing sections. Identifying areas that require attention will guide you in determining the type and extent of weather seal replacement needed.
  3. Choosing the Right Weather Seal: With various types of weather seals available on the market, selecting the right one for your garage door is crucial. Common options include bottom seals, threshold seals, and perimeter seals. Consider factors such as material (rubber, vinyl, or foam), durability, and compatibility with your garage door type and size. Consult with a professional or refer to the manufacturer’s recommendations to ensure you choose the most suitable weather seal for your needs.
  4. Gathering Necessary Tools and Materials: Before starting the installation process, gather all the necessary tools and materials. Typically, you’ll need a utility knife, measuring tape, screwdriver, adhesive or nails, and, of course, the weather seal itself. Ensure that you have enough seal material to cover the entire perimeter of your garage door, as well as any gaps or openings that need sealing.
  5. Preparing the Garage Door: Proper preparation is essential for a successful weather seal installation. Begin by thoroughly cleaning the bottom of the garage door to remove any dirt, debris, or old seal remnants. Use a mild detergent and water solution to clean the surface, then allow it to dry completely before proceeding. Ensuring a clean, dry surface will promote better adhesion and sealing effectiveness.
  6. Measuring and Cutting the Seal: Use a measuring tape to determine the length of weather seal needed for each section of the garage door. Measure the bottom, sides, and top of the door, as well as any gaps or openings that require sealing. Use a utility knife to cut the weather seal to the appropriate length, ensuring a precise fit for each section.
  7. Installing the Weather Seal: Begin by attaching the weather seal to the bottom of the garage door. Position the seal along the bottom edge of the door, ensuring that it overlaps slightly on either side. Use adhesive or nails to secure the seal in place, following the manufacturer’s instructions for proper installation. Next, install perimeter seals along the sides and top of the door, making sure to press firmly to ensure a tight seal.
  8. Sealing Any Gaps or Openings: In addition to sealing the perimeter of the garage door, it’s essential to address any gaps or openings that may allow air, water, or pests to enter the garage. Use weatherproof caulk or sealant to fill in any gaps around windows, vents, or other openings. For larger gaps, consider installing foam insulation strips or weatherstripping to provide added protection.
  9. Testing for Effectiveness: Once the weather seal installation is complete, it’s important to test its effectiveness. Close the garage door and inspect the perimeter for any gaps or areas where air or light may be entering. Additionally, listen for drafts or rattling noises that may indicate areas requiring further sealing. Making any necessary adjustments will ensure that your garage door is properly sealed and protected against the elements.
  10. Maintaining Your Weather Seals: To prolong the life and effectiveness of your garage door weather seals, it’s important to perform regular maintenance. Inspect the seals periodically for signs of wear or damage, and replace any worn or deteriorated sections as needed. Additionally, keep the seals clean and free of debris to prevent obstruction and maintain optimal sealing performance.

In conclusion, based from Garage Door Repair Sarasota FL, installing weather seals on your garage door is a simple yet effective way to protect your home against the elements and enhance energy efficiency. By understanding the importance of weather sealing, choosing the right seals for your needs, and following proper installation techniques, you can create a secure, comfortable environment in your garage. With proper maintenance and periodic inspections, your garage door weather seals will continue to provide reliable protection for years to come.

Veterans Garage Door

6497 Parkland Dr F, Sarasota, FL 34243, United States

941-699-6198

How To Fix Rotted Wood Garage Door Frame – Veterans Garage Door

A rotted wood Garage Door Repair Sarasota FL not only compromises the structural stability of your garage but also diminishes the overall curb appeal of your home.

Addressing the issue promptly is essential to prevent further damage. This guide will provide you with detailed instructions and tips on restoring your rotted wood garage door frame.

Materials and Tools You’ll Need

Before starting the repair process, gather the following materials and tools:

  • Protective gear (safety glasses, gloves, mask)
  • Circular saw
  • Reciprocating saw
  • Chisel
  • Wood filler or epoxy
  • Putty knife
  • Sandpaper (coarse and fine grit)
  • Primer
  • Exterior paint or wood sealant
  • New wood (if replacement is necessary)
  • Screws

: Assess the Extent of Damage

Begin by thoroughly inspecting the garage door frame to assess the extent of the damage. Identify areas of rot and determine whether the damage is superficial or if it has affected the structural integrity of the frame. This assessment will guide you in deciding which repair methods to employ.

: Remove Rotted Wood

Using a circular saw or reciprocating saw, carefully remove the rotted wood from the garage door frame. Make clean and straight cuts to ensure a precise removal. Take your time during this step to avoid causing additional damage to the surrounding, healthy wood.

: Clean and Prepare the Area

Once the rotted wood is removed, clean the exposed area thoroughly. Use a chisel to remove any remaining debris, old paint, or rotten wood particles. The goal is to create a clean and stable surface for the repair.

: Apply Wood Filler or Epoxy

For smaller areas of rot, wood filler or epoxy can be effective in restoring the damaged sections. Apply the wood filler or epoxy according to the manufacturer’s instructions, using a putty knife to spread it evenly over the damaged area. Ensure that the filler is tightly packed and level with the surrounding wood.

: Replace Damaged Sections (If Necessary)

If the rot has extensively damaged the frame, you may need to replace entire sections. Use the removed rotted wood as a template to cut matching pieces from new wood. Secure the new sections in place using screws, ensuring a snug fit. For larger repairs, it might be advisable to consult a professional carpenter.

: Sand the Repaired Area

After the wood filler, epoxy, or replacement sections have dried and cured, use coarse sandpaper to smooth the repaired area. Gradually transition to fine grit sandpaper for a polished finish. This step is crucial for achieving a seamless and professional-looking result.

: Prime the Repaired Area

Apply a primer to the repaired area to prepare it for painting or sealing. The primer will enhance adhesion and protect the repaired wood from the elements. Follow the primer manufacturer’s instructions regarding drying times and application methods.

: Paint or Seal the Garage Door Frame

Choose a high-quality exterior paint or wood sealant to protect the repaired garage door frame from moisture, sunlight, and other environmental factors. Apply the paint or sealant evenly over the entire frame, following the product’s instructions for optimal results.

: Regular Maintenance

To prevent future issues, perform regular maintenance on your garage door frame. Inspect it annually for signs of wear, rot, or damage. Promptly address any issues to avoid extensive repairs in the future.

Conclusion:

Fixing a rotted wood Garage Door Repair Sarasota FL requires patience, attention to detail, and the right materials. By following these step-by-step instructions, you can restore your garage door frame’s structural integrity and enhance its longevity. Remember to prioritize safety during the repair process, and consult professionals for extensive damage or if you’re unsure about certain aspects of the repair.

Veterans Garage Door

6497 Parkland Dr F, Sarasota, FL 34243, United States

1-941-699-6198

How Much Do Wayne Dalton Garage Doors Cost – Little Elm Gates & Garage Door Repair

Garage Door Repair Little Elm TX can vary based on several factors, including the type of door, material, design features, size, insulation, and additional accessories.

Wayne Dalton is a reputable manufacturer known for producing a wide range of residential and commercial garage doors. In this comprehensive guide, we’ll explore the factors influencing the cost of Wayne Dalton garage doors and provide insights into the various options available.

1. Types of Wayne Dalton Garage Doors: Wayne Dalton offers various types of garage doors, each catering to different preferences and requirements:

  • Classic Steel Garage Doors: These doors feature sturdy steel construction, offering durability and a variety of design options.
  • Carriage House Steel Garage Doors: Combining the look of traditional carriage house doors with modern functionality, these doors often come with decorative hardware for an authentic appearance.
  • Wood Garage Doors: For a more natural and classic aesthetic, Wayne Dalton offers wood garage doors in various styles, including carriage house and traditional designs.
  • Contemporary Aluminum Garage Doors: These doors are characterized by clean lines and a modern design, often featuring glass panels for enhanced aesthetics.
  • Fiberglass Garage Doors: Fiberglass doors provide the look of wood but with added durability and resistance to environmental conditions.

2. Material: The material of the garage door significantly influences its cost:

  • Steel: Steel garage doors are durable, low-maintenance, and come in various finishes. Wayne Dalton’s steel doors cater to different styles and preferences.
  • Wood: Wooden garage doors provide a classic and authentic appearance. While they are more expensive and require more maintenance, they can add a unique charm to the home.
  • Aluminum: Aluminum doors are lightweight, corrosion-resistant, and suitable for contemporary designs. They often feature glass panels for a modern look.
  • Fiberglass: Fiberglass doors offer the appearance of wood with increased durability and resistance to environmental factors.

3. Design and Style: Wayne Dalton garage doors come in a variety of designs, including traditional, carriage house, contemporary, and custom designs. More intricate designs or customizations may contribute to a higher overall cost.

4. Size of the Door: The size of the garage door directly impacts the cost. Larger doors require more materials and may involve additional structural considerations.

5. Insulation Features: Insulated garage doors can contribute to energy efficiency and temperature control within the garage space. Wayne Dalton offers doors with varying levels of insulation, and higher insulation factors may increase the cost.

6. Additional Accessories: Adding windows, decorative hardware, or specific finishes can contribute to the overall cost. Wayne Dalton provides various accessory options to enhance the appearance and functionality of their garage doors.

7. Professional Installation: While some homeowners may choose to install garage doors themselves, professional installation is often recommended. Installation costs can vary based on factors such as the complexity of the installation and local labor rates.

8. Brand and Quality: Wayne Dalton is a well-known brand with a reputation for quality products. While their doors may have higher upfront costs, they often provide durability and reliability.

9. Warranty: Consider the warranty offered by Wayne Dalton for their garage doors. A longer warranty period can provide peace of mind and contribute to the overall value of the product.

10. Local Market Conditions: Local factors, such as labor costs and market demand, can influence the overall price of Wayne Dalton garage doors and installation services.

11. Obtaining Quotes and Comparisons: To get an accurate estimate, it’s recommended to obtain quotes from multiple garage door dealers and installation professionals. Comparing these quotes will help you make an informed decision based on your budget and preferences.

Conclusion:

Garage Door Repair Little Elm TX depends on various factors, including the type of door, material, design features, size, insulation, additional accessories, professional installation, brand, and local market conditions. Carefully consider your specific needs, budget, and preferences to choose a Wayne Dalton garage door that enhances the aesthetics and functionality of your home. Professional installation is advised to ensure proper alignment and functionality of the door. Regular maintenance contributes to the longevity and performance of your garage door system.

Little Elm Gates & Garage Door Repair

14809 Lone Spring Dr, Little Elm, TX 75068

1-972-597-8816

Page 1 of 2

Powered by WordPress & Theme by Anders Norén