Local Services in Texas

Month: January 2024

How Much Are Garage Door Panel Replacement – BH Gates & Garage Door Repair


The cost of Garage Door Repair Rockwall TX can vary based on several factors, including the material of the panels, the size of the door, the brand, and whether you opt for professional installation.

Replacing a damaged or worn-out garage door panel is a common maintenance task that can improve the appearance and functionality of your garage door. In this comprehensive guide, we’ll explore the factors influencing the cost of garage door panel replacement and provide insights into the various options available.

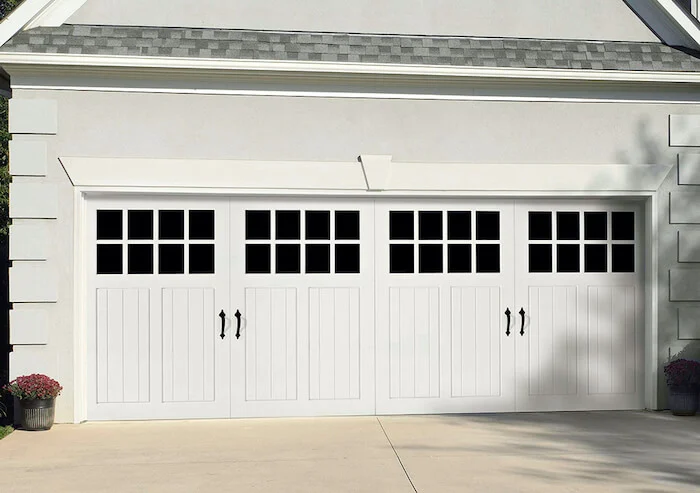
1. Types of Garage Door Panels: Garage door panels come in different materials, each with its own characteristics and price range:

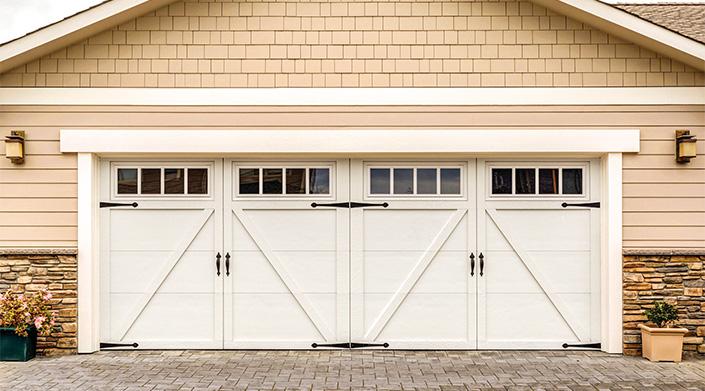
  • Steel Panels: Steel panels are durable, low-maintenance, and relatively affordable. The cost may vary based on the gauge (thickness) of the steel.
  • Aluminum Panels: Aluminum panels are lightweight, resistant to corrosion, and suitable for contemporary designs. They tend to be more expensive than steel panels.
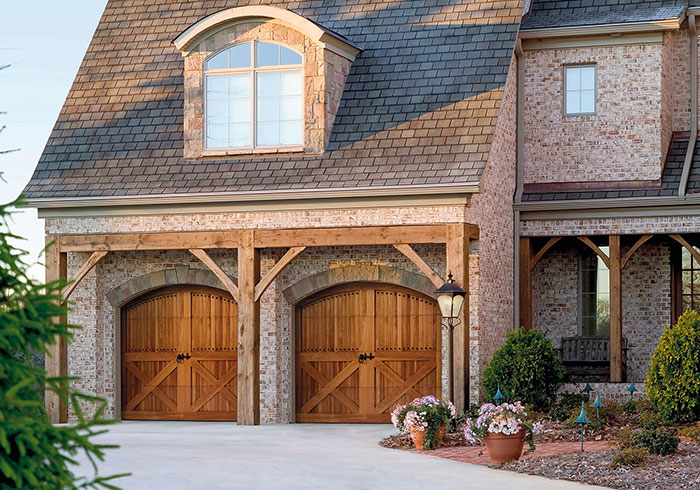
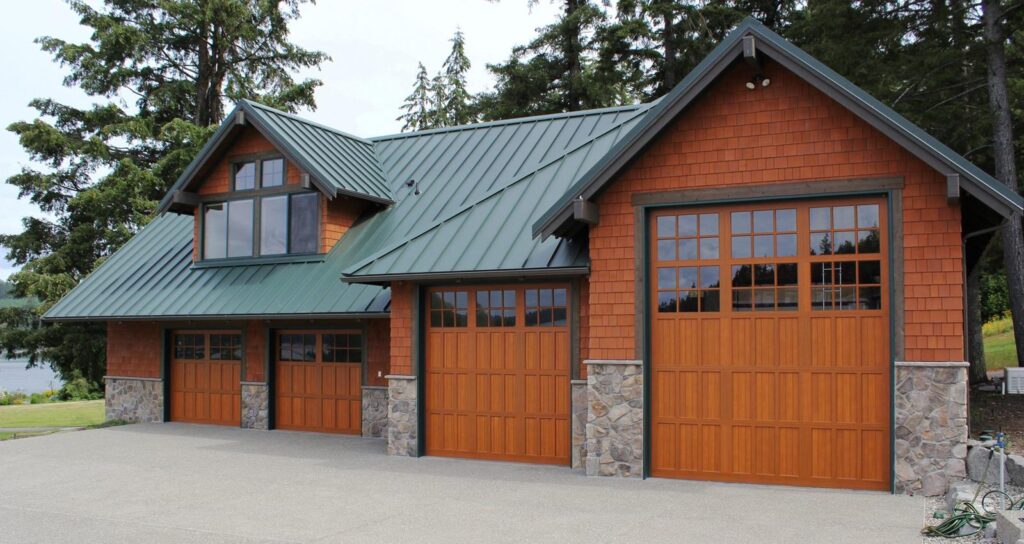
  • Wood Panels: Wooden panels offer a classic and natural look but are generally more expensive. The type of wood, design, and finish can impact the cost.
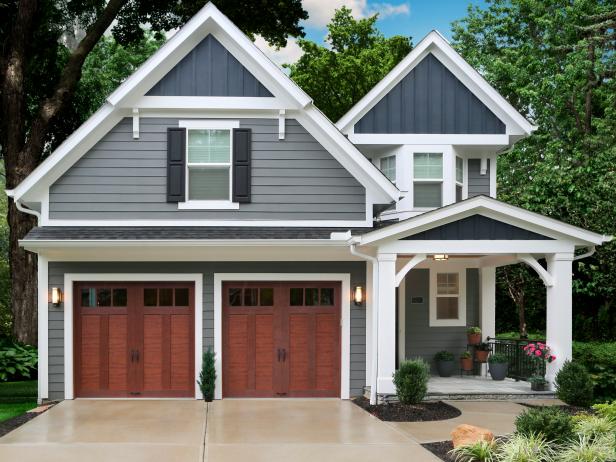
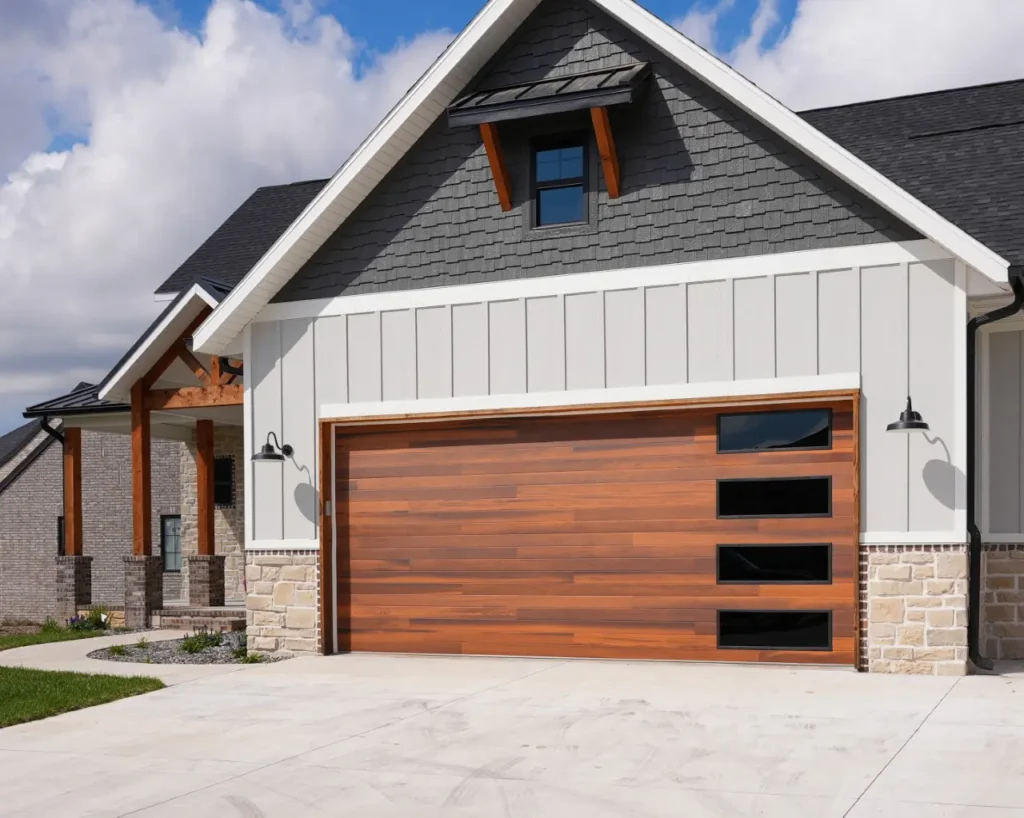
  • Fiberglass Panels: Fiberglass panels are lightweight, resistant to moisture, and can mimic the appearance of wood. They are typically mid-range in terms of cost.

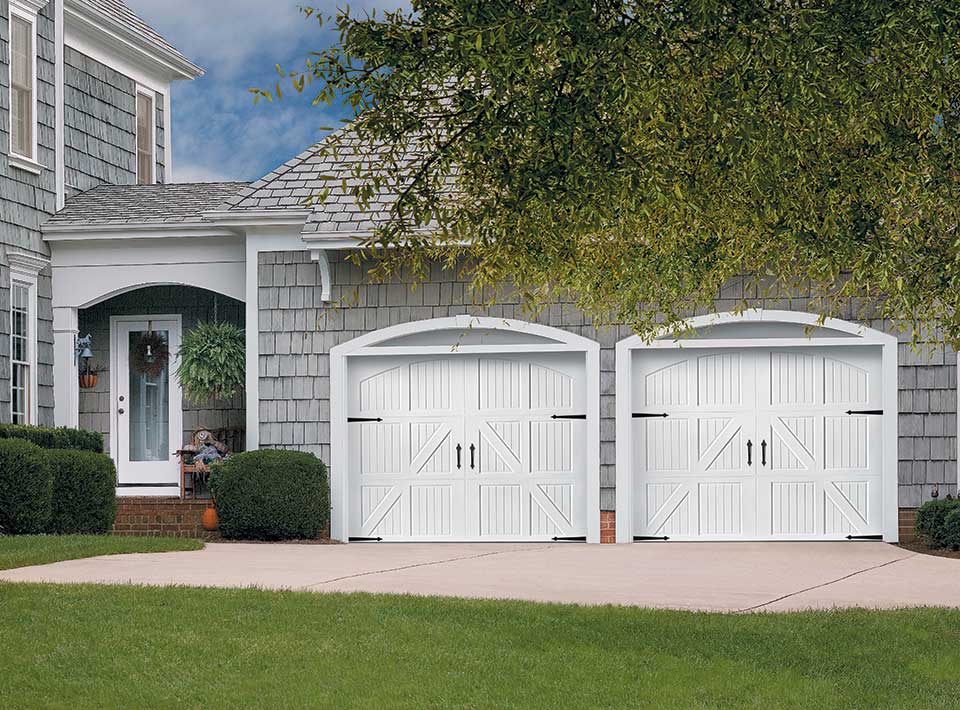
2. Panel Size and Design: The size and design of the panels contribute to the overall cost. Larger garage doors with more intricate designs or unique patterns may have higher replacement costs.

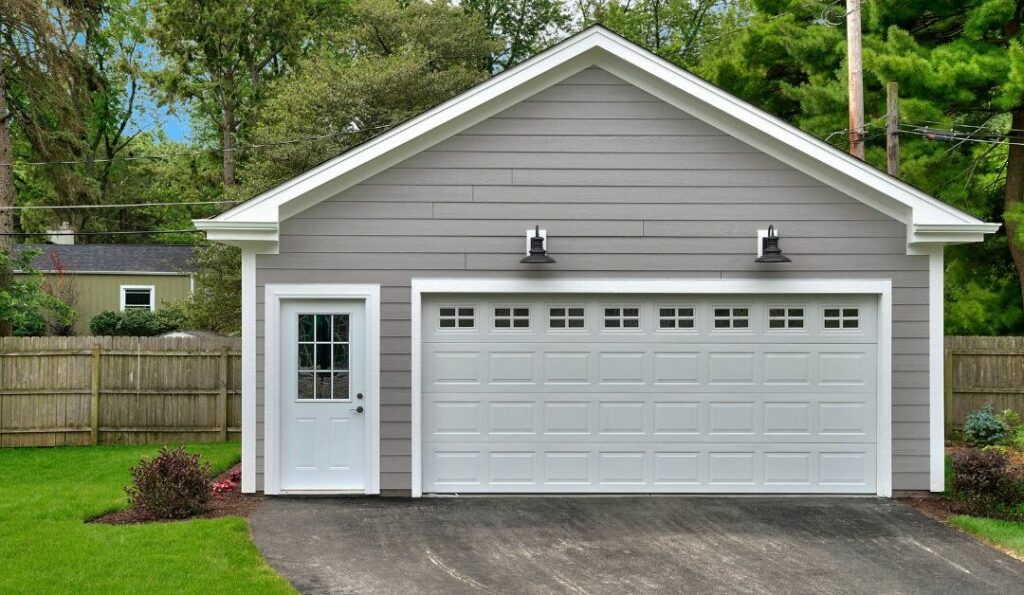
3. Single vs. Double Garage Doors: Replacing panels on a single garage door is generally less expensive than on a double garage door due to the difference in size.

4. Professional Installation: While some homeowners may choose to replace garage door panels themselves, professional installation is often recommended. Installation costs can vary based on factors such as the complexity of the installation, the type of panels, and local labor rates.

5. Brand and Quality: Different brands offer garage door panels with varying levels of quality and design options. High-quality panels from reputable brands may have higher upfront costs but can provide better durability and warranty coverage.

6. Paint or Finish: If you choose to match the new panels to your existing ones, additional costs may be associated with painting or finishing to ensure a uniform appearance.

7. DIY vs. Professional Installation: DIY installation can save money, but it requires the right tools and skills. Professional installation ensures that the replacement panels are correctly installed, reducing the risk of malfunctions and ensuring safety.

8. Local Market Conditions: Local factors, such as labor costs and market demand, can influence the overall price of garage door panel replacement and installation services.

9. Obtaining Quotes and Comparisons: To get an accurate estimate, it’s recommended to obtain quotes from multiple garage door panel manufacturers and installation professionals. Comparing these quotes will help you make an informed decision based on your budget and preferences.

10. Additional Considerations:

  • Insulation: Some garage door panels come with insulation options, which can affect the overall cost but may contribute to energy efficiency and temperature regulation in the garage.
  • Windows: If your garage door has windows in the panels, replacing them may involve additional costs. Consider the type of glass and design when determining the overall price.

Conclusion:

Garage Door Repair Rockwall TX is a common maintenance task that can enhance the aesthetics and functionality of your garage door. The cost can vary based on factors such as the material of the panels, size, design, professional installation, brand, and additional features. Carefully assess your needs, budget, and preferences to select replacement panels that match your existing door and provide reliable, long-lasting performance. Professional installation is recommended to ensure proper alignment and functionality of the replaced panels.

BH Gates & Garage Door Repair

420 Lynne Dr, Rockwall, TX 75032

1-469-654-3876

How Do You Reconnect A Garage Door Opener – Celina Gates & Garage Door Repair

Reconnecting a Garage Door Repair Celina TX involves restoring the communication between the opener and the remote control or wall-mounted control panel.

Whether you’ve recently moved, changed the remote control batteries, or experienced a loss of connection, here’s a comprehensive guide with step-by-step instructions to help you reconnect your garage door opener.

: Identify the Opener Model

Before you start the reconnection process, identify the make and model of your garage door opener. This information is typically found on the motor unit or in the owner’s manual. Knowing the model is crucial for following the correct steps, as procedures may vary between manufacturers.

: Power Cycle the Opener

Begin by power cycling the garage door opener. Locate the power cord or plug and disconnect it from the electrical outlet. Wait for about 30 seconds to a minute before reconnecting the power. This action helps reset the opener and may resolve communication issues.

: Check Remote Control Batteries

Ensure that the batteries in your remote control are in good condition. Weak or dead batteries can cause connectivity problems. Replace the batteries with fresh ones if needed, following the instructions in your remote control’s manual.

: Clear Existing Codes (if necessary)

If you’re reprogramming the garage door opener due to security concerns or a new home, clear existing codes from the opener’s memory. Look for a “Learn” or “Program” button on the motor unit and follow the instructions in your owner’s manual to clear stored codes.

: Locate the “Learn” or “Program” Button

Most garage door openers have a “Learn” or “Program” button on the motor unit. Find this button, typically located on the back or side of the motor unit. This button is essential for syncing the opener with remote controls.

: Program the Remote Control

Hold the remote control close to the garage door opener and press the designated button you want to program. Simultaneously, press and release the “Learn” or “Program” button on the opener. The indicator light on the opener should flash, indicating that it’s ready to learn a new code.

: Wait for Confirmation

After pressing the remote control button and the “Learn” button on the opener, wait for the indicator light on the opener to flash or click. This confirms that the garage door opener has successfully learned the new code from the remote control.

: Test the Remote Control

Test the remote control by pressing the button you just programmed. The garage door should respond by either opening or closing. If the door doesn’t move, repeat the programming process, ensuring that you follow the steps accurately.

: Program Additional Remote Controls (if needed)

If you have multiple remote controls, repeat the programming process for each one. This ensures that all remote controls can operate the garage door opener.

: Program the Wall-Mounted Control Panel (if needed)

If your garage door opener has a wall-mounted control panel, follow a similar process to program it. Locate the “Learn” or “Program” button on the opener and press it. Within a short timeframe, enter the desired PIN on the control panel. Wait for confirmation, and test the control panel to ensure proper programming.

: Repeat for Keyless Entry Keypad (if needed)

If your garage door opener includes a keyless entry keypad, follow the manufacturer’s instructions to program it. This often involves entering a specific PIN code on the keypad and pressing the “Learn” or “Program” button on the opener.

: Finalize Programming

Once all remote controls, control panels, and keypads are successfully programmed, follow the instructions in your owner’s manual to finalize the programming process. This typically involves pressing the “Learn” or “Program” button again to exit programming mode.

: Test All Controls

Test all programmed controls, including remote controls, wall-mounted control panels, and keyless entry keypads, to ensure that they can operate the garage door opener without any issues.

Additional Tips:

  1. Check Interference: If you experience ongoing connectivity issues, consider checking for interference from other devices. Some electronic devices may cause interference with garage door opener signals.
  2. Update Firmware (if applicable): For smart garage door openers with Wi-Fi capabilities, check if there are firmware updates available. Keeping the firmware up-to-date can improve performance and address connectivity issues.
  3. Consult the Owner’s Manual: Always refer to your garage door opener’s owner’s manual for specific instructions and troubleshooting tips. Manuals provide valuable information tailored to your opener’s make and model.

Conclusion:

Reconnecting a Garage Door Repair Celina TX is a relatively simple process that involves power cycling, programming remote controls, and ensuring proper communication. By following these detailed steps and consulting your owner’s manual, you can successfully reconnect your garage door opener and enjoy seamless operation. If you encounter challenges beyond your expertise, consider seeking assistance from the manufacturer’s customer support or a professional garage door technician for further guidance.

Celina Gates & Garage Door Repair

211 S Ohio Dr, Celina, TX 75009

1-214-833-9968

How Do You Program A Linear Garage Door Opener – Valley Center Gates & Garage Doors

Programming a Linear Garage Door Repair Valley Center CA is a straightforward process that allows you to configure your remote control or keypad to operate your garage door with ease.

Linear garage door openers are known for their reliability and user-friendly features. In this comprehensive guide, I’ll walk you through the step-by-step process for programming a Linear garage door opener.

: Identify Your Linear Garage Door Opener Model

Before you start the programming process, it’s crucial to identify the model of your Linear garage door opener. Different models may have specific instructions for programming remotes and keypads. Refer to the user manual that came with your opener or check the model information on the motor unit.

: Locate the “Learn” or “Program” Button on the Garage Door Opener

Most Linear garage door openers have a “Learn” or “Program” button on the motor unit. Find this button, as it is essential for syncing the remote control or keypad with the garage door opener. The button is usually located on the back or side of the motor unit.

: Clear Previous Codes (if necessary)

If you are reprogramming a remote or keypad or experiencing issues, it’s advisable to clear any existing codes. Press and hold the “Learn” or “Program” button on the garage door opener until the indicator light turns off. This action resets the system and prepares it for new programming.

: Program the Linear Garage Door Remote Control

For Linear Remote Controls:

  • Press and hold the button on the remote control that you want to program.
  • Simultaneously, press the “Learn” or “Program” button on the garage door opener.
  • Continue holding the remote button until the indicator light on the motor unit flashes, confirming successful programming.
  • Release the remote button.

For Linear Keypads:

  • Enter the desired PIN code on the keypad.
  • Press and hold the “Enter” or “Program” button on the keypad.
  • Simultaneously, press the “Learn” or “Program” button on the garage door opener.
  • Continue holding the keypad button until the indicator light on the motor unit flashes.
  • Release the keypad button.

: Test the Remote Control or Keypad

After programming, test the remote control or keypad by pressing the programmed button or entering the PIN code. The garage door should respond by either opening or closing. If the door doesn’t move, double-check the programming steps and repeat the process if necessary.

: Repeat for Multiple Doors (if needed)

If you have a multi-door garage opener or if you want to program additional remotes or keypads, repeat the entire process for each button or device you want to add. Each remote control or keypad can have its unique code or PIN, providing flexibility for different users.

: Finalize Programming

Once all remotes and keypads are successfully programmed, press the “Learn” or “Program” button on the Linear garage door opener once more to exit programming mode. This ensures that the opener is back to its regular operating state.

: Troubleshooting

If you encounter any issues during the programming process or if the remote control or keypad doesn’t work as expected, consult the user manual for your Linear garage door opener. Common troubleshooting tips may include checking battery levels, ensuring proper alignment, or reprogramming the device.

Conclusion:

Programming a Linear Garage Door Repair Valley Center CA is a user-friendly process that enhances the convenience and security of accessing your garage. By following these detailed steps and referring to your specific garage door opener’s user manual, you can successfully program your remote control or keypad and enjoy seamless operation of your garage door. If you encounter challenges, don’t hesitate to seek assistance from Linear’s customer support or refer to their online resources for further guidance.

Valley Center Gates & Garage Doors

15947 Mac Tan Ln, Valley Center, CA 92082

1-760-309-7584

How Much Does It Cost To Repair Garage Door Spring – Encinitas Overhead & Garage Doors

The smooth operation of a Garage Door Repair Encinitas CA relies heavily on its springs, and when these vital components malfunction, the immediate concern is often about repair costs.

Understanding the factors influencing the cost to repair a garage door spring can help homeowners navigate this essential maintenance task more confidently.

Importance of Garage Door Springs:

Garage door springs play a crucial role in the door’s functionality, supporting the weight and facilitating smooth opening and closing. There are two main types of springs commonly used: torsion springs and extension springs. The choice of spring and its condition contribute to the overall repair cost.

Common Signs of a Faulty Garage Door Spring:

  1. Unusual Noises:
    • Squeaking or popping sounds during operation may indicate a spring issue.
  2. Difficulty in Opening or Closing:
    • A door that struggles to open or close evenly is a clear sign of spring problems.
  3. Visible Wear and Tear:
    • Inspection may reveal visible signs of wear, such as rust or fraying.
  4. Sudden Door Movement:
    • A door that suddenly slams shut or moves unevenly may suggest a broken spring.

Cost Factors for Garage Door Spring Repair:

  1. Type of Spring:
    • Torsion springs are generally more expensive to repair than extension springs.
  2. Number of Springs:
    • Single-door systems typically have one spring, while double-door systems may have two. Repair costs increase with the number of springs.
  3. Size and Weight of the Door:
    • Larger and heavier doors require more robust springs, impacting repair costs.
  4. Material and Quality:
    • High-quality springs made from durable materials may cost more initially but offer long-term reliability.
  5. Professional Labor:
    • Hiring a professional for spring repair ensures proper installation but adds to the overall cost.
  6. Emergency Repairs:
    • Urgent repairs outside regular business hours may incur additional charges.

Average Costs for Garage Door Spring Repair:

  1. Torsion Springs:
    • Single spring replacement: $150 – $300
    • Double spring replacement: $200 – $400
  2. Extension Springs:
    • Single spring replacement: $80 – $150
    • Double spring replacement: $150 – $300

Tips for Cost-Effective Spring Repairs:

  1. Regular Maintenance:
    • Conduct routine inspections and lubrication to prolong the lifespan of springs.
  2. Address Issues Promptly:
    • Timely repairs can prevent further damage and reduce overall costs.
  3. Professional Inspection:
    • Schedule periodic inspections by professionals to identify potential issues before they escalate.
  4. DIY Assessments:
    • Homeowners can visually inspect springs for signs of wear, but repairs should be left to professionals.

Conclusion:

The cost to repair a Garage Door Repair Encinitas CA depends on various factors, including the type of spring, the number needed, and the size of the door. Investing in timely repairs not only ensures the smooth operation of the garage door but also prevents more extensive and costly issues down the line. Understanding the factors influencing repair costs empowers homeowners to make informed decisions regarding the maintenance of this integral component.

Encinitas Overhead & Garage Doors

1069 Double Ll Ranch Rd, Encinitas, CA 92024

1-858-758-9493

How Do I Program A Liftmaster Garage Door Opener – Solana Beach Garage & Overhead Doors

Programming a LiftMaster Garage Door Repair Solana Beach CA is a fundamental task for homeowners seeking to customize their access controls.

Whether you’re setting up a new remote or reprogramming an existing one, understanding the process ensures a secure and efficient garage door operation.

Before You Begin

Before diving into the programming steps, make sure you have the following:

  • LiftMaster garage door opener manual: This invaluable resource provides specific instructions for your model.
  • A stable ladder: Ensure safety while accessing the opener unit.
  • New remote or keypad: If you’re adding a new device, have it ready for programming.
  • Personal identification number (PIN): If programming a keypad, decide on a secure PIN.

Clear the Area Around the Opener

Create a safe workspace by clearing any obstructions around the garage door opener. This ensures easy access during the programming process.

Programming Steps

LiftMaster garage door openers feature a “Learn” button, a key element in the programming process. This button is typically located on the motor unit near the antenna wire. Consult your manual for the precise location on your model.

Erase Existing Codes (Optional)

If you’re reprogramming a remote or keypad, it’s advisable to clear existing codes for security reasons. To do this:

  1. Press and hold the “Learn” button until the indicator light turns off.
  2. Release the button, and all existing codes are now erased.

Program a Remote Control

1. Press the “Learn” Button

Press the “Learn” button on the motor unit. The indicator light will illuminate, indicating that the opener is ready to learn a new remote code.

2. Press the Remote Button

Within 30 seconds, press the button on the remote you wish to program. The indicator light on the motor unit will flash or click, signifying that the code has been successfully learned.

3. Test the Remote

Check the functionality by pressing the programmed button on the remote. The garage door should respond accordingly. If not, repeat the programming process.

Program a Wireless Keypad

1. Enter PIN and Press “Learn” Button

If you’re programming a wireless keypad, enter your chosen PIN and press the “Learn” button on the motor unit. The indicator light will activate.

2. Enter PIN on Keypad

Within 30 seconds, enter the same PIN on the keypad and press the “Enter” or “Send” button. The indicator light on the motor unit will again flash or click, indicating successful programming.

3. Test the Keypad

Test the keypad by entering the PIN and pressing the “Enter” or “Send” button. The garage door should respond accordingly. If not, revisit the programming steps.

Program Homelink (Vehicle Remote Control System)

1. Press and Hold the Homelink Button

For vehicles equipped with the Homelink system, follow these steps:

  • Press and hold the Homelink button you wish to program until the indicator light starts flashing.

2. Press the “Learn” Button on the Opener

  • Within 30 seconds, press the “Learn” button on the garage door opener motor unit. The indicator light will again flash or click.

3. Test the Homelink System

  • Test the Homelink system by pressing the programmed button in your vehicle. The garage door should respond. If not, repeat the programming process.

Troubleshooting Tips

If the remote, keypad, or vehicle Homelink system is not working consistently, consider these troubleshooting tips:

  • Replace the remote batteries.
  • Reposition the antenna on the motor unit for better signal reception.
  • Ensure there are no electronic devices causing interference.

Inconsistent Response

If the garage door opener responds inconsistently to the programmed codes, try the following:

  • Reprogram the remote or keypad, ensuring correct button sequences.
  • Check for any physical obstructions blocking the garage door’s path.

Conclusion:

Programming a LiftMaster Garage Door Repair Solana Beach CA may seem complex at first, but with careful adherence to the steps outlined in your manual, it becomes a manageable task. Whether you’re adding a new remote, programming a wireless keypad, or integrating the Homelink system in your vehicle, following these instructions ensures a secure and efficient garage door operation.

Solana Beach Garage & Overhead Doors

1034 Santa Helena Park Ct, Solana Beach, CA 92075

1-858-648-5118

How To Pair A Chamberlain Garage Door Opener – Vista Overhead & Garage Door Repair

Pairing a Chamberlain Garage Door Repair Vista CA is a crucial step to enable seamless communication between the opener and the remote control or other devices.

Whether you’re setting up a new Chamberlain opener or reprogramming an existing one, the process involves a few straightforward steps. In this detailed guide, we’ll walk you through the step-by-step process to pair a Chamberlain garage door opener, ensuring a smooth and secure connection.

1. Gather Necessary Materials: Before starting the pairing process, ensure you have all the necessary materials. This typically includes the Chamberlain garage door opener, a compatible remote control or keypad, and fresh batteries for the devices.

2. Read the Opener’s Manual: Consult the user manual that came with your Chamberlain garage door opener. The manual provides specific instructions for your model and may include additional details or features that are unique to your opener.

3. Locate the “Learn” Button: Most Chamberlain garage door openers have a “Learn” button, which is a key component in the pairing process. Locate this button on the motor unit of the garage door opener. The button is often colored and may be labeled “Learn” or “Smart.”

4. Clear Existing Programming (if needed): If you are reprogramming the opener or if it has been previously paired with other devices, it’s a good practice to clear existing programming. Press and hold the “Learn” button until the indicator light on the opener blinks, indicating that the memory has been cleared.

5. Choose a Remote Control or Keypad: Decide which remote control or keypad you want to pair with the Chamberlain garage door opener. If it’s a new device, make sure it is compatible with your specific Chamberlain model.

6. Press the “Learn” Button: With the chosen remote control or keypad in hand, stand within a few feet of the garage door opener motor unit. Press the “Learn” button on the opener and release it. The indicator light on the opener will begin to flash, indicating that it’s ready to learn a new device.

7. Press a Button on the Remote or Keypad: Quickly press the desired button on the remote control or enter a PIN on the keypad. This action sends a signal to the garage door opener, and the indicator light should either flash, indicating successful programming, or remain steady, indicating an issue.

8. Test the Connection: To ensure the pairing was successful, test the connection by pressing the programmed button on the remote or entering the PIN on the keypad. The garage door opener should respond by either opening or closing the door, depending on the programmed function.

9. Repeat for Additional Devices: If you have multiple remote controls or keypads, repeat the same process for each device. Each device can be paired with the Chamberlain garage door opener by following the steps outlined above.

10. Secure the Garage Door Opener: After successfully pairing all desired devices, secure the garage door opener by pressing the “Learn” button again. This step prevents unauthorized devices from being added to the opener’s memory.

11. Troubleshooting (if needed): If the pairing process is unsuccessful, consult the user manual for troubleshooting tips. Ensure that the remote control or keypad is within the recommended range, replace batteries, and double-check that the devices are compatible.

12. Regular Maintenance: Periodically check the batteries in your remote controls and keypads to ensure consistent communication with the garage door opener. Replace batteries as needed to maintain reliable operation.

Conclusion:

Pairing a Chamberlain Garage Door Repair Vista CA is a straightforward process that enhances the convenience and security of your garage access. By following these step-by-step instructions and consulting the user manual for your specific model, you can successfully program remote controls and keypads to operate your Chamberlain garage door opener. Regular maintenance and attention to battery life will contribute to the ongoing efficiency of your garage door system.

Vista Overhead & Garage Door Repair

1495 Poinsettia Ave Suite 152, Vista, CA 92081

1-760-546-9954

How To Fix A Broken Garage Door Spring – Palm Springs Garage & Overhead Doors

Garage Door Repair Palm Springs CA is a task that requires caution and precision. Garage door springs are under high tension and can be dangerous if mishandled.

If you’re not experienced with garage door systems, it’s highly recommended to seek professional assistance. However, if you feel confident and are committed to safety, follow these detailed steps to fix a broken garage door spring:

1. Safety First: Before starting any work, prioritize safety. Disconnect the power to the garage door opener to prevent accidental activation. Wear safety glasses, gloves, and appropriate protective gear. If you are not experienced with garage door systems, consider hiring a professional technician for this task.

2. Identify the Type and Size of the Broken Spring: Garage doors come with two main types of springs: torsion springs and extension springs. Identify the type of spring that has broken. Additionally, measure the length, inside diameter, and wire size of the broken spring. This information is crucial for obtaining the correct replacement spring.

3. Purchase Replacement Springs: Purchase high-quality replacement springs that match the measurements and specifications of the broken spring. It’s crucial to get the correct type and size for your garage door system. Consult with a reputable garage door supplier to ensure compatibility.

4. Secure the Garage Door in the Open Position: Use locking pliers or clamps to secure the garage door in the fully open position. This prevents the door from accidentally closing during the repair process.

5. Release Tension on the Broken Spring: If you have a torsion spring, use winding bars to release the tension on the broken spring. Insert the winding bars into the winding cone and turn them in the direction that opens up the coils. Release tension gradually to prevent accidents.

6. Disconnect the Broken Spring: Once the tension is released, use a wrench to loosen the set screws on the winding cone. Disconnect the broken spring from the stationary cone and center bracket. Carefully remove it from the torsion tube.

7. Install the New Spring: Slide the new spring onto the torsion tube. Ensure that it is correctly seated in the center bracket. Lubricate the torsion tube to facilitate smooth movement.

8. Wind the New Spring: Use the winding bars to wind the new spring. Follow the manufacturer’s guidelines for the correct number of turns based on the weight of your garage door. Wind the spring in the opposite direction as when releasing tension.

9. Secure the New Spring: Once the new spring is wound, secure it in place by tightening the set screws on the winding cone. Ensure that the set screws are tightened evenly and securely.

10. Test the Garage Door Balance: Manually lift the garage door and release it. The door should stay in place when opened halfway and shouldn’t feel too heavy. If the door is imbalanced, you may need to adjust the spring tension.

11. Adjust Spring Tension if Necessary: If the garage door feels imbalanced, use the winding bars to make minor adjustments to the tension on the new spring. This process may require trial and error to achieve the correct balance.

12. Reconnect Cables and Hardware: Reconnect any cables or hardware that were detached during the repair process. Ensure that everything is securely fastened and aligned.

13. Test the Garage Door: Test the garage door by operating it manually and with the opener. Check for smooth and even movement. Listen for any unusual noises that might indicate issues with the spring or other components.

14. Regular Maintenance: Periodically inspect the torsion springs and other components for wear and tear. Lubricate moving parts as recommended by the manufacturer. Regular maintenance helps ensure the longevity and proper function of the garage door system.

15. Seek Professional Help if Needed: If you encounter difficulties during the repair process or if the issues persist, consider seeking professional assistance. A trained technician can address more intricate problems and ensure proper installation.

16. Consider Replacing Both Springs: If one torsion spring has broken, it’s often advisable to replace both springs. This ensures even wear and maintains proper balance, enhancing the longevity of your garage door system.

Conclusion:

Garage Door Repair Palm Springs CA involves safety precautions, identifying the type and size of the broken spring, purchasing replacement springs, securing the garage door in the open position, releasing tension on the broken spring, disconnecting the broken spring, installing the new spring, winding the new spring, securing the new spring, testing the garage door balance, adjusting spring tension if necessary, reconnecting cables and hardware, testing the garage door, regular maintenance, seeking professional help if needed, and considering replacing both springs for even wear. Follow these steps meticulously to ensure a safe and effective repair of your broken garage door spring.

Palm Springs Garage & Overhead Doors

1877 E Amado Rd, Palm Springs, CA 92262

1-760-239-5657

How To Program Multiple Garage Door Openers Chamberlain – La Mesa Gates & Garage Doors

Programming multiple Garage Door Repair La Mesa CA system may seem complex, but with a systematic approach, you can easily manage and control multiple doors.

Follow these detailed steps to program multiple garage door openers with a Chamberlain system:

1. Identify Your Chamberlain Garage Door Opener Model: Chamberlain offers a variety of garage door opener models, each with slightly different programming procedures. Check your opener’s manual or locate the model number on the motor unit to ensure accurate instructions.

2. Locate the “Learn” Button(s) on Each Opener: Each Chamberlain garage door opener typically has a “Learn” button on the motor unit. This button is crucial for syncing the remote controls and keypads with the opener. Find and note the location of this button on each opener.

3. Clear Existing Codes: To start with a clean slate, clear any existing codes from each opener. Press and hold the “Learn” button on each motor unit until the indicator light turns off. This action resets the system for new programming.

4. Choose a Unique PIN for Each Keypad: If you’re programming keypads, select a unique and secure four-digit PIN for each one. Avoid easily guessable combinations and ensure each code is distinct.

5. Enter Program Mode on Each Keypad: For each Chamberlain keypad, locate the “Program” or “Learn” button. Press and release this button to initiate the programming mode. The keypad should indicate that it’s ready to accept a new PIN.

6. Enter the Chosen PIN on Each Keypad: Input the unique four-digit PIN you selected for each keypad. Be precise in entering it, as these codes will be used to control the corresponding garage doors.

7. Press Enter or Send on Each Keypad: After entering the PIN on each keypad, press the “Enter” or “Send” button. This signals the system to process and store the new codes. The keypad’s indicator light should flash, confirming successful programming.

8. Program Each Remote Control: If you have multiple remote controls, the process is similar. For each remote, locate the “Learn” button on the opener and press it. Within 30 seconds, press the desired button on the remote control. The opener should acknowledge the signal, indicating successful programming.

9. Test Each Code and Remote: Step outside your garage and test each keypad and remote control. Enter the unique PIN on each keypad or use the buttons on the remote controls corresponding to each door. Observe how each garage door responds, ensuring that each code controls the intended door.

10. Optional Features (If Available): Some Chamberlain openers offer additional features, such as controlling garage lights or setting temporary PINs for guests. Consult your opener and keypad manuals for instructions on programming these optional settings.

11. Secure Each PIN: Treat each PIN as sensitive information. Avoid sharing them with strangers and choose secure codes. Consider periodically updating the PINs for enhanced security.

12. Troubleshooting: If you encounter issues during programming or testing, refer to the manuals for each opener and keypad. Check that you followed the steps correctly, and if problems persist, contact Chamberlain customer support for assistance.

13. Maintenance and Security: Regularly update your keypad PINs and remote control codes for added security. Keep the keypads and remotes clean and free from debris. Address any security concerns promptly to ensure the safety of your garage.

In conclusion, programming multiple Garage Door Repair La Mesa CA system involves identifying the opener model, locating the “Learn” button on each opener, clearing existing codes, choosing unique PINs for each keypad, entering program mode on each keypad, inputting the PINs, pressing Enter, programming each remote control, testing each code and remote, exploring optional features, securing each PIN, troubleshooting if necessary, and maintaining overall system security. Follow these steps meticulously to establish a reliable and secure control system for multiple garage doors.

La Mesa Gates & Garage Doors

4396 Bellflower Dr, La Mesa, CA 91941

1-619-848-3026

How To Connect Chamberlain Garage Door Opener – Garden Grove Garage & Overhead Doors

Connecting your Chamberlain Garage Door Repair Garden Grove CA involves a series of steps to ensure proper synchronization with remote controls, keypads, and other devices.

Whether you’re setting up a new Chamberlain garage door opener or reprogramming an existing one, this comprehensive guide will walk you through the process step by step.

: Read the Manual

Before starting the connection process, familiarize yourself with the Chamberlain garage door opener manual. The manual provides essential information about the specific model you have, including the location of the learn button and any unique programming features.

: Locate the Learn Button

Most Chamberlain garage door openers feature a learn button that is crucial for programming and connecting devices. Find the learn button on the motor unit of the garage door opener. The learn button is typically a small, colored button (common colors include red, yellow, green, or purple) and is often located near the antenna wire.

: Clear Previous Programming (if applicable)

If the garage door opener has been previously programmed to other devices or remote controls, it’s advisable to clear its memory. Press and hold the learn button until the indicator light on the motor unit goes out. This action erases any existing programming and prepares the opener for new configurations.

: Power On the Opener

Ensure that the Chamberlain garage door opener is powered on. This may involve plugging it into an electrical outlet or restoring power through the circuit breaker. The opener needs power to enter programming mode and connect with devices.

: Program Remote Controls

If you have remote controls for your Chamberlain garage door opener, follow these steps to program them:

a. Press and release the learn button on the motor unit. b. Within 30 seconds, press and hold the button on the remote control that you want to program. c. Release the remote control button when the garage door opener lights flash or you hear a clicking sound.

Repeat this process for each remote control you want to connect.

: Program Keypad (if applicable)

If your Chamberlain garage door opener includes a wireless keypad, follow these steps to program it:

a. Enter a four-digit PIN of your choice on the keypad. b. Press and hold the enter button on the keypad. c. Release the enter button when the garage door opener lights flash or you hear a clicking sound.

Test the keypad to ensure it opens and closes the garage door.

: Program Homelink in Your Car (if applicable)

If your car is equipped with Homelink, follow these steps to program it:

a. Press and hold the Homelink button in your car. b. While holding the button, press and release the learn button on the motor unit. c. Release the Homelink button when the garage door opener lights flash or you hear a clicking sound.

Test the Homelink system to ensure it operates the garage door.

: Test Connections

After programming remote controls, keypads, and Homelink, test each device to confirm that they successfully operate the garage door opener. This step ensures that all connected devices are synchronized with the Chamberlain opener.

: Secure the Learn Button

After successfully connecting all devices, secure the learn button on the motor unit. Some Chamberlain garage door openers have a cover or sliding panel that can protect the learn button from accidental presses. Ensure that the learn button is not easily accessible.

: Troubleshoot (if necessary)

If you encounter any issues during the connection process, consult the Chamberlain garage door opener manual for troubleshooting tips. Common issues may include interference, incorrect programming sequences, or device compatibility.

Conclusion:

Connecting your Chamberlain Garage Door Repair Garden Grove CA involves programming remote controls, keypads, and possibly Homelink in your car. By following these step-by-step instructions and referring to the Chamberlain manual, you can successfully connect and synchronize devices with your garage door opener. Enjoy the convenience and security of a well-connected garage door system.

Garden Grove Garage & Overhead Doors

12861 West St SPC 162, Garden Grove, CA 92840

1-714-886-3142

How To Program A Garage Door Remote From Another Remote – Santee Gates & Garage Doors

Programming a  Garage Door Repair Santee CA from another remote can be a convenient process, allowing you to easily control your garage door opener.

Whether you’ve lost a remote and need to replace it or simply want to add a new remote to your existing system, this step-by-step guide will walk you through the process.

Tools and Materials Needed:

  1. Existing working garage door remote: This will serve as the reference remote.
  2. New garage door remote: The one you want to program.
  3. Ladder: If your garage door opener is mounted high.

Step-by-Step Guide:

: Identify the Garage Door Opener Type

Before you start programming, identify the type of garage door opener you have. Garage door openers typically use either DIP switches or rolling-code technology for programming remotes.

: Locate the “Learn” Button on the Garage Door Opener

Most modern garage door openers have a “Learn” or “Program” button on the motor unit. This button is usually located near the hanging antenna wire. If you’re unsure, consult your garage door opener’s manual or check the manufacturer’s website for instructions.

: Clear Existing Programming (If Necessary)

If you are replacing an old remote or want to start fresh, it’s a good idea to clear the existing programming on the garage door opener. To do this, press and hold the “Learn” button until the indicator light on the opener turns off. This step may vary depending on the opener model, so consult your manual if needed.

: Identify DIP Switch Positions (If Applicable)

If your garage door opener uses DIP switches, both the existing remote and the new remote must have matching DIP switch settings. Open the battery compartment on both remotes and set the DIP switches on the new remote to match the existing one.

: Press the “Learn” Button on the Garage Door Opener

Press the “Learn” button on the garage door opener. The indicator light on the opener will typically start blinking, indicating that it is in programming mode.

: Program the New Remote

Within 30 seconds of pressing the “Learn” button, press the button on the new remote that you want to use to control the garage door. Hold the button until the indicator light on the opener either stops blinking or turns solid, indicating that the remote is successfully programmed.

: Test the New Remote

To ensure successful programming, test the new remote by pressing the programmed button. The garage door should respond by opening or closing, depending on its current position.

: Repeat for Additional Remotes

If you have more than one new remote to program, repeat steps 5-7 for each additional remote. Make sure to complete the programming within the 30-second window after pressing the “Learn” button.

: Secure the Remote and Close the Battery Compartment

Once programming is complete, secure the remote by closing the battery compartment. Ensure that the remote is ready for regular use.

: Store the Existing Remote in a Safe Place

Since the existing remote served as a reference during programming, store it in a safe place in case you need it for future programming or troubleshooting.

Tips and Troubleshooting:

  • If the programming is not successful, double-check the DIP switch settings (if applicable) and repeat the process.
  • Ensure that the new remote’s battery is fresh and properly inserted.
  • Consult your garage door opener’s manual for model-specific instructions and troubleshooting tips.

Conclusion:

Programming a  Garage Door Repair Santee CA from another remote is a straightforward process that can be completed with a few simple steps. Following this guide will allow you to effortlessly add a new remote to your garage door opener system, providing you with convenient and secure access to your garage.

Santee Gates & Garage Doors

110 Town Center Pkwy Suite #21, Santee, CA 92071, United States

1-619-377-1538

Page 2 of 2

Powered by WordPress & Theme by Anders Norén