Local Services in Texas

Category: garage floor

Are There Any DIY Options For Garage Floor Installation – The Garage Floor Company Arizona


Garage Floor Chandler AZ can be cost-effective, rewarding, and relatively straightforward, depending on the chosen flooring material and the homeowner’s level of skill and experience.

Here are some popular DIY options for garage floor installation:

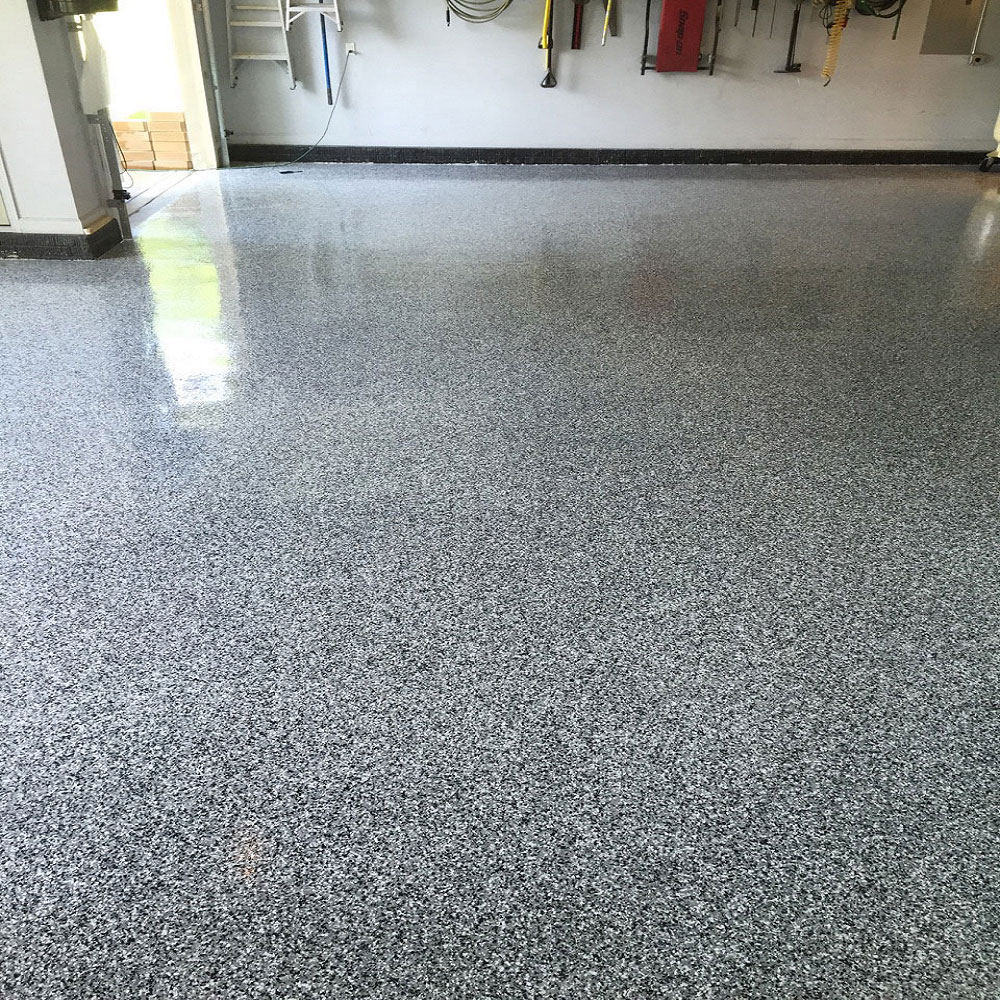
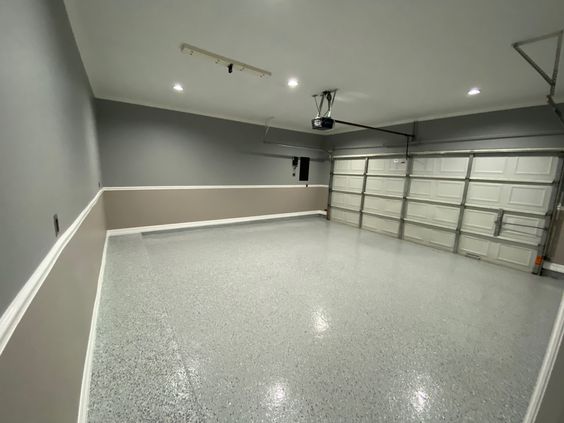
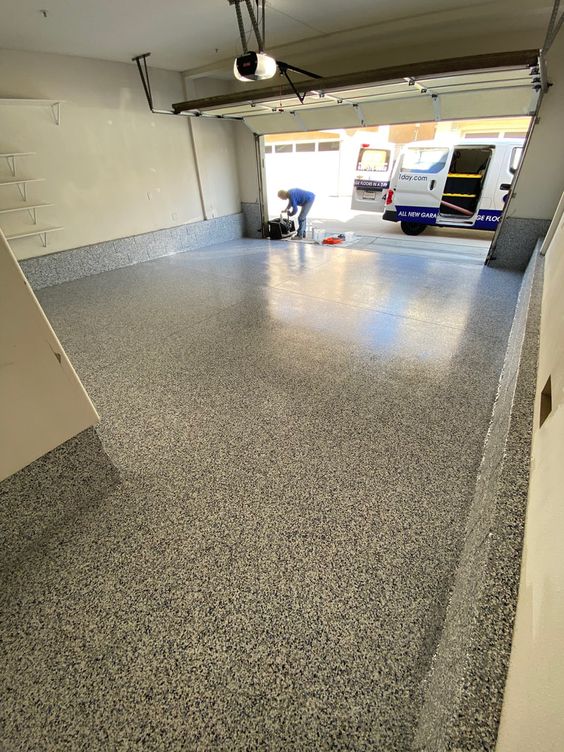
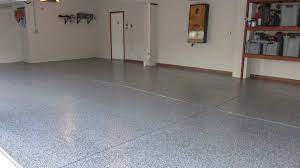
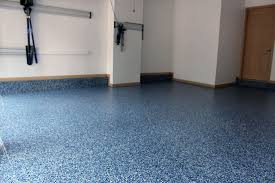
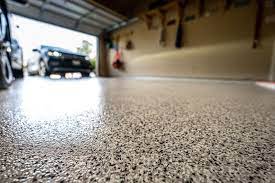
1. Epoxy Coatings: Epoxy garage floor coatings are a popular choice for DIY installations due to their ease of application, durability, and aesthetic appeal. Epoxy coatings typically come in two parts – a resin and a hardener – that are mixed together before application. Homeowners can apply the epoxy coating using a roller or squeegee, following the manufacturer’s instructions for mixing, application techniques, and curing times. Epoxy coatings create a seamless, high-gloss surface that is resistant to stains, impacts, and chemicals, making them ideal for garage environments.

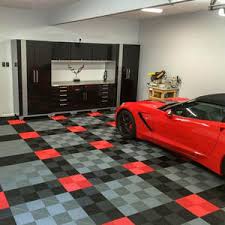
2. Interlocking Garage Floor Tiles: Interlocking garage floor tiles are another DIY-friendly option that provides a quick and easy way to upgrade the garage floor. These tiles simply snap together like puzzle pieces, creating a uniform surface that is resistant to stains, impacts, and chemicals. Interlocking tiles come in various materials, including PVC, polypropylene, and rubber, and are available in a wide range of colors, patterns, and styles. Homeowners can install interlocking tiles themselves using basic hand tools, such as a rubber mallet or hammer, and following the manufacturer’s instructions for layout and installation.

3. Rubber Mats: Rubber garage floor mats are a simple and cost-effective DIY option for covering the garage floor. These mats provide a durable and resilient surface that helps protect the underlying concrete from damage caused by heavy equipment and vehicles. Rubber mats come in various thicknesses and styles, including solid mats, perforated mats, and anti-fatigue mats, and can be easily trimmed to fit the dimensions of the garage floor. Homeowners can install rubber mats themselves by simply rolling them out and securing them in place with double-sided tape or adhesive.

4. Concrete Stain: Concrete stain is a DIY-friendly option for enhancing the appearance of existing concrete garage floors. Stains penetrate the concrete surface to create a permanent color that won’t peel or fade over time. Homeowners can choose from a wide range of colors and application techniques to achieve custom designs and effects. Applying concrete stain typically involves cleaning the floor, applying the stain with a brush or sprayer, and sealing the surface with a protective sealer. With proper preparation and application, DIY concrete staining can transform a dull concrete floor into a vibrant, attractive surface.

5. Concrete Sealers: Concrete sealers are another DIY option for protecting and enhancing existing concrete garage floors. Sealers penetrate the concrete surface to form a protective barrier against moisture, stains, and chemicals, while also enhancing the appearance of the floor. Homeowners can choose from water-based or solvent-based sealers, as well as clear or tinted formulations, to achieve the desired level of protection and aesthetics. Applying concrete sealer typically involves cleaning the floor, applying the sealer with a roller or sprayer, and allowing it to dry completely before use.

6. Garage Floor Paint: Garage floor paint is a budget-friendly DIY option for covering and protecting concrete garage floors. Epoxy or latex-based paints can be applied directly to the clean, dry surface using a roller or brush, creating a durable and attractive finish. Garage floor paint is available in a variety of colors and finishes, allowing homeowners to customize the look of their garage space. With proper preparation and application, DIY garage floor painting can provide a quick and easy way to refresh the appearance of the floor.

7. Modular Flooring Systems: Modular flooring systems consist of interlocking plastic or PVC tiles that snap together to create a durable and customizable surface for garage floors. These systems are designed for easy DIY installation and can be configured to fit any size or shape of the garage. Modular flooring is resistant to stains, chemicals, and impacts, making it an ideal choice for garage environments. Homeowners can install modular flooring themselves using basic hand tools, such as a rubber mallet or hammer, and following the manufacturer’s instructions for layout and installation.

Conclusion:

Garage Floor Chandler AZ With proper preparation, tools, and techniques, homeowners can achieve professional-quality results and enjoy a clean, attractive, and functional garage floor for years to come.

The Garage Floor Company Arizona

2300 W Pecos Rd #126, Chandler, AZ 85224, United States

1-480-405-1661

How To Repair Cracks In Garage Floor – The Garage Floor Company

Repairing cracks in a Garage Floor Lincoln NE is essential to maintain the structural integrity and appearance of the surface.

Cracks can result from various factors, including settling, freeze-thaw cycles, or simply the natural aging of the concrete. Here’s a detailed guide on how to effectively repair cracks in your garage floor:

: Gather Materials and Tools

Before starting the repair process, gather the necessary materials and tools. You’ll need a concrete patching compound, a trowel, a wire brush, a vacuum or compressed air, a concrete bonding agent, safety gear (gloves and eye protection), and possibly a putty knife.

: Clean the Crack

Begin by thoroughly cleaning the crack. Use a wire brush to remove any loose debris, dirt, or old filler from the crack. After brushing, vacuum or use compressed air to ensure the crack is clean and free of loose particles.

: Prepare the Crack

For better adhesion, dampen the crack slightly with water before applying the concrete patch. If the crack is deep, consider using a concrete bonding agent to enhance the bond between the existing concrete and the patching compound.

: Mix the Concrete Patching Compound

Follow the manufacturer’s instructions to mix the concrete patching compound. Typically, you’ll add water gradually and mix until you achieve a smooth, workable consistency. It’s crucial to mix only the amount you can apply within the product’s working time.

: Apply the Patching Compound

Using a trowel, apply the mixed patching compound to the crack, ensuring it fills the entire void. Smooth the surface with the trowel to create a level finish. For deeper cracks, apply the patching compound in layers, allowing each layer to dry before adding the next.

: Feather the Edges

Feather the edges of the patch to blend it seamlessly with the surrounding concrete. This will create a more natural appearance and help prevent tripping hazards.

: Let the Patch Cure

Allow the patching compound to cure according to the manufacturer’s instructions. This typically involves keeping the patched area moist for a specified time to promote proper curing.

: Sand the Patch

Once the patch is fully cured, use fine-grit sandpaper to smooth the surface. This step is especially important for achieving a uniform appearance and preventing the patch from standing out against the rest of the floor.

: Clean Up

Clean any tools, including the trowel and mixing container, promptly after completing the repair. The patching compound can harden quickly, making cleanup more challenging if delayed.

: Seal the Floor

Consider applying a concrete sealer to the entire garage floor to enhance its durability and protect against future cracks. Follow the sealer manufacturer’s instructions for proper application and drying times.

: Address Underlying Issues

While patching is a solution for visible cracks, it’s essential to address any underlying issues contributing to the cracking. Ensure proper drainage around the garage, address soil settlement, and take preventive measures to minimize future cracks.

: Regular Maintenance

Monitor your garage floor for any new cracks or signs of wear. Perform regular maintenance to address minor issues before they escalate. This proactive approach will help keep your garage floor in good condition over the long term.

Conclusion:

Repairing cracks in a Garage Floor Lincoln NE is a manageable DIY project that can significantly improve the overall appearance and functionality of the space. By following these step-by-step instructions and taking a proactive approach to maintenance, you can effectively address cracks and ensure the longevity of your garage floor.

The Garage Floor Company

1510 SW 30th St, Lincoln, NE 68522

1-402-795-8771

How to Replace Garage Floor – Garage Floor Coatings Omaha

Replacing a garage floor is a significant undertaking that requires careful planning and execution. Whether you’re dealing with severe damage, extensive cracks, or simply want to upgrade the look and functionality of your garage.

As someone who has gone through the process of replacing a garage floor, let me share my experience and provide a step-by-step guide from Garage Floor Coatings Omaha NE on how to replace a garage floor:

  1. Assess the Existing Floor: Before starting the replacement process, carefully evaluate the condition of your current garage floor. Look for cracks, damage, or unevenness that may require attention. Also, inspect the underlying structure to ensure it is stable and suitable for the new floor.
  2. Determine the Replacement Method: Based on the extent of damage and your preferences, decide on the best method for replacing the garage floor. You can choose between a partial replacement, full replacement, or resurfacing, depending on the condition of the existing floor.
  3. Gather the Necessary Tools and Materials: Once you have decided on the replacement method, gather all the tools and materials you will need. This typically includes safety gear like goggles, gloves, and a mask, as well as demolition tools like a jackhammer, sledgehammer, and chisel. Additionally, you will need concrete cutting tools, a wheelbarrow or concrete mixer, shovels, rakes, concrete mix, reinforcement materials, leveling and compacting tools, waterproofing and sealing materials, and finishing materials.
  4. Prepare the Work Area: Clear out your garage completely, removing all vehicles, equipment, and belongings. Create a clean and open space to work in. Cover the walls, doors, and other items with drop cloths or plastic sheeting to protect them from dust, debris, and splatters during the replacement process.
  5. Demolish and Remove the Existing Floor: If you’re doing a full or partial replacement, start by demolishing the existing floor. Use a jackhammer or a sledgehammer to break up the concrete, starting from the edges and working your way inward. Be cautious of any buried utility lines or plumbing. Remove the broken concrete and dispose of it properly.
  6. Prepare the Subgrade: With the old floor removed, assess the subgrade and ensure it is properly prepared. Clear away any remaining debris and level the surface. Address any soil or drainage issues to ensure a stable base for the new floor.
  7. Install Reinforcement: Consider installing reinforcement materials like rebar or wire mesh to add strength to the new concrete. This step is particularly important for heavy-duty applications or areas prone to cracking.
  8. Mix and Pour the Concrete: Follow the manufacturer’s instructions to mix the concrete properly. Use a concrete mixer or a wheelbarrow to achieve a consistent mixture. Begin pouring the concrete into the designated area, starting from one corner and working your way towards the exit. Use shovels, rakes, and leveling tools to spread the concrete evenly and achieve the desired thickness.
  9. Level and Smooth the Surface: Once the concrete is poured, use a screed board to level the surface. Move the screed board back and forth in a sawing motion while applying downward pressure to remove excess concrete and achieve a level surface. Use a float to further smooth and level the surface.
  10. Cure and Finish the Floor: Follow the curing guidelines provided by the concrete manufacturer to allow the floor to set properly. This typically involves covering the surface with plastic sheeting and keeping it moist for a specific period. After the curing period, apply any desired finishes like stains, coatings, or sealants to protect the floor and enhance its appearance.
  11. Clean and Reorganize: Once the floor is completely cured, clean up the work area and remove any remaining debris. Reorganize your garage, bringing back your vehicles, equipment, and storage items to their designated places.

Overall, as per Garage Floor Coatings Omaha NE, replacing a garage floor is a significant undertaking that requires careful planning, attention to detail, and the right tools. If you’re unsure or inexperienced, it’s recommended to consult with professionals who can guide you through the process and ensure a successful floor replacement.

Garage Floor Coatings Omaha

14685 California St, Omaha, NE 68154, United States

402-538-8225

How to Maintain Your Epoxy-coated Garage Floor? – Omaha’s Best Epoxy Garage Floor

As a homeowner with an epoxy-coated garage floor, I understand the importance of proper maintenance to keep it looking pristine and prolong its lifespan. Maintaining an epoxy garage floor is relatively easy and requires regular cleaning and a few preventive measures.

Here’s a step-by-step guide from Epoxy Garage Floor Omaha NE on how I maintain my epoxy-coated garage floor:

  1. Regular Cleaning: I make it a habit to sweep or dust mop my garage floor regularly to remove loose dirt, dust, and debris. Using a soft-bristle broom or a dust mop, I gently sweep the entire floor, paying attention to corners, edges, and areas near entry points. This simple step helps prevent scratches and keeps the floor looking clean.
  2. Preventative Measures: To protect my epoxy-coated floor, I take preventive measures. I place mats or rugs in high-traffic areas, near the garage entrance, and under vehicles to capture dirt, water, and chemicals. This helps reduce the amount of debris that can potentially damage the epoxy surface. Additionally, I use floor protectors under heavy objects such as workbenches or toolboxes to prevent any scratches or dents.
  3. Promptly Address Stains and Spills: If I notice any spills or stains on the floor, I take immediate action to clean them up. Using a mild detergent or a specialized epoxy floor cleaner mixed with warm water, I apply the solution to the stained area and gently scrub it with a soft brush or a sponge mop. Afterward, I rinse the area thoroughly with clean water and ensure it is completely dry.
  4. Avoid Harsh Chemicals and Abrasive Cleaners: I am careful to avoid using harsh chemicals, bleach, or abrasive cleaners on my epoxy-coated floor. These substances can damage the epoxy surface and compromise its integrity and appearance. Instead, I stick to mild detergents or specialized epoxy floor cleaners recommended by the manufacturer.
  5. Be Mindful of Tire Marks and Chemicals: To prevent tire marks, especially from hot tires, I use mats or rugs in areas where my vehicles make contact with the floor. If any tire marks do appear, I gently remove them using a rubber eraser or a specialized tire mark cleaner. I am also cautious when handling chemicals in the garage, promptly cleaning up any spills and using appropriate containment measures to prevent damage to the epoxy surface.
  6. Regular Inspections: I perform periodic inspections of my epoxy floor to identify any signs of damage, such as chips, cracks, or peeling. If I notice any issues, I address them promptly to prevent further deterioration. Depending on the severity of the problem, I may seek professional assistance to repair or recoat the affected areas.
  7. Recoating (if necessary): Over time, the epoxy coating may show signs of wear or lose its shine. If I notice significant wear or want to rejuvenate the floor’s appearance, I consider recoating the epoxy surface. I carefully follow the manufacturer’s instructions and recommendations for proper recoating techniques and products, ensuring a smooth and even application.

By following these steps from Epoxy Garage Floor Omaha NE and maintaining a regular maintenance routine, I can keep my epoxy-coated garage floor looking beautiful and well-protected. Proper care and preventive measures go a long way in preserving the longevity and durability of my epoxy floor.

Omaha’s Best Epoxy Garage Floor

5060 Dodge St, Omaha, NE 68132, United States

402-814-8957

How Long Does it Take to Install a Garage Door? – Presto Garage Door of Atlanta

I recently went through the process of installing a new garage door, and I understand how important it is to have an estimate of the time it takes for the installation.

According to Atlanta Garage Door, while I can’t provide an exact timeframe for your specific situation, I can share my experience and give you a general idea of the installation process and the factors that can affect the duration.

  1. Preparation: Before starting the installation, it’s essential to prepare the area and gather all the necessary tools and materials. This includes clearing the workspace, ensuring the floor is clean and level, and having all the components of the garage door system readily available. The time required for preparation can vary depending on the condition of the existing garage door and the readiness of the installation area.
  2. Removing the Old Door (if applicable): If you’re replacing an existing garage door, the time needed to remove the old door should be taken into account. This process involves disconnecting the opener, detaching the tracks and hardware, and carefully removing the door panels. The duration of this step depends on factors such as the size of the door, the complexity of the existing setup, and any unforeseen challenges that may arise during the removal.
  3. Installing the Tracks and Hardware: The next step involves installing the vertical and horizontal tracks that guide the movement of the door. This includes securing the tracks to the walls and ceiling, ensuring they are properly aligned and leveled. Additionally, the necessary hardware, such as brackets, hinges, rollers, and cables, needs to be attached to the door panels and correctly positioned. The time required for this step will depend on the size of the door, the complexity of the track system, and the number of hardware components involved.
  4. Installing the Door Panels: Once the tracks and hardware are in place, the door panels can be installed. This involves positioning the panels within the tracks, attaching them to the hinges and rollers, and ensuring they are properly aligned and balanced. The duration of this step depends on the size and weight of the door panels, as well as the number of panels involved in the design.
  5. Installing the Springs and Opener (if applicable): If your garage door system includes springs for counterbalancing, they will need to be installed correctly to ensure smooth and safe operation. Additionally, if you’re installing a garage door opener, this step will involve mounting the opener unit, connecting the necessary wiring, and programming the opener. The time required for installing springs and openers can vary depending on the complexity of the system and the level of expertise of the installer.
  6. Testing and Adjustment: Once the installation is complete, it’s crucial to conduct thorough testing and make any necessary adjustments to ensure proper functionality. This includes checking the balance of the door, testing the safety features, and fine-tuning the door’s operation. The time required for testing and adjustment will depend on the complexity of the system and the level of fine-tuning required.

While it’s difficult to provide an exact timeframe, a typical garage door installation can take anywhere from a few hours to a full day. However, it’s important to note that this is a general estimate, and the actual time required may vary based on factors such as the size and complexity of the door, the level of customization, the expertise of the installer, and any unforeseen challenges that may arise during the installation process.

Overall, as per Atlanta Garage Door, to get a more accurate estimate for your specific situation, it’s best to consult with a professional garage door installer or contractor. They will assess your unique circumstances, consider any specific requirements or challenges, and provide you with a more precise timeframe for the installation of your garage door.

Presto Garage Door of Atlanta

535 Means St NW, Atlanta, GA 30318, United States

470-281-3823

Garage Floor Repair-Garage Floor Coatings Omaha

The Garage Floor Coatings Omaha NE is an essential component of any home, serving as a durable surface for parking vehicles, storage, and various other activities. Over time, however, the garage floor may experience wear and tear, cracks, or damage that require repair.

This article aims to provide a comprehensive guide to garage floor repair, covering common issues, repair techniques, and preventive measures.

  1. Understanding Common Garage Floor Problems: a. Cracks: Cracks are a frequent issue in garage floors and can occur due to various factors such as heavy loads, temperature changes, or settling of the foundation. b. Spalling: Spalling refers to the chipping or flaking of the surface layer of the garage floor, often caused by freeze-thaw cycles, moisture, or the use of improper materials during the initial installation. c. Pitting: Pitting involves the formation of small holes or indentations in the garage floor, typically resulting from the corrosive effects of chemicals, oil spills, or inadequate surface preparation.
  2. Assessing the Severity of Damage: Before initiating any repair work, it is crucial to assess the severity of the damage. Minor cracks or surface imperfections can often be repaired using simple DIY methods, while more extensive damage may require professional intervention.
  3. DIY Garage Floor Repair Techniques: a. Filling Cracks: Small cracks can be filled using epoxy or concrete crack fillers. The process involves cleaning the crack, applying the filler, and smoothing the surface. b. Patching Spalled Areas: Spalled areas can be patched by removing loose or damaged concrete and applying a resurfacing compound or epoxy mortar to restore the surface. c. Leveling Pitted Surfaces: Pitted surfaces can be leveled by using a self-leveling compound or resurfacer, which is poured onto the floor and spread evenly to create a smooth surface.
  4. Professional Garage Floor Repair: a. Complex Cracks or Structural Issues: If the cracks are extensive or there are underlying structural problems, it is advisable to seek professional help. They may use techniques such as epoxy injection or carbon fiber reinforcement to address the issues effectively. b. Resurfacing: In cases of severe damage or extensive pitting, professional resurfacing methods, such as concrete overlays or microtoppings, can provide a long-lasting solution.
  5. Preventive Measures: To minimize the need for future repairs, it is important to take preventive measures: a. Regular Cleaning: Keep the garage floor clean from debris, chemicals, and oil spills. b. Surface Protection: Use sealants or coatings to protect the floor from moisture, stains, and chemicals. c. Reinforcement: Consider adding reinforcement, such as fiber mesh or rebar, during initial installation or repairs to enhance the floor’s durability.
  6. Safety Precautions: When undertaking garage floor repair, safety should be a priority: a. Use appropriate protective gear, such as safety goggles, gloves, and respiratory masks. b. Follow the manufacturer’s instructions for any products or materials used. c. Ensure proper ventilation in enclosed garages to avoid inhaling harmful fumes.

Conclusion: Repairing a Garage Floor Coatings Omaha NE is essential for maintaining its functionality and extending its lifespan. By understanding common issues, assessing the damage, and employing the appropriate repair techniques, you can restore your garage floor to a safe and sturdy condition. Regular maintenance and preventive measures will help minimize future damage, ensuring a durable and long-lasting garage floor for years to come.

Garage Floor Coatings Omaha

14685 California St, Omaha, NE 68154, United States

1-402-538-8225

How Much Does Garage Floors Cost-Omaha’s Best Epoxy Garage Floor

The cost of Epoxy Garage Floor Omaha NE can vary depending on various factors such as the size of the garage, the type of flooring material chosen, and the complexity of the installation process.

Here are some common options and their approximate cost ranges:

  1. Concrete: Plain concrete floors are a popular choice for garages. The cost can range from $2 to $10 per square foot, depending on factors like the condition of the existing concrete, any desired coatings or finishes, and the local labor costs.
  2. Epoxy Coating: Epoxy coatings provide a durable and attractive finish to garage floors. The cost typically ranges from $3 to $12 per square foot, depending on the quality of the epoxy, the number of coats applied, and any additional customization or decorative options.
  3. Interlocking Tiles: Interlocking tiles offer a quick and easy way to upgrade garage floors. Prices vary depending on the material, design, and quality of the tiles. Generally, interlocking tiles can cost between $2 and $10 per square foot.
  4. Rubber Flooring: Rubber flooring provides a cushioned and slip-resistant surface. The cost of rubber flooring typically falls between $3 and $8 per square foot, depending on the thickness and quality of the rubber.
  5. Other Options: There are several other options available for garage flooring, such as vinyl, laminate, or specialty coatings. The cost for these options can vary significantly based on the material and complexity of installation.

It’s important to note that these cost estimates are approximate and can vary based on your location and specific project requirements. It’s recommended to consult with local contractors or flooring specialists to get accurate cost estimates for your Epoxy Garage Floor Omaha NE project.

Omaha’s Best Epoxy Garage Floor

5060 Dodge St, Omaha, NE 68132

1-402-814-8957

The New Design of Garage Floor-The Garage Floor Company

A Epoxy Garage Floor is an integral part of any home, serving as a functional space for parking vehicles, storing tools, and engaging in various activities. Over the years, garage floors have evolved from being purely utilitarian to becoming a space that blends functionality with aesthetics.

In this article, we will explore the new design trends for garage floors, focusing on innovative materials, finishes, and layouts that can transform this often overlooked space into a visually appealing and highly functional area.

  1. Material Selection: Traditionally, garage floors were constructed using plain concrete, which offered durability but lacked visual appeal. However, recent advancements in flooring materials have provided homeowners with a wide range of options to choose from. One popular choice is epoxy flooring, a seamless and glossy surface that not only enhances the aesthetics of the garage but also provides excellent resistance to stains, chemicals, and wear. Other materials like porcelain tiles, rubber flooring, and stained concrete are also gaining popularity due to their durability and customizable design options.
  2. Decorative Finishes: Gone are the days when garage floors were restricted to a simple gray or plain look. Modern garage designs embrace decorative finishes to add personality and style. Metallic epoxy coatings create a stunning, high-gloss finish with unique patterns and colors, mimicking the appearance of luxurious materials like marble or granite. Stenciled or stamped concrete is another option that allows homeowners to add intricate designs, logos, or patterns to the floor surface. These decorative finishes not only make the garage floor visually appealing but also turn it into a conversation piece.
  3. Color Schemes: Garage floors are no longer limited to dull and monotonous colors. The new design trends encourage the use of vibrant and contrasting color schemes to create an inviting and dynamic space. Bright colors like red, blue, or green can add a playful touch to the garage, while neutral tones such as gray or beige provide a sleek and modern look. Homeowners can choose colors that complement the overall design of their home or use contrasting hues to make the garage floor stand out as a unique feature.
  4. Lighting: Proper lighting is crucial for any functional space, and garages are no exception. Thoughtful lighting design can enhance the overall ambiance of the garage and make it more visually appealing. Incorporating overhead lighting fixtures, LED strips, or spotlights can illuminate specific areas, such as workstations or storage spaces, while accentuating the design elements of the floor. Smart lighting systems with adjustable brightness and color options are gaining popularity, allowing homeowners to customize the garage’s lighting according to their needs and preferences.
  5. Organization and Layout: An organized garage not only improves functionality but also enhances the visual appeal. Innovative storage solutions, such as wall-mounted cabinets, pegboards, and overhead racks, can keep tools, equipment, and other items neatly organized, making the garage appear clean and spacious. Additionally, creating designated zones for different activities, such as parking, workshop, or storage, helps optimize the garage space and ensures efficient use of the floor area.

Conclusion: The new design trends for Epoxy Garage Floor have revolutionized this once-neglected space into a stylish and functional part of the home. With a wide range of materials, finishes, and layouts to choose from, homeowners can now transform their garage floors into visually appealing areas that reflect their personal style. Whether it’s using decorative finishes, incorporating vibrant color schemes, or optimizing lighting and organization, the new design options allow for endless possibilities in creating a garage floor that goes beyond its utilitarian purpose.

The Garage Floor Company

866-507-0096

Powered by WordPress & Theme by Anders Norén