Local Services in Texas

Month: March 2024 Page 3 of 6

Garage Door Hinge Replacement: When and How to Do It – Roadrunner Garage Doors

As a homeowner who takes pride in maintaining every aspect of my property, I’ve come to appreciate the importance of a well-functioning garage door. It’s not just about curb appeal—it’s about safety, security, and convenience. However, like any mechanical system, garage doors require regular maintenance and occasional repairs to ensure they continue to operate smoothly and efficiently. One critical component that often needs attention is the hinges.

In this guide from Garage Door Repair, I’ll walk you through everything you need to know about garage door hinge replacement: when it’s necessary, how to do it yourself, and the benefits of keeping your hinges in top condition.

Knowing When It’s Time for Replacement

First and foremost, let’s discuss when it’s time to replace your garage door hinges. Over time, hinges can become worn, damaged, or corroded due to constant use, exposure to the elements, and general wear and tear. Here are some signs that indicate it may be time for a replacement:

  1. Visible Damage: Inspect the hinges for signs of cracking, bending, or rust. If you notice any visible damage, it’s a clear indication that the hinges need to be replaced.
  2. Squeaking or Grinding Sounds: If your garage door emits squeaking or grinding noises when opening or closing, it could be a sign that the hinges are worn out and in need of replacement.
  3. Difficulty Opening or Closing: A garage door that struggles to open or close smoothly may have hinge issues. Worn or damaged hinges can cause the door to bind or get stuck, compromising both safety and functionality.
  4. Loose or Wobbly Hinges: Check the hinges for any looseness or wobbliness. Loose hinges can lead to misalignment and instability, posing a safety risk to you and your family.

Gathering the Necessary Tools and Materials

Before you begin the replacement process, gather the necessary tools and materials:

  • Replacement hinges
  • Wrench or socket set
  • Hammer
  • Screwdriver
  • Lubricant (such as silicone spray or WD-40)
  • Safety goggles and gloves

Steps for Garage Door Hinge Replacement

Now, let’s walk through the steps for replacing your garage door hinges:

  1. Safety First: Ensure the garage door is fully closed and disconnected from the opener to prevent any accidents or injuries during the replacement process.
  2. Remove the Old Hinges: Using a wrench or socket set, loosen and remove the bolts securing the old hinges to the door panels. Carefully pry the hinges away from the door using a screwdriver or hammer if necessary.
  3. Clean and Lubricate: Take this opportunity to clean the hinge areas on the door panels and lubricate the new hinges with a silicone spray or WD-40 for smooth operation.
  4. Install the New Hinges: Position the new hinges in place on the door panels, aligning them with the existing holes. Insert the bolts and tighten them securely using a wrench or socket set.
  5. Test the Door: Once all the new hinges are installed, manually open and close the garage door several times to ensure smooth operation and proper alignment.
  6. Adjust if Necessary: If the door is not closing or opening correctly, you may need to make adjustments to the hinge placement or tension. Refer to the manufacturer’s instructions for guidance on adjusting the hinges.
  7. Final Checks: Inspect the hinges and door panels one last time to ensure everything is securely in place and functioning properly.

Benefits of Garage Door Hinge Replacement

Investing the time and effort into replacing your garage door hinges offers several benefits:

  • Improved Functionality: New hinges ensure smooth and reliable operation of your garage door, reducing the risk of malfunctions and breakdowns.
  • Enhanced Safety: Worn or damaged hinges can compromise the safety and security of your garage, so replacing them helps maintain a secure environment.
  • Extended Lifespan: By replacing hinges before they fail completely, you can extend the lifespan of your garage door system and avoid costly repairs down the line.
  • Curb Appeal: A well-maintained garage door enhances the overall appearance of your home, boosting curb appeal and property value.

Conclusion: Preserve Your Garage Door’s Integrity

In conclusion, based from Garage Door Repair, garage door hinge replacement is a straightforward yet essential maintenance task that can prolong the lifespan of your garage door system and ensure its continued functionality and safety. By knowing when it’s time for replacement, gathering the necessary tools and materials, and following the step-by-step installation process outlined above, you can tackle this project with confidence and keep your garage door operating smoothly for years to come. Remember, regular maintenance is key to preserving the integrity of your garage door and protecting your home and family.

Roadrunner Garage Doors

2950 North Loop West, Suite 500
Houston, TX 77092

713-473-8168

How To Adjust Spring Tension On Garage Door – Camco Commercial Door Company


In this guide, I’ll walk you through the process of adjusting spring tension on a  Garage Door Repair Knoxville TN in covering the tools you’ll need, safety precautions to observe, and step-by-step instructions for adjusting both extension and torsion springs:

Garage Door Installation And Repair At Home. Contractor Man In House

Tools You’ll Need:

Before you begin, gather the following tools:

  1. C-clamps or locking pliers: Used to secure the door in place.
  2. Winding bars: Required for adjusting torsion springs.
  3. Adjustable wrench or socket wrench: For loosening and tightening bolts.
  4. Tape measure: Used to ensure balanced tension adjustment.

Safety Precautions:

Adjusting garage door spring tension can be dangerous, as springs are under high tension and can cause serious injury if mishandled. Follow these safety precautions:

  1. Disconnect power: Unplug the garage door opener and lock out its power source to prevent accidental activation.
  2. Secure the door: Use C-clamps or locking pliers to secure the door in place, preventing it from moving during adjustment.
  3. Wear protective gear: Wear safety glasses and work gloves to protect yourself from potential hazards.

Adjusting Extension Springs:

Extension springs run parallel to the tracks on both sides of the garage door. To adjust tension:

  1. Close the door: Ensure the door is fully closed before beginning adjustment.
  2. Secure the door: Use C-clamps or locking pliers to secure the door in place, preventing it from opening unexpectedly.
  3. Adjust the cable: If necessary, adjust the cable tension by moving the S-hook to a different hole on the track bracket.
  4. Test the door: After making adjustments, test the door to ensure it opens and closes smoothly.

Adjusting Torsion Springs:

Torsion springs are located above the door and wind up to store energy. To adjust tension:

  1. Identify the winding cone: Locate the winding cone at the end of the torsion spring shaft.
  2. Use winding bars: Insert one winding bar into the holes on the winding cone to hold it in place.
  3. Loosen the set screws: Use an adjustable wrench to loosen the set screws on the winding cone.
  4. Adjust tension: To increase tension, insert a second winding bar into the next set of holes on the winding cone and turn it in the direction indicated by the arrow on the cone. To decrease tension, reverse the direction.
  5. Tighten set screws: Once the desired tension is achieved, tighten the set screws securely.
  6. Balance the tension: Repeat the adjustment process on the other side of the door to ensure balanced tension.

Testing and Fine-Tuning:

After adjusting spring tension, perform the following tests to ensure proper operation:

  1. Door balance test: Manually open the door halfway and release it. It should remain in place. If it moves up or down, further adjustment is needed.
  2. Door operation test: Open and close the door several times using both manual and automatic operation to ensure smooth movement.

Additional Tips:

  • Consult a professional: If you’re unsure about adjusting spring tension or encounter difficulties, consult a professional garage door technician for assistance.
  • Regular maintenance: Inspect and lubricate springs regularly to keep them in good condition and prevent premature wear.
  • Safety first: Always prioritize safety when working with garage door springs. If you’re uncomfortable or inexperienced, seek professional help to avoid accidents.

Conclusion:

 Garage Door Repair Knoxville TN If you’re unsure or uncomfortable performing the adjustment yourself, don’t hesitate to seek professional assistance to ensure the job is done safely and effectively.

Camco Commercial Door Company

1-865-776-9455

How To Close A Garage Door With A Broken Spring – EDM Garage Doors, LLC


Garage Door Repair Volo IL It’s essential to proceed with caution and follow proper procedures to avoid injury or damage to the door and surrounding property.

Here’s a comprehensive guide on how to close a garage door with a broken spring in 1000 words:

Assess the Situation:

Before attempting to close the garage door, it’s essential to assess the condition of the broken spring and the overall state of the door. Look for signs of damage or misalignment, such as loose cables, bent tracks, or broken rollers, that could affect the door’s operation. If the door appears to be severely damaged or if you’re unsure how to proceed safely, it’s best to seek professional assistance from a qualified garage door technician.

Gather Necessary Tools and Equipment:

To safely close the garage door with a broken spring, you’ll need the following tools and equipment:

  1. Protective gloves
  2. Safety goggles
  3. A sturdy ladder or step stool
  4. Vice grips or locking pliers
  5. C-clamps or locking pliers
  6. A winding bar or sturdy metal rod

Release the Emergency Release Cord:

Most garage door openers are equipped with an emergency release cord or handle that disengages the opener mechanism and allows you to operate the door manually. Locate the emergency release mechanism, typically located near the opener motor or on the garage door track, and pull it down to disengage the opener.

Secure the Door in the Open Position:

Before attempting to close the garage door manually, it’s essential to secure it in the open position to prevent it from falling unexpectedly. Use locking pliers or C-clamps to secure the door tracks or rollers, ensuring that the door remains stable and stationary while you work.

Disconnect the Opener from the Door:

Once the door is securely open, disconnect the garage door opener from the door to prevent it from engaging accidentally during the closing process. This typically involves pulling the release cord or handle until you hear a clicking sound, indicating that the opener has been disconnected.

Support the Weight of the Door:

With the opener disconnected, you’ll need to support the weight of the garage door manually as you lower it to the closed position. Enlist the help of a friend or family member to assist you in supporting the door, especially if it’s large or heavy.

Lower the Door Carefully:

Using caution and working slowly, begin to lower the garage door manually by carefully guiding it downward. Use your hands to guide the door along the tracks, ensuring that it moves smoothly and evenly without binding or catching on any obstacles.

Use Vice Grips to Secure the Door:

As you lower the door, use vice grips or locking pliers to secure the door tracks or rollers at regular intervals along the track. This will help prevent the door from sliding back up unexpectedly and provide added stability as you work.

Avoid Putting Pressure on the Broken Spring:

When manually closing the garage door, it’s essential to avoid putting pressure on the broken spring or attempting to operate the door using the spring system. Doing so could cause further damage to the spring or compromise the door’s stability and safety.

Test the Door’s Operation:

Once the garage door is fully closed, test its operation by manually lifting and lowering it a few times to ensure that it moves smoothly and evenly along the tracks. Check for any signs of binding, sticking, or misalignment that could indicate underlying issues with the door or track system.

Secure the Door in the Closed Position:

After confirming that the garage door is functioning correctly, secure it in the closed position using locking pliers or C-clamps to prevent it from opening unexpectedly. Make sure that the door is securely closed and latched before releasing the weight of the door.

Schedule Repairs or Replacement:

Closing the garage door manually with a broken spring is only a temporary solution, and it’s essential to schedule repairs or replacement as soon as possible to restore the door’s proper function and safety. Contact a reputable garage door repair company to assess the damage and recommend the appropriate course of action.

Exercise Caution and Follow Safety Guidelines:

Throughout the process of closing the garage door with a broken spring, it’s crucial to exercise caution and follow proper safety guidelines to avoid injury or damage. Wear protective gloves and safety goggles to protect your hands and eyes from potential hazards, and enlist the help of a friend or family member to assist you in supporting the door safely.

Seek Professional Assistance if Needed:

If you encounter any difficulties or concerns while closing the garage door with a broken spring, don’t hesitate to seek professional assistance from a qualified garage door technician. They have the knowledge, experience, and equipment to address the issue safely and effectively, ensuring that your garage door is repaired or replaced promptly and correctly.


Garage Door Repair Volo IL Remember to schedule repairs or replacement promptly to restore the door’s proper function and ensure continued safety and security.

EDM Garage Doors, LLC

596 Richard Brown Blvd, Volo, IL 60073, United States

1-847-416-3036

What Are The Essential Steps In Preparing A Worksite For Concrete Pouring – Mesquite Concrete Crew


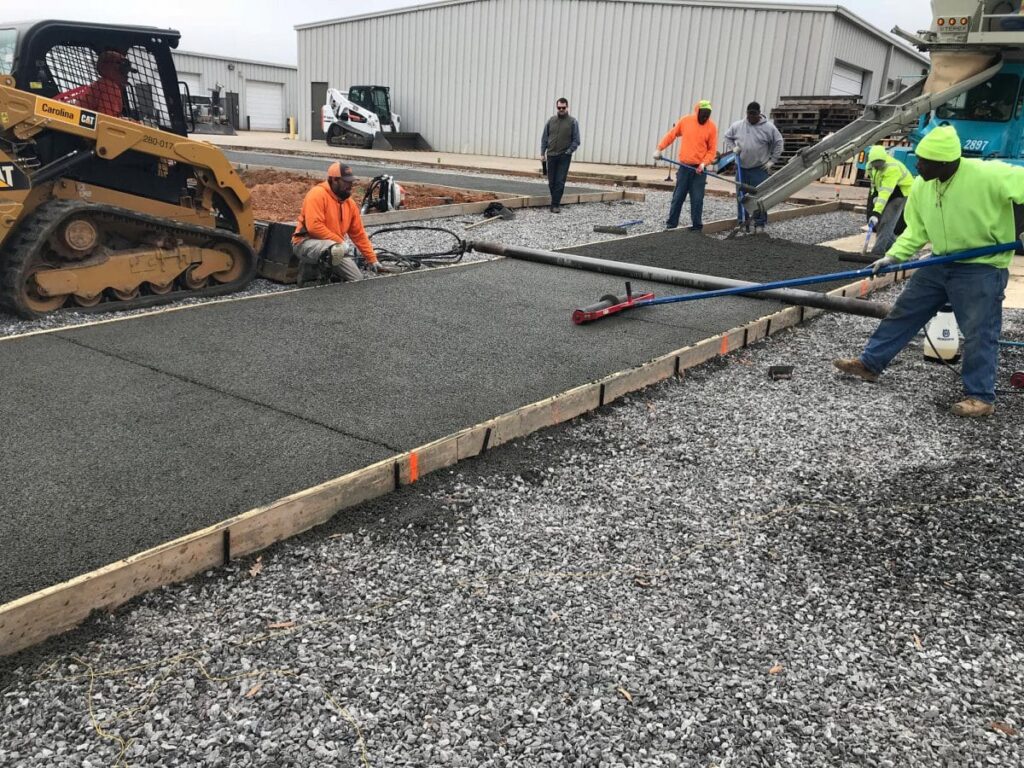
Preparing a worksite for Concrete Crew Mesquite TX is a crucial step in ensuring a successful construction project. Proper preparation helps create a stable foundation, ensures accurate placement of concrete, and minimizes the risk of issues such as cracks or uneven surfaces.

Here are the essential steps in preparing a worksite for concrete pouring:

  1. Site Assessment and Planning:
    • Before starting any work, conduct a thorough assessment of the site to identify potential hazards, obstructions, and soil conditions. Consider factors such as site access, drainage, and proximity to utilities. Develop a detailed plan for the concrete pour, including layout, formwork requirements, and sequencing of activities.
  2. Site Clearing and Grading:
    • Clear the site of any debris, vegetation, or obstructions that could interfere with the concrete pour. Use heavy equipment such as excavators, bulldozers, or skid-steer loaders to grade the site to the desired elevation and slope. Ensure that the ground is compacted and stable to support the weight of the concrete.
  3. Layout and Marking:
    • Mark the boundaries of the concrete slab or structure using string lines, stakes, or spray paint. Use a tape measure and level to ensure accurate dimensions and alignment. Mark the locations of control joints, expansion joints, and any embedded fixtures or anchor bolts as specified in the project plans.
  4. Formwork Installation:
    • Construct formwork, also known as molds or shuttering, to contain and shape the concrete during pouring and curing. Formwork can be made from wood, metal, or plastic, depending on the project requirements. Install formwork according to the layout markings, ensuring proper alignment, bracing, and reinforcement as necessary.
  5. Reinforcement Placement:
    • Install reinforcement materials such as rebar (reinforcing bar) or wire mesh within the formwork to provide strength and structural integrity to the concrete. Position reinforcement according to engineering drawings and specifications, ensuring adequate cover and spacing between bars. Use tie wire or chairs to support and secure reinforcement in place.
  6. Embedments and Inserts:
    • Install any embedded fixtures, anchor bolts, or utility conduits required for the project. Place these items within the formwork, ensuring they are properly positioned and aligned according to the layout markings. Use templates or guides to ensure accurate placement and spacing of embedments.
  7. Surface Preparation:
    • Prepare the subgrade or base surface to ensure proper bonding and adhesion of the concrete. Remove any loose material, dirt, or debris from the surface. Compact the subgrade using a compactor or roller to achieve a firm, uniform surface. Apply a layer of granular fill or gravel to improve drainage and prevent soil erosion.
  8. Moisture Management:
    • Manage moisture levels in the subgrade and formwork to prevent issues such as excessive drying or water accumulation. Use moisture barriers or vapor barriers as necessary to control moisture migration from the subgrade. Avoid pouring concrete in wet or rainy conditions that could affect the quality of the finished product.
  9. Joint Preparation:
    • Prepare control joints, expansion joints, and construction joints as required to control cracking and accommodate movement in the concrete. Install joint filler materials or preformed joint strips to protect joints from debris and facilitate movement during curing. Ensure that joints are properly spaced and aligned according to project specifications.
  10. Final Inspection and Approval:
    • Conduct a final inspection of the worksite to ensure that all preparations have been completed according to the project plans and specifications. Verify the alignment, dimensions, and condition of formwork, reinforcement, and embedments. Address any issues or discrepancies identified during the inspection before proceeding with the concrete pour.

By following these essential steps, a Concrete Crew Mesquite TX can effectively prepare a worksite for concrete pouring, laying the foundation for a successful construction project. Proper preparation ensures that the concrete will be placed accurately, bonded securely, and cured to achieve the desired strength and durability.

Mesquite Concrete Crew

109 Rollingwood Dr, Mesquite, TX 75149, United States

1-972-848-9594

What Safety Measures Should A Concrete Crew Follow On The Job Site – Mckinney Concrete Crew


Safety is paramount on any construction site, especially for a Concrete Crew McKinney TX  engaged in tasks involving heavy equipment, machinery, and materials. Implementing comprehensive safety measures helps mitigate risks and prevent accidents, injuries, and fatalities.

Here are the essential safety measures that a concrete crew should follow on the job site:

  1. Personal Protective Equipment (PPE):
    • All crew members must wear appropriate PPE to protect themselves from hazards. This includes:
      • Hard hats to guard against head injuries from falling objects.
      • Safety glasses or goggles to shield the eyes from debris, dust, and splashes.
      • Hearing protection, such as earplugs or earmuffs, to prevent hearing loss from loud equipment and machinery.
      • Steel-toe boots with slip-resistant soles to protect feet from crushing injuries and punctures.
      • High-visibility vests or clothing to enhance visibility and reduce the risk of being struck by moving vehicles or equipment.
      • Gloves to safeguard hands from cuts, abrasions, chemical exposure, and hand-arm vibration syndrome (HAVS) from power tools.
  2. Safety Training and Education:
    • All crew members should undergo comprehensive safety training before starting work on the job site. Training programs should cover topics such as:
      • Hazard recognition and identification.
      • Safe work practices and procedures.
      • Proper use of equipment and machinery.
      • Emergency response and evacuation procedures.
      • Fall protection and prevention.
    • Regular safety meetings, toolbox talks, and refresher training sessions should be conducted to reinforce safety awareness and discuss site-specific hazards and controls.
  3. Fall Protection:
    • Working at heights presents significant fall hazards for concrete crew members. To prevent falls and injuries, the following fall protection measures should be implemented:
      • Guardrails or barriers installed along open edges or platforms.
      • Safety nets or catch platforms positioned beneath elevated work areas.
      • Personal fall arrest systems (PFAS) consisting of harnesses, lanyards, and anchor points used when working at heights.
      • A written fall protection plan outlining procedures and controls for working at heights and conducting regular inspections of fall protection equipment.
  4. Traffic Control and Pedestrian Safety:
    • On job sites located near roadways or heavy traffic areas, the following measures should be implemented to protect workers from vehicle collisions:
      • Barricades, cones, signage, and flaggers used to redirect traffic and create safe pedestrian pathways.
      • High-visibility clothing or vests worn by flaggers and workers working near traffic.
      • Designated crossing points and pedestrian walkways separated from vehicular traffic.
      • Safe vehicle operation procedures, including speed limits and the use of spotters when backing up or maneuvering equipment.
  5. Material Handling and Lifting:
    • Proper lifting techniques should be used when manually handling heavy materials or equipment to prevent strains, sprains, and musculoskeletal injuries. To minimize the risk of lifting-related injuries, crew members should:
      • Lift with their legs, not their backs, and avoid twisting or bending at the waist.
      • Use mechanical lifting aids, such as hoists, cranes, or forklifts, for heavy or awkward loads.
      • Ensure that loads are properly secured and balanced before lifting and transporting.
  6. Tool and Equipment Safety:
    • Workers should use tools and equipment according to manufacturer guidelines and safety recommendations to prevent accidents and injuries. Safety measures include:
      • Using guards, shields, and safety interlocks on machinery to prevent contact with moving parts.
      • Ensuring that equipment is properly grounded, and electrical cords are inspected for damage or fraying.
      • Storing tools safely when not in use to prevent tripping hazards and injuries.
  7. Hazard Communication and Chemical Safety:
    • Workers should be aware of hazardous substances present on the job site, including concrete additives, solvents, and cleaning agents. To minimize exposure and prevent chemical-related injuries, the following measures should be implemented:
      • Providing workers with access to Material Safety Data Sheets (MSDS) for all chemicals used on the job site.
      • Using appropriate personal protective equipment (PPE), such as gloves, goggles, and respirators, when handling hazardous chemicals.
      • Implementing proper storage, handling, and disposal procedures for hazardous materials according to manufacturer recommendations and regulatory requirements.
  8. Emergency Response and First Aid:
    • Concrete crews should be prepared to respond to emergencies, including injuries, fires, and medical emergencies. Key measures include:
      • Providing first aid training to designated personnel and ensuring that first aid kits and emergency eyewash stations are readily accessible on the job site.
      • Conducting regular emergency drills and familiarizing workers with emergency procedures and evacuation routes.
      • Posting emergency contact information, including the location of nearest medical facilities and emergency services, in prominent areas of the job site.
  9. Housekeeping and Site Maintenance:
    • A clean and organized work site is essential for preventing slips, trips, and falls. Crew members should:
      • Clean up spills, debris, and waste materials promptly and dispose of them properly.
      • Keep walkways, stairs, and access routes clear of obstructions and trip hazards.
      • Regularly inspect and maintain equipment, machinery, and work areas to ensure they are in safe working condition.
  10. Heat Stress Prevention:
    • In hot weather conditions, workers should take precautions to prevent heat-related illnesses such as heat exhaustion or heat stroke. Key measures include:
      • Providing access to cool drinking water and encouraging workers to stay hydrated throughout the day.
      • Allowing for frequent breaks in shaded or air-conditioned areas to rest and cool down.
      • Providing lightweight, breathable clothing and sunscreen to protect against sun exposure.
  11. Communication and Coordination:
    • Effective communication among Concrete Crew McKinney TX  supervisors, and other trades is essential for maintaining a safe work environment. Key measures include:
      • Using two-way radios, cell phones, and hand signals to communicate instructions, warnings, and alerts.
      • Holding regular safety meetings and toolbox talks to discuss site-specific hazards, controls, and best practices.
      • Encouraging workers to report any safety concerns, near misses, or incidents promptly to supervisors for investigation and corrective action.

Mckinney Concrete Crew

1812 N Lake Forest Dr, McKinney, TX 75071, United States

1-972-846-9264

How Do Concrete Crews Handle Reinforcement Placement And Formwork Installation – Concrete Crew


Handling reinforcement placement and formwork installation are critical tasks for Concrete Crew Carrallton TX  in preparing for concrete construction activities. Proper execution of these tasks ensures the structural integrity, stability, and quality of concrete structures.

Here’s a detailed explanation of how concrete crews handle reinforcement placement and formwork installation:

  1. Reinforcement Placement: Reinforcement, typically in the form of steel bars (rebar), mesh, or fibers, is essential for enhancing the strength, durability, and structural integrity of concrete. Concrete crews handle reinforcement placement with precision and care to ensure optimal performance of the concrete structure.
    • Material Inspection and Preparation: Before placing reinforcement, crews inspect rebar, mesh, or fibers to ensure compliance with project specifications and quality standards. They verify the dimensions, grades, and quantities of reinforcement materials required for the concrete structure. Crews organize and stage reinforcement materials at the worksite, ensuring easy access and efficient placement during construction activities.
    • Layout and Marking: Crews use layout drawings, plans, and specifications to determine the placement and configuration of reinforcement within the concrete forms. They mark reference points, dimensions, and spacing requirements on the formwork to guide the placement of rebar and mesh accurately. Using measuring tools, such as tape measures and laser levels, crews position and align reinforcement materials according to the layout markings, ensuring proper coverage and spacing.
    • Cutting and Fabrication: If necessary, crews cut, bend, and fabricate reinforcement bars to the required sizes, shapes, and configurations using cutting tools, rebar benders, and tying machines. They follow bending schedules and templates provided in project plans to achieve the desired shapes and angles. Crews ensure proper overlap, lap splicing, and anchorage of reinforcement bars at intersections and joints to maintain continuity and structural integrity throughout the concrete structure.
    • Placement and Fixing: Crews place reinforcement materials within the formwork in accordance with the approved layout and design drawings. They secure rebar and mesh in position using tie wire, rebar chairs, spacers, or supports to maintain the specified concrete cover and spacing. Crews verify the alignment, elevation, and orientation of reinforcement materials relative to layout markings and structural requirements, making adjustments as needed to ensure proper placement and alignment.
    • Inspection and Verification: After completing reinforcement placement, crews conduct visual inspections and spot checks to verify the accuracy, completeness, and compliance of the installed reinforcement with project specifications. They inspect critical areas, such as column footings, beams, slabs, and walls, for proper reinforcement coverage, spacing, and anchorage, addressing any discrepancies or deficiencies identified during the inspection process.
  2. Formwork Installation: Formwork, also known as molds or shuttering, provides temporary support and containment for freshly poured concrete until it sets and gains sufficient strength to support its own weight. Concrete crews handle formwork installation with precision and attention to detail to ensure accurate shaping and alignment of concrete structures.
    • Material Preparation and Assembly: Concrete crews prepare formwork materials, including lumber, plywood, steel, or prefabricated formwork systems, for assembly and installation at the worksite. They inspect formwork components for defects, damage, or wear and tear, replacing or repairing as needed. Crews assemble formwork panels, beams, and supports according to project plans and specifications, ensuring tight joints, proper alignment, and sufficient bracing and reinforcement to withstand concrete pressure and loads.
    • Layout and Positioning: Using layout drawings and reference points, crews position and align formwork components accurately to define the shape, dimensions, and contours of the concrete structure. They secure formwork in place using nails, screws, clamps, or ties, ensuring stability and resistance to lateral pressures. Crews verify the verticality, alignment, and elevation of formwork elements using leveling instruments and measuring tools, making adjustments as needed to achieve the desired formwork geometry and dimensions.
    • Bracing and Shoring: Crews install bracing, shoring, and reinforcement within the formwork to support the weight of the concrete and resist lateral pressures during pouring and curing. They position and secure bracing elements, such as diagonal struts, braces, and shores, to prevent formwork deformation or collapse. Crews verify the adequacy and stability of formwork bracing and shoring systems, conducting load tests and inspections to ensure structural integrity and safety before concrete placement.
    • Waterproofing and Release Agents: Prior to concrete pouring, crews apply waterproofing membranes or form release agents to formwork surfaces to prevent concrete adhesion and facilitate easy stripping after curing. They ensure uniform coverage and proper application of release agents to all formwork surfaces to avoid surface defects or blemishes on the concrete.
    • Inspection and Quality Assurance: After completing formwork installation, crews conduct final inspections and checks to verify the accuracy, integrity, and readiness of the formwork for concrete pouring. They inspect formwork joints, connections, and seals for tightness and integrity, addressing any leaks or deficiencies identified. Crews confirm the alignment, dimensions, and geometry of the formwork relative to project specifications, making any necessary adjustments or modifications to ensure compliance and quality assurance.

Concrete Crew Carrallton TX  Attention to detail, proper planning, and adherence to safety and quality standards are essential for achieving optimal results and minimizing risks and delays during concrete placement and finishing operations.

Concrete Crew

2535 Oak Tree Dr, Carrollton, TX 75006, United States

1-972-845-8931

What Safety M0easures Should Concrete Crews Follow On The Job Site – Bedford Concrete Crew


Concrete Crew Bedford TX  Adhering to strict safety measures not only protects workers but also enhances productivity and project efficiency.

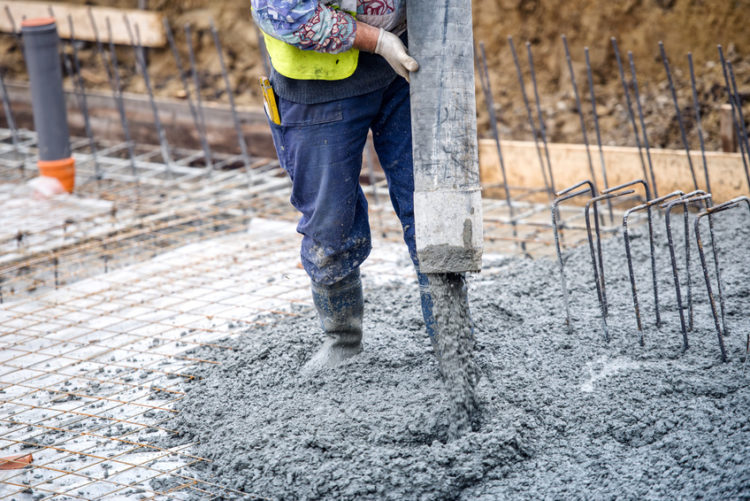
building construction worker pouring cement or concrete with pump tube

Here’s a comprehensive guide outlining the safety measures that concrete crews should follow on the job site:

1. Personal Protective Equipment (PPE):

  • Hard Hats: All workers should wear hard hats to protect their heads from falling objects, overhead hazards, and impact injuries.
  • Safety Glasses: Eye protection is essential to prevent eye injuries from flying debris, dust, or chemical splashes.
  • Gloves: Workers handling concrete, tools, or equipment should wear gloves to protect their hands from cuts, abrasions, and chemical exposure.
  • Steel-Toed Boots: Reinforced footwear provides protection against crushing injuries, punctures, and slips on uneven surfaces.
  • High-Visibility Clothing: Wearing bright-colored or reflective clothing enhances visibility, especially in low-light conditions or near heavy machinery.

2. Fall Protection:

  • Guardrails and Toeboards: Install guardrails or toeboards around elevated work areas, such as formwork, scaffolding, or edges of concrete slabs, to prevent falls.
  • Personal Fall Arrest Systems (PFAS): Workers working at heights should use PFAS, including harnesses, lanyards, and anchor points, to arrest falls and minimize injuries.

3. Hazard Communication:

  • Material Safety Data Sheets (MSDS): Ensure that MSDS are readily available for all hazardous chemicals and substances used on the job site, including concrete admixtures, sealants, and coatings.
  • Labeling and Signage: Clearly label hazardous materials and areas, such as chemical storage areas, confined spaces, or excavation zones, with appropriate signage and warnings.

4. Equipment Safety:

  • Equipment Inspection: Conduct pre-operation inspections of all equipment, including concrete mixers, pumps, scaffolding, and power tools, to verify proper functioning and safety features.
  • Lockout/Tagout (LOTO): Implement LOTO procedures to de-energize and lock out equipment or machinery during maintenance, repair, or servicing to prevent accidental startup or release of stored energy.
  • Safe Operating Procedures: Train operators and workers on safe operating procedures for all equipment, including startup, shutdown, and emergency shutdown protocols.

5. Concrete Handling and Placement:

  • Manual Lifting Techniques: Train workers on proper lifting techniques to prevent strains, sprains, and musculoskeletal injuries when handling bags of cement, reinforcing bars, or concrete forms.
  • Mechanical Aids: Use mechanical aids such as cranes, forklifts, or material handling equipment to lift and transport heavy loads of concrete or reinforcement materials.
  • Ergonomic Design: Design workstations and work processes to minimize bending, reaching, and repetitive motions that can lead to ergonomic injuries.

6. Electrical Safety:

  • Ground Fault Circuit Interrupters (GFCIs): Install GFCIs on all electrical circuits to protect workers from electric shock hazards, especially in wet or damp environments.
  • Electrical Cord Management: Secure electrical cords and cables to prevent tripping hazards and damage from equipment movement or traffic.
  • Qualified Personnel: Ensure that only qualified electricians or trained personnel perform electrical work, including wiring, connections, and troubleshooting.

7. Fire Safety:

  • Fire Extinguishers: Provide fire extinguishers in accessible locations throughout the job site and train workers on their proper use in case of fire emergencies.
  • Hot Work Permits: Obtain permits and implement procedures for hot work activities, such as welding, cutting, or torching, to prevent fire hazards and control ignition sources.

8. Environmental Protection:

  • Spill Containment: Use spill containment measures such as berms, dikes, or absorbent materials to contain and clean up spills of hazardous chemicals, fuels, or lubricants.
  • Waste Management: Properly dispose of construction waste, debris, and hazardous materials in accordance with environmental regulations and best practices.

9. Emergency Preparedness:

  • Emergency Response Plan: Develop and communicate an emergency response plan that outlines procedures for evacuating the job site, contacting emergency services, and providing first aid or medical assistance.
  • First Aid and CPR Training: Train designated personnel in first aid, CPR, and basic life support techniques to respond to medical emergencies promptly.

10. Supervision and Training:

  • Safety Orientation: Conduct comprehensive safety orientations for all workers before starting work on the job site to familiarize them with potential hazards, emergency procedures, and safety protocols.
  • Ongoing Training: Provide regular safety training sessions and toolbox talks to reinforce safe work practices, address emerging hazards, and promote a culture of safety awareness among all crew members.

Concrete Crew Bedford TX  to ensure everyone returns home safely at the end of the day.

Bedford Concrete Crew

2301 Central Dr, Bedford, TX 76021, United States

1-817-859-6661

What Factors Should I Consider When Choosing The Right Type Of Concrete For my Project – Wise County Concrete Crew

Concrete Crew Decatur TX  consideration to ensure that you achieve the desired results in terms of durability, strength, appearance, and performance.

Here are the key factors to consider when selecting the appropriate type of concrete for your project:

1. Project Requirements:

The specific requirements of your project will play a significant role in determining the type of concrete needed. Consider factors such as:

  • The intended use of the concrete (e.g., structural support, decorative purposes, pavement, etc.).
  • The load-bearing capacity and strength required for the application.
  • The climate and environmental conditions in which the concrete will be installed.

2. Strength and Durability:

Different types of concrete offer varying levels of strength and durability, depending on the materials and mix proportions used. Consider the following strength classifications when selecting concrete:

  • Normal Strength Concrete: Suitable for most residential applications, such as driveways, sidewalks, and patios, with compressive strengths ranging from 2,500 to 5,000 psi.
  • High-Strength Concrete: Ideal for commercial and industrial projects requiring higher compressive strengths, typically ranging from 6,000 to 12,000 psi.
  • Specialty Concrete: Customized mixes designed to meet specific performance requirements, such as high early strength, low permeability, or resistance to chemical corrosion.

3. Aggregate Selection:

The choice of aggregate (sand, gravel, crushed stone, etc.) used in the concrete mix will impact its strength, durability, and appearance. Consider factors such as:

  • Aggregate size and gradation: Larger aggregates provide greater strength and stability, while finer aggregates improve workability and surface finish.
  • Aggregate type and quality: Select aggregates that are clean, well-graded, and free from contaminants to ensure optimal concrete performance.
  • Aggregate color and texture: Choose aggregates that complement the aesthetic of your project, whether you prefer a smooth, uniform finish or a more textured appearance.

4. Admixtures and Additives:

Admixtures and additives can be incorporated into the concrete mix to enhance its properties and performance. Consider the following options:

  • Air-Entraining Agents: Improve freeze-thaw resistance and workability by entraining tiny air bubbles into the concrete mixture.
  • Water-Reducing Admixtures: Increase workability and reduce water content without sacrificing strength or durability.
  • Set Retarders or Accelerators: Control the setting time of concrete to accommodate specific project requirements or environmental conditions.
  • Colorants or Pigments: Add color to the concrete mix for decorative applications, such as stamped or stained concrete.

5. Environmental Factors:

Consider the environmental conditions in which the concrete will be installed, as they can affect its performance and longevity. Factors to consider include:

  • Temperature and humidity: Extreme temperatures or rapid temperature changes can impact the curing and strength development of concrete.
  • Exposure to moisture or chemicals: Choose a concrete mix with appropriate resistance to water penetration, chemical corrosion, and other environmental factors.
  • Sustainability: Consider using eco-friendly concrete mixes containing recycled materials or supplementary cementitious materials (SCMs) to reduce environmental impact.

6. Budget and Cost Considerations:

Your budget and cost constraints will also influence the choice of concrete for your project. Consider factors such as:

  • Material costs: Compare the prices of different types of concrete mixes, including materials, delivery, and labor costs.
  • Long-term maintenance and repair expenses: Invest in high-quality concrete upfront to minimize future maintenance and repair costs over the lifespan of the project.
  • Value and return on investment: Choose a concrete mix that provides the best value and meets your project requirements without compromising quality or performance.

7. Contractor Experience and Expertise:

Consult with a qualified concrete contractor or supplier who has experience and expertise in selecting and installing the right type of concrete for your project. They can provide valuable guidance and recommendations based on local codes, regulations, and best practices.

Concrete Crew Decatur TX  Investing in high-quality concrete upfront will ensure a durable and long-lasting solution that enhances the value and functionality of your property for years to come.

Wise County Concrete Crew

103 US-287, Decatur, TX 76234, United States

1-940-461-7137

How To Seal Garage Doors – Atlas Door Company


Sealing your Garage Door Repair Joshua TX  is an essential step to improve energy efficiency, protect against weather elements, and enhance the overall comfort and security of your home. Properly sealing your garage doors can help prevent drafts, moisture, dust, and pests from entering the garage space.

Here’s a comprehensive guide on how to seal garage doors effectively:

1. Assess the Condition of Your Garage Doors:

Before you begin sealing your garage doors, it’s essential to assess their condition and identify any areas that may require attention. Inspect the edges, bottom, and top of the garage doors for gaps, cracks, or damage that may compromise the seal. Check for signs of wear or deterioration in the existing seals, weather stripping, and hardware.

2. Choose the Right Sealant and Materials:

Selecting the appropriate sealant and materials is crucial for achieving a durable and effective seal. Depending on the type of garage door and the severity of the gaps, you may need:

  • Weather stripping: Choose weather stripping specifically designed for garage doors, such as vinyl or rubber seals with adhesive backing.
  • Garage door threshold seal: A threshold seal creates a barrier between the garage floor and the bottom of the door, preventing water, debris, and pests from entering. Threshold seals are available in various materials, including rubber, vinyl, and aluminum.
  • Caulk or sealant: Use caulk or sealant to fill gaps and cracks in the garage door frame, trim, and siding. Choose a high-quality exterior-grade caulk or silicone sealant that is flexible, weather-resistant, and paintable.

3. Prepare the Garage Doors:

Before applying any sealant or weather stripping, thoroughly clean the surfaces of the garage doors to remove dirt, debris, and grease. Use a mild detergent or cleaner and water to wash the door surfaces, and allow them to dry completely before proceeding. Remove any existing weather stripping or seals that are damaged, worn out, or no longer effective.

4. Install Weather Stripping:

Begin by installing weather stripping along the sides and top of the garage door frame to create a tight seal between the door and the frame. Measure the length of the door frame and cut the weather stripping to size using scissors or a utility knife. Peel off the adhesive backing and press the weather stripping firmly into place along the edges of the frame, ensuring a snug fit.

5. Apply Threshold Seal:

If your garage door has gaps along the bottom or does not sit flush with the floor, consider installing a threshold seal to prevent water, debris, and pests from entering. Measure the width of the garage door opening and cut the threshold seal to size using a saw or utility knife. Position the threshold seal at the bottom of the door opening and secure it in place using screws or adhesive, following the manufacturer’s instructions.

6. Seal Gaps and Cracks:

Inspect the garage door frame, trim, and siding for gaps, cracks, or openings that may allow air, water, or pests to enter the garage. Use caulk or sealant to fill any gaps or cracks, ensuring a tight seal and smooth finish. Apply the caulk or sealant along the seams, joints, and edges of the garage door frame, trim, and siding, using a caulking gun or squeeze tube.

7. Test the Seal:

Once you’ve applied the weather stripping, threshold seal, and caulk, test the effectiveness of the seal by closing the garage door and inspecting for any gaps or leaks. Check for light seeping through the edges or bottom of the door, as well as any signs of air drafts, moisture, or pests. Make any necessary adjustments or additions to improve the seal and ensure optimal performance.

8. Maintain the Seal:

Regular maintenance is essential to preserve the integrity and effectiveness of the garage door seal over time. Inspect the weather stripping, threshold seal, and caulk periodically for signs of wear, damage, or deterioration. Replace worn or damaged seals and reapply caulk or sealant as needed to maintain a tight seal and prevent air and water infiltration.

9. Consider Additional Insulation:

If you live in a region with extreme temperatures or want to further improve energy efficiency, consider adding insulation to your garage doors. Insulated garage doors help regulate indoor temperatures, reduce heating and cooling costs, and provide additional soundproofing benefits. Choose garage doors with built-in insulation or install insulation panels or kits to existing doors for added thermal performance.

10. Address Structural Issues:

In some cases, gaps and leaks in garage doors may be caused by underlying structural issues, such as misalignment, warping, or damage to the door or frame. If you encounter persistent sealing problems despite your efforts, consider consulting a professional garage door technician to assess and address any structural issues that may be affecting the door’s performance.

Garage Door Repair Joshua TX  Regular maintenance and inspections will help ensure that the seals remain intact and effective over time, providing long-lasting benefits for your home.

Atlas Door Company

6817 Sundance Cir W, Joshua, TX 76058, United States

1-817-295-3660

Can You Paint A Metal Garage Door – 8565 S Eastern Ave 150 a


Yes, you can paint a metal Garage Door Repair Las Vegas NV  to refresh its appearance, enhance curb appeal, and protect it from the elements. Painting a metal garage door is a straightforward process that can be accomplished with the right materials, preparation, and techniques.

Here’s a detailed guide on how to paint a metal garage door:

1. Gather Materials and Tools:

Before starting the painting process, gather all the necessary materials and tools:

  • Exterior metal paint suitable for garage doors
  • Primer designed for metal surfaces
  • Paintbrushes or paint sprayer
  • Paint rollers and trays
  • Painter’s tape
  • Drop cloths or plastic sheeting
  • Sandpaper or sanding block
  • Clean rags or tack cloth
  • Mild detergent or degreaser
  • Bucket and water
  • Masking tape

Ensure that you choose high-quality paint and primer specifically formulated for use on metal surfaces to ensure proper adhesion and durability.

2. Prepare the Surface:

Proper surface preparation is essential for a successful paint job. Follow these steps to prepare the metal garage door:

  • Clean the surface: Use a mild detergent or degreaser mixed with water to clean the surface of the garage door thoroughly. Remove any dirt, dust, grease, or debris using a scrub brush or sponge. Rinse the door with clean water and allow it to dry completely.
  • Remove old paint: If the garage door has peeling or flaking paint, use a scraper or wire brush to remove loose paint chips. Sand the surface with medium-grit sandpaper or sanding block to create a smooth, uniform surface. Remove any rust spots or corrosion using a rust remover or sandpaper.
  • Protect surrounding areas: Use painter’s tape and masking tape to protect surrounding areas such as trim, windows, and hardware from accidental paint overspray or drips. Cover the ground with drop cloths or plastic sheeting to protect it from paint splatters.

3. Apply Primer:

Applying primer is essential for promoting adhesion and ensuring long-lasting paint durability. Follow these steps to apply primer to the metal garage door:

  • Stir the primer thoroughly before use to ensure proper consistency.
  • Use a paintbrush or paint sprayer to apply a thin, even coat of primer to the entire surface of the garage door. Work in small sections to ensure thorough coverage.
  • Allow the primer to dry according to the manufacturer’s instructions. Typically, it takes 1 to 2 hours for the primer to dry to the touch.

4. Paint the Garage Door:

Once the primer is dry, it’s time to apply the paint to the metal garage door. Follow these steps for a smooth and even paint application:

  • Stir the paint thoroughly before use to ensure proper consistency.
  • Use a paintbrush or paint sprayer to apply the paint to the garage door surface. Work in small sections, starting at the top and working your way down to ensure even coverage.
  • Apply the paint in thin, overlapping strokes to achieve a smooth finish. Avoid applying too much paint at once, as it can lead to drips or runs.
  • Allow the first coat of paint to dry according to the manufacturer’s instructions. Depending on the paint type and environmental conditions, it may take 1 to 2 hours for the paint to dry to the touch.

5. Apply Additional Coats (If Necessary):

Depending on the desired color and coverage, you may need to apply multiple coats of paint to achieve the desired results. Follow the same process of applying thin, even coats of paint and allowing each coat to dry completely before applying the next one. Most metal garage doors will require at least two coats of paint for optimal coverage and durability.

6. Allow Paint to Cure:

Once all coats of paint have been applied and allowed to dry completely, it’s essential to allow the paint to cure fully before using the garage door. Depending on the paint type and environmental conditions, curing can take anywhere from 24 to 48 hours or longer. During this time, avoid touching or leaning objects against the freshly painted surface to prevent damage.

7. Clean Up:

After completing the painting process, clean up any paint spills or drips using a damp cloth or paint thinner. Remove painter’s tape and masking tape carefully to avoid pulling off fresh paint. Dispose of used paintbrushes, rollers, and other materials according to local regulations.

Garage Door Repair Las Vegas NV  By following the steps outlined above and using quality materials and tools, you can achieve a professional-looking finish that will protect and beautify your home’s exterior for years to come.

8565 S Eastern Ave 150 a

8565 S Eastern Ave 150 a, Las Vegas, NV 89123

702-343-2252

Page 3 of 6

Powered by WordPress & Theme by Anders Norén