Local Services in Texas

Month: June 2023 Page 2 of 5

How Long Does a Garage Door Keypad Last? – Team Taylor Garage Doors

As someone who has owned a garage door keypad for several years, I can share my personal experience regarding its lifespan. A garage door keypad is a convenient and essential device that adds an extra layer of security and convenience to accessing my garage.

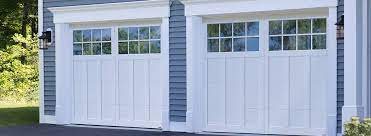
According to Harrisonville Garage Door, when I initially installed my garage door keypad, I made sure to choose a reputable brand and a high-quality model. I understood the importance of investing in a durable keypad that would last for years to come. By opting for a trusted manufacturer, I hoped to maximize the lifespan of the keypad and minimize the chances of premature failure.

In terms of usage, my garage door keypad sees regular but not excessive use. It is used by various family members and occasionally by visitors. I’ve noticed that the frequency of use can impact the lifespan of the keypad. Keypads that are used more frequently, such as in busy households or commercial settings, may experience more wear and tear compared to those in residential settings with less traffic.

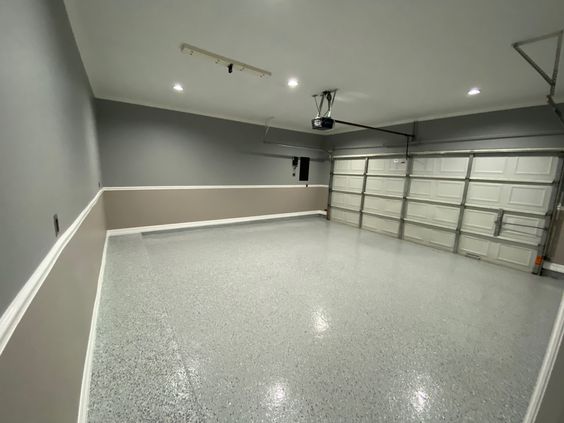
Another factor that can affect the lifespan of a garage door keypad is the environmental conditions it is exposed to. Extreme temperatures, humidity, and direct sunlight can all impact the performance and longevity of electronic components. Fortunately, my keypad is located in a sheltered area, away from direct sunlight and protected from harsh weather conditions. This has likely contributed to its extended lifespan.

Maintenance has played a role in prolonging the life of my garage door keypad. I make it a point to regularly clean the keypad and remove any dirt, dust, or debris that may accumulate. This not only keeps the keypad looking good but also helps prevent any buildup that could potentially affect the functionality of the buttons. Additionally, I replace the batteries as needed to ensure consistent performance.

Based on my personal experience, my garage door keypad has lasted around 8 years and is still functioning well. However, it’s important to note that this is an individual case, and the lifespan of a garage door keypad can vary. Factors such as quality, frequency of use, environmental conditions, and maintenance practices all play a role.

When considering whether a garage door keypad needs replacement, there are some common signs to watch out for. If the keypad becomes unresponsive, has intermittent functionality, or shows physical damage, it may be an indication that a replacement is necessary. In such cases, it’s best to consult the manufacturer or a professional technician to determine the best course of action.

In conclusion, by following Harrisonville Garage Door and based on my personal experience, a well-maintained and high-quality garage door keypad can last around 5 to 10 years or more. Factors such as the brand, frequency of use, environmental conditions, and maintenance practices all contribute to the lifespan of the keypad. By investing in a reliable keypad, practicing regular maintenance, and being mindful of environmental factors, I’ve been able to enjoy the convenience and security of my garage door keypad for an extended period of time.

Team Taylor Garage Doors

1004 W Mechanic St #12, Harrisonville, MO 64701, United States

816-239-2371

Can an Iphone Open a Garage Door-Parma Overhead & Garage Door

With the rapid advancements in technology and the increasing popularity of smart homes, it’s natural to wonder if our beloved smartphones can perform even more tasks beyond their traditional functionalities. Opening a Garage Door Repair Parma OH using an iPhone has become a common query among homeowners seeking greater convenience and control over their living spaces.

In this article, we will explore the possibilities of integrating an iPhone with a garage door opener system, examining the available options, compatibility factors, and potential benefits.

  1. Traditional Garage Door Openers: Before delving into iPhone compatibility, it’s essential to understand the workings of traditional garage door openers. Typically, garage doors are operated using a physical button or remote control, which sends a signal to the opener unit to open or close the door. These openers are usually powered by electricity and come with a variety of features, such as safety sensors, rolling codes, and keypads.
  2. The Rise of Smart Garage Door Openers: As technology continues to evolve, traditional garage door openers have been upgraded to incorporate smart features, enabling seamless integration with smartphones and other smart devices. Smart garage door openers leverage wireless connectivity and advanced security measures to provide homeowners with enhanced control and monitoring capabilities.
  3. iPhone Integration Options: To determine whether an iPhone can open a garage door, let’s explore the integration options available:

a. Manufacturer-Specific Apps: Some garage door opener manufacturers offer dedicated mobile applications compatible with iPhones. These apps allow users to control their garage doors remotely, view door status, and receive notifications. They usually require connecting the garage door opener to a Wi-Fi network and registering the device with the manufacturer’s app.

b. Home Automation Platforms: Another integration option involves incorporating a smart garage door opener into a broader home automation system, such as Apple’s HomeKit or Amazon’s Alexa. These platforms provide a centralized interface for controlling various smart devices, including garage door openers, using an iPhone or other compatible devices.

c. Third-Party Solutions: There are also third-party solutions available in the market that bridge the gap between garage door openers and iPhones. These solutions often involve retrofitting existing garage door opener systems with additional hardware or utilizing external devices that communicate with the opener, allowing control via a dedicated app on the iPhone.

  1. Factors to Consider: Before attempting to open a garage door with an iPhone, several factors should be taken into account:

a. Compatibility: Ensure that the chosen garage door opener or integration solution is compatible with your iPhone model and operating system version. Some older garage door opener models may not support smartphone integration or require additional hardware for compatibility.

b. Security Measures: Security is paramount when it comes to accessing your garage door remotely. Opt for systems that implement robust encryption protocols and multi-factor authentication to prevent unauthorized access.

c. Network Connectivity: For iPhone-controlled garage door openers, a stable and reliable internet connection is crucial. Ensure that your Wi-Fi network is properly set up and has sufficient coverage in the garage area.

d. Power Backup: Consider the availability of a power backup solution in case of power outages. Some smart garage door openers offer battery backup features to ensure functionality during emergencies.

  1. Benefits and Considerations: Integrating an iPhone with a garage door opener can offer several benefits:

a. Convenience: Opening and closing your garage door with a few taps on your iPhone provides convenience, particularly when arriving or leaving your home. You can remotely grant access to family members, friends, or delivery personnel.

b. Monitoring and Notifications: Smart garage door openers allow you to monitor the status of your garage door, receive notifications when it’s opened or closed, and track its usage history. This feature enhances security and offers peace of mind.

c. Integration with Home Automation: By integrating your garage door opener with a broader home automation system, you can create customized routines and automate various tasks, such as closing the garage door when you leave or open it when you arrive home.

However, some considerations should be kept in mind:

a. Cost: Smart garage door openers or retrofit solutions may come with an additional cost compared to traditional garage door openers. Evaluate your budget and prioritize the features that align with your requirements.

b. Technical Expertise: Depending on the chosen integration method, some technical knowledge might be necessary to set up and troubleshoot any connectivity issues.

Conclusion: While an iPhone alone cannot directly open a garage door, integrating it with a compatible smart Garage Door Repair Parma OH opener system or employing third-party solutions allows for convenient control and monitoring. The ability to operate your garage door remotely using an iPhone brings added convenience, security, and flexibility to your daily routine. When considering smart garage door opener options, evaluate compatibility, security features, network connectivity, and potential benefits to make an informed decision. Embracing the possibilities of smart home integration can transform your living experience and offer greater peace of mind.

Parma Overhead & Garage Door

1440 Rockside Rd #331, Parma, OH 44134, United States

1-440-271-8916

Can a Door Swing Into a Garage-Celina Garage Doors Co


Yes, a door can swing into a garage. When it comes to Garage Door Repair Celina TX, there are several types of doors available, including those that swing inward. These doors are commonly known as swing doors or inward-swinging doors. They operate on hinges and open into the garage space instead of outward.

Inward-swinging garage doors offer a few advantages and considerations that make them suitable for certain situations. Let’s explore some key points about these doors:

  1. Space Efficiency: Inward-swinging doors can be advantageous in situations where space is limited. Since they swing inward, they do not require additional clearance outside the garage, which can be helpful when the garage is located in a tight area or close to a property boundary.
  2. Weather Protection: In regions with severe weather conditions, inward-swinging garage doors can provide better protection against elements like strong winds or heavy rain. When closed, the door can form a tight seal against the frame, reducing the chance of water or debris entering the garage.
  3. Security: Inward-swinging doors can offer enhanced security features. When closed, the hinges and locking mechanisms are located on the inside, making them less accessible to potential intruders from the outside. This can provide an added layer of security for the garage and its contents.
  4. Design Flexibility: These doors come in various styles, materials, and designs, allowing homeowners to choose an option that complements the overall aesthetics of their property. Whether it’s a traditional wooden door or a modern aluminum one, inward-swinging doors can be customized to suit different architectural styles.
  5. Accessibility Considerations: While inward-swinging doors have their advantages, it’s essential to consider accessibility requirements. In some cases, the inward swing might restrict the space available for maneuvering large vehicles or moving items in and out of the garage. It’s crucial to assess the specific needs and limitations of the garage space before opting for this type of door.
  6. Installation and Maintenance: Inward-swinging garage doors require proper installation by professionals to ensure smooth operation and structural integrity. Regular maintenance is also necessary to keep the hinges, locking mechanisms, and overall door functionality in good condition.
  7. Building Codes and Regulations: Local building codes and regulations may dictate specific requirements for garage doors, including the direction in which they should swing. It’s important to consult with local authorities or a professional garage door installer to ensure compliance with applicable regulations.

In conclusion, an inward-swinging Garage Door Repair Celina TX can be a viable option depending on the specific requirements, space limitations, and preferences of the homeowner. While they offer advantages such as space efficiency, weather protection, and enhanced security, careful consideration should be given to accessibility needs and local building codes. Consulting with professionals and conducting thorough research will help determine if an inward-swinging garage door is the right choice for a particular situation.

Celina Garage Doors Co

312 W Walnut St #12, Celina, TX 75009, United States

1-214-833-9968

How to Trim a Garage Door-Decatur Door & Gate

Trimming a Garage Door Repair Decatur TX involves adjusting its size to fit the opening properly and enhance its appearance. While the specific steps may vary depending on the type and material of the garage door, the following guide will provide a general overview of the process.

Keep in mind that this guide is for informational purposes only, and it’s always recommended to consult the manufacturer’s instructions or seek professional assistance when trimming a garage door.

  1. Safety Precautions: Before starting any work, ensure your safety by taking the following precautions:
    • Wear appropriate protective gear, such as safety glasses and gloves.
    • Disconnect the power to the garage door opener to prevent accidental activation.
    • Clear the area around the garage door from any obstructions.
  2. Measure and Plan: Accurate measurements are crucial to ensure a proper fit. Measure the height and width of the garage door opening. If you need to trim both sides of the door, remember to divide the total amount you want to trim equally.
  3. Identify the Trim Areas: Determine which parts of the garage door require trimming. Typically, the vertical tracks, horizontal tracks, and the bottom section of the door may need to be adjusted. It’s important to examine the specific design of your garage door to identify the trim areas correctly.
  4. Removing the Door Panels: In some cases, you may need to remove the door panels before trimming. Follow these steps:
    • Disconnect the garage door opener from the power source.
    • Open the door partially, supporting it securely.
    • Remove the bolts or screws holding the door panels in place.
    • Carefully remove the panels, starting from the top and working your way down.
  5. Trimming the Tracks: If the tracks need to be trimmed, follow these steps:
    • Remove the screws or bolts securing the tracks to the door frame.
    • Use a hacksaw or a reciprocating saw to trim the tracks to the desired length.
    • Smooth the edges of the trimmed tracks using a file or sandpaper.
  6. Trimming the Bottom Section: To trim the bottom section of the garage door, follow these steps:
    • Support the door securely in the open position.
    • Measure the amount you need to trim from the bottom.
    • Use a straightedge or a level to mark a straight line across the bottom section of the door.
    • Use a circular saw or a jigsaw to cut along the marked line.
    • Smooth the cut edges using sandpaper or a file.
  7. Reinstalling the Door Panels: If you removed the door panels, follow these steps to reinstall them:
    • Place the bottom panel in position, ensuring it is aligned correctly.
    • Insert the hinges and secure them with screws.
    • Connect the subsequent panels, ensuring proper alignment and securing them with screws.
    • Once all the panels are reinstalled, reconnect the door to the opener system.
  8. Testing and Adjustments: After trimming and reinstalling the garage door, perform the following checks:
    • Manually operate the door to ensure smooth and even movement.
    • Check the alignment of the tracks and adjust if necessary.
    • Test the door with the garage door opener to ensure proper functioning.
    • Make any additional adjustments as needed to ensure the door operates smoothly.

Remember, these instructions provide a general guideline for trimming a garage door. The specific steps may vary based on the type and manufacturer of your Garage Door Repair Decatur TX. When in doubt or if you lack experience, it’s advisable to consult a professional for assistance to ensure the job is done correctly and safely.

Decatur Door & Gate

1200 FM 51 Suite F, Decatur, TX 76234, United States

1-940-283-6188

How Do You Test a Garage Door Sensor? – Team Taylor Garage Doors

When it comes to testing a garage door sensor, I’ve done it myself and can guide you through the process.

Follow these steps from Liberty Garage Door to successfully test your garage door sensor:

  1. Understand the function of the sensors: Garage door sensors are an important safety feature that prevents the door from closing if an object or person is detected in its path. They work by emitting an infrared beam between two sensors, one on each side of the garage door near the floor. When the beam is interrupted, the sensors send a signal to the garage door opener to stop or reverse the door’s movement.
  2. Inspect the sensors: Start by visually inspecting the sensors. Look for any physical damage, misalignment, or obstructions that may hinder their operation. Clear away any dirt, dust, or debris that may be blocking the sensor’s path. Ensure that nothing is blocking the sensor’s view or impeding the infrared beam.
  3. Check the sensor lights: Most garage door sensors have indicator lights that indicate their status. Typically, one sensor will have a green light, indicating power, while the other will have a red or yellow light, indicating the sensor’s signal status. Make sure both lights are solid or blinking regularly. If either light is off or blinking irregularly, there may be an issue with the sensor or its wiring.
  4. Test the sensor alignment: Close the garage door using the wall button or remote control. While the door is closing, wave your hand or a non-metallic object in front of one of the sensors to interrupt the infrared beam. If the sensors are properly aligned, the door should stop or reverse its movement immediately. If the door continues to close without interruption, there may be a misalignment or issue with the sensor.
  5. Adjust the sensor alignment: If the sensors are misaligned, gently adjust their positions until the indicator lights on both sensors become solid or blink consistently. Use a level to ensure they are aligned horizontally. Most sensors have adjustment screws or brackets that allow for fine-tuning their positions. Consult the manufacturer’s instructions for your specific sensor model to understand the adjustment mechanism.
  6. Check the wiring connections: Inspect the wiring connections of the sensors to ensure they are securely attached. Loose or damaged wires can cause issues with the sensor’s functionality. Examine the wiring from the sensors to the garage door opener motor. If you notice any loose or damaged wires, consider repairing or replacing them. Remember to turn off the power to the garage door opener before working on any electrical connections.
  7. Test the sensors again: After adjusting and checking the wiring connections, perform another test to ensure the sensors are working correctly. Close the garage door and wave your hand or an object in front of one of the sensors to interrupt the beam. The door should stop or reverse its movement immediately. If it doesn’t, further troubleshooting or professional assistance may be necessary.
  8. Regular maintenance: It’s important to regularly maintain your garage door sensors. Keep the sensor lenses clean and free from dirt or debris. Ensure that the sensor alignment remains intact and that the indicator lights are functioning properly. Regularly test the sensors to ensure they are working as intended.

By following these steps from Liberty Garage Door, you can effectively test your garage door sensor and ensure its proper functionality. Remember, garage door sensors are vital for safety, so it’s essential to keep them well-maintained and address any issues promptly.

Team Taylor Garage Doors

1520 N Church Rd Suite F, Liberty, MO 64068, United States

816-239-3936

How to Repair Garage Door during Emergency? – Acclaim Garage Doors of Scottsdale

When faced with an emergency garage door repair situation, it’s important not to panic. I’ve been in similar situations before, and I’ve learned that a calm and systematic approach can make a big difference. Let me share some tips based on my own experiences.

Based from Scottsdale Garage Door, the first thing I do is assess the situation. Is the garage door completely stuck, making unusual noises, or showing signs of physical damage? Understanding the severity of the problem helps me determine the urgency and decide on the appropriate course of action.

Next, I prioritize safety. The safety of myself and those around me is paramount. If the garage door is partially open or in an unsafe position, I make sure to secure the area and keep everyone away from the door. I avoid attempting any repairs that are beyond my capabilities, as it can be risky. Safety always comes first.

If the door is in a partially open position and won’t close, I try to perform a temporary fix to secure it. I manually disconnect the opener from the door and carefully lower it to the ground. Using clamps or locking pliers, I secure the door in place to prevent any unexpected movements.

After ensuring the immediate safety, I try troubleshooting the issue. I check for any obstructions in the door’s tracks and clear them if possible. I also inspect the safety sensors to see if they are misaligned or obstructed. Checking the cables, springs, and rollers for signs of damage or wear is also important. However, I must emphasize that I only attempt basic troubleshooting that I’m comfortable with. Complex repairs are best left to professional technicians.

In most cases, I find it necessary to call a professional for emergency garage door repairs. They have the expertise, experience, and specialized tools to handle a wide range of issues safely and efficiently. I contact a reputable garage door repair company and explain the emergency situation in detail. This helps them assess the situation accurately and come prepared with the necessary tools and parts.

When communicating with the professional, I ensure that I clearly convey the nature of the emergency and any temporary fixes I’ve attempted. This information is vital for them to assess the situation accurately and provide the appropriate assistance. If I know the make and model of my garage door, I provide that information as well, as it can aid in expediting the repair process.

Once the emergency repair is addressed, I make it a point to prioritize preventive maintenance. Regularly inspecting and lubricating moving parts, cleaning the tracks, and testing the safety features of my garage door helps prevent future emergencies. I also schedule periodic professional maintenance to ensure optimal performance and identify any potential issues before they escalate into emergencies.

Remember, emergencies happen, but panicking won’t solve the problem. By assessing the situation, prioritizing safety, attempting temporary fixes when appropriate, and calling for professional help, you can handle emergency garage door repairs effectively. Stay calm, take the necessary steps, and trust in the expertise of professionals when needed.

It’s important to note that while you can handle certain emergency situations on your own, there are limits to what you should attempt. For complex repairs or situations involving significant physical damage, it’s always best to rely on the expertise of professional technicians. They have the necessary knowledge, equipment, and safety protocols to handle emergencies effectively.

From my own experience and by following Scottsdale Garage Door, I’ve learned that staying calm and taking a proactive approach is key when dealing with emergency garage door repairs. By doing so, you can minimize the stress and inconvenience that comes with these situations and ensure the security and functionality of your garage door.

Acclaim Garage Doors of Scottsdale

7400 E McDonald Dr #122, Scottsdale, AZ 85250, United States

480-386-1249

How to Replace Garage Floor – Garage Floor Coatings Omaha

Replacing a garage floor is a significant undertaking that requires careful planning and execution. Whether you’re dealing with severe damage, extensive cracks, or simply want to upgrade the look and functionality of your garage.

As someone who has gone through the process of replacing a garage floor, let me share my experience and provide a step-by-step guide from Garage Floor Coatings Omaha NE on how to replace a garage floor:

  1. Assess the Existing Floor: Before starting the replacement process, carefully evaluate the condition of your current garage floor. Look for cracks, damage, or unevenness that may require attention. Also, inspect the underlying structure to ensure it is stable and suitable for the new floor.
  2. Determine the Replacement Method: Based on the extent of damage and your preferences, decide on the best method for replacing the garage floor. You can choose between a partial replacement, full replacement, or resurfacing, depending on the condition of the existing floor.
  3. Gather the Necessary Tools and Materials: Once you have decided on the replacement method, gather all the tools and materials you will need. This typically includes safety gear like goggles, gloves, and a mask, as well as demolition tools like a jackhammer, sledgehammer, and chisel. Additionally, you will need concrete cutting tools, a wheelbarrow or concrete mixer, shovels, rakes, concrete mix, reinforcement materials, leveling and compacting tools, waterproofing and sealing materials, and finishing materials.
  4. Prepare the Work Area: Clear out your garage completely, removing all vehicles, equipment, and belongings. Create a clean and open space to work in. Cover the walls, doors, and other items with drop cloths or plastic sheeting to protect them from dust, debris, and splatters during the replacement process.
  5. Demolish and Remove the Existing Floor: If you’re doing a full or partial replacement, start by demolishing the existing floor. Use a jackhammer or a sledgehammer to break up the concrete, starting from the edges and working your way inward. Be cautious of any buried utility lines or plumbing. Remove the broken concrete and dispose of it properly.
  6. Prepare the Subgrade: With the old floor removed, assess the subgrade and ensure it is properly prepared. Clear away any remaining debris and level the surface. Address any soil or drainage issues to ensure a stable base for the new floor.
  7. Install Reinforcement: Consider installing reinforcement materials like rebar or wire mesh to add strength to the new concrete. This step is particularly important for heavy-duty applications or areas prone to cracking.
  8. Mix and Pour the Concrete: Follow the manufacturer’s instructions to mix the concrete properly. Use a concrete mixer or a wheelbarrow to achieve a consistent mixture. Begin pouring the concrete into the designated area, starting from one corner and working your way towards the exit. Use shovels, rakes, and leveling tools to spread the concrete evenly and achieve the desired thickness.
  9. Level and Smooth the Surface: Once the concrete is poured, use a screed board to level the surface. Move the screed board back and forth in a sawing motion while applying downward pressure to remove excess concrete and achieve a level surface. Use a float to further smooth and level the surface.
  10. Cure and Finish the Floor: Follow the curing guidelines provided by the concrete manufacturer to allow the floor to set properly. This typically involves covering the surface with plastic sheeting and keeping it moist for a specific period. After the curing period, apply any desired finishes like stains, coatings, or sealants to protect the floor and enhance its appearance.
  11. Clean and Reorganize: Once the floor is completely cured, clean up the work area and remove any remaining debris. Reorganize your garage, bringing back your vehicles, equipment, and storage items to their designated places.

Overall, as per Garage Floor Coatings Omaha NE, replacing a garage floor is a significant undertaking that requires careful planning, attention to detail, and the right tools. If you’re unsure or inexperienced, it’s recommended to consult with professionals who can guide you through the process and ensure a successful floor replacement.

Garage Floor Coatings Omaha

14685 California St, Omaha, NE 68154, United States

402-538-8225

How to Align Genie Garage Door Sensors-First Call Garage Doors

Aligning Genie Garage Door Repair Houston TX sensors is an important step to ensure proper functioning and safety of your garage door system.

Here are the steps to align the Genie garage door sensors:

  1. Safety First: Before starting any work on your garage door, make sure to disconnect the power supply to avoid any accidents or injuries.
  2. Locate the Sensors: The Genie garage door sensors are usually mounted on the vertical tracks on both sides of the garage door, near the floor. Each sensor consists of an emitter (sending unit) and a receiver (receiving unit). The emitter has a red light, while the receiver has a green light.
  3. Check Sensor Alignment: Look at the alignment of the sensors. The red light on the emitter should be facing the green light on the receiver. If they are misaligned, it can disrupt the signal and prevent the door from closing or opening properly.
  4. Clean the Sensors: Dirt, dust, or debris on the sensors can also interfere with their operation. Clean the lenses of both the emitter and receiver using a soft cloth or a cotton swab and a mild household cleaner. Ensure they are free from any obstructions.
  5. Adjust Sensor Position: Gently loosen the screws or brackets that hold the sensors in place. Adjust the position of the sensors, ensuring they are facing each other directly. Use a level to make sure they are aligned both horizontally and vertically.
  6. Maintain Proper Height: The sensors should be installed at the same height on both sides. Use a measuring tape to ensure that the sensors are mounted at the correct height (usually around 6 inches from the floor). Make any necessary adjustments to achieve the proper height.
  7. Check Alignment Indicator: Some Genie garage door opener models have an alignment indicator on the receiver unit. This indicator helps you determine if the sensors are properly aligned. Follow the instructions provided with your specific model to use the alignment indicator effectively.
  8. Secure the Sensors: Once the sensors are properly aligned, tighten the screws or brackets to secure them in place. Ensure that the sensors do not move or vibrate during the operation of the garage door.
  9. Test the Garage Door: Reconnect the power supply and test the garage door operation. Press the garage door opener button to close the door and observe if it closes smoothly without any issues. If the door doesn’t close or opens immediately after closing, it indicates that the sensors are still misaligned. Repeat the alignment process until the door operates correctly.
  10. Regular Maintenance: To prevent future alignment issues, periodically check the sensors for any dirt, misalignment, or damage. Clean them if necessary and make any adjustments to maintain their proper alignment.

Remember, proper alignment of Genie Garage Door Repair Houston TX sensors is crucial for the safe and efficient operation of your garage door system. If you encounter persistent alignment problems or if you are unsure about any step, it is recommended to consult a professional garage door technician for assistance.

First Call Garage Doors

12505 Memorial Dr #246, Houston, TX 77024, United States

1-713-597-4617

Can a Garage Door Opener be Reprogrammed-First Call Garage Doors

Yes, a Garage Door Repair Katy TX opener can typically be reprogrammed to change its settings or to synchronize it with a new remote control. Reprogramming a garage door opener is a fairly simple process that involves following specific instructions provided by the manufacturer.

In this response, we will discuss the general steps involved in reprogramming a garage door opener, along with some troubleshooting tips.

  1. Read the Manual: Before attempting to reprogram a garage door opener, it is essential to consult the manufacturer’s manual. The manual provides detailed instructions specific to your model, ensuring a successful reprogramming process.
  2. Clear Existing Codes: To start the reprogramming process, clear all existing codes from the opener’s memory. This step is necessary to ensure that old remotes or keypads no longer have access to your garage.
  3. Access the Programming Mode: Most garage door openers have a programming button or switch that needs to be accessed to enter the programming mode. This button is usually located on the back of the opener or on the wall-mounted control panel. Pressing or flipping this button will activate the programming mode.
  4. Program the Remote Control: Once in programming mode, follow the specific instructions provided by the manufacturer to program your remote control. This typically involves pressing a button on the opener and then pressing the desired button on the remote control to sync them together. Repeat this process for each remote control you wish to program.
  5. Program the Keypad: If your garage door opener has a keypad for code entry, you can also program it during the reprogramming process. Again, refer to the manual for detailed instructions on how to program the keypad. Usually, you will need to enter a specific code or series of buttons on the keypad to establish a connection with the opener.
  6. Test the Reprogramming: After programming the remote control and keypad, it is crucial to test their functionality. Stand within the range of the opener and press the programmed buttons on the remote control or enter the programmed code on the keypad. The garage door should respond accordingly, either opening or closing as intended.

Troubleshooting Tips:

  • Ensure that you are within range of the opener when attempting to program the remote control or keypad.
  • Check the batteries in the remote control to ensure they have enough power.
  • If the programming process fails, try resetting the opener by unplugging it from the power source for a few minutes and then plugging it back in. This can sometimes resolve issues with reprogramming.
  • If you encounter persistent issues, consult the manufacturer’s customer support or seek assistance from a professional garage door technician.

In conclusion, reprogramming a Garage Door Repair Katy TX opener involves clearing existing codes, entering the programming mode, and following the specific instructions provided by the manufacturer to program remote controls and keypads. By following these steps and troubleshooting tips, you can successfully reprogram your garage door opener to meet your needs.

First Call Garage Doors

5007 E 3rd St #102, Katy, TX 77493, United States

1-281-572-5307

How to Reprogram Genie Garage Door Keypad-Medina Garage & Overhead Doors

Reprogramming a Genie Garage Door Repair Medina OH keypad involves a series of steps that allow you to change the access code or set up a new code.

Follow the instructions below to successfully reprogram your Genie garage door keypad.

  1. Locate the Learn Code button: The Learn Code button is typically located on the motor head of the garage door opener. It may be colored red, green, or purple, depending on the model. Find the button and make sure it is easily accessible.
  2. Clear the previous code: To start the reprogramming process, you need to clear the previous access code from the keypad’s memory. Press and hold the Learn Code button until the indicator light next to it turns on and then off. This clears the old code.
  3. Choose a PIN: Decide on a new personal identification number (PIN) that you want to use for your keypad. Make sure it is a combination that is easy for you to remember but difficult for others to guess.
  4. Enter programming mode: Press the Learn Code button once and release it. The indicator light will begin to blink, indicating that the opener is ready to accept a new code.
  5. Enter your PIN: Enter the new PIN on the keypad. Make sure to press each digit firmly and clearly. The indicator light will remain steady for a few seconds to confirm that the code has been accepted.
  6. Test the new code: Test the new code by pressing the PIN followed by the “#” or “Enter” button on the keypad. The garage door should start moving if the code was entered correctly. If it doesn’t, repeat steps 4 and 5 to ensure the code was programmed accurately.
  7. Add additional keypads (optional): If you have additional keypads that you want to program with the same PIN, follow the manufacturer’s instructions to sync them. This usually involves pressing the Learn Code button on the motor head and then entering the PIN on each keypad.
  8. Customize advanced settings (optional): Some Genie garage door openers offer additional programming options, such as adjusting the delay time or setting up temporary access codes. Consult your owner’s manual to explore these advanced settings and make any desired adjustments.
  9. Test all programmed keypads: Once you have finished programming the main keypad and any additional keypads, test each of them to ensure they are functioning correctly. Enter the PINs on each keypad and observe if the garage door opens or closes accordingly.
  10. Secure your new code: It is essential to keep your new access code confidential. Avoid sharing it with anyone you do not trust, and periodically change the code for enhanced security. Follow the reprogramming steps whenever you need to update or modify the existing access code.

By following these steps, you should be able to reprogram your Genie garage door keypad successfully. Remember to consult the owner’s manual for your specific model if you encounter any difficulties, as the process may vary slightly between different Genie Garage Door Repair Medina OH opener models.

Medina Garage & Overhead Doors

3745 Medina Rd Suite H, Medina, OH 44256, United States

1-330-785-7630

Page 2 of 5

Powered by WordPress & Theme by Anders Norén