Local Services in Texas

Tag: garage door repair Volo IL

How To Fix Torsion Spring On Garage Door – EDM Garage Doors, LLC


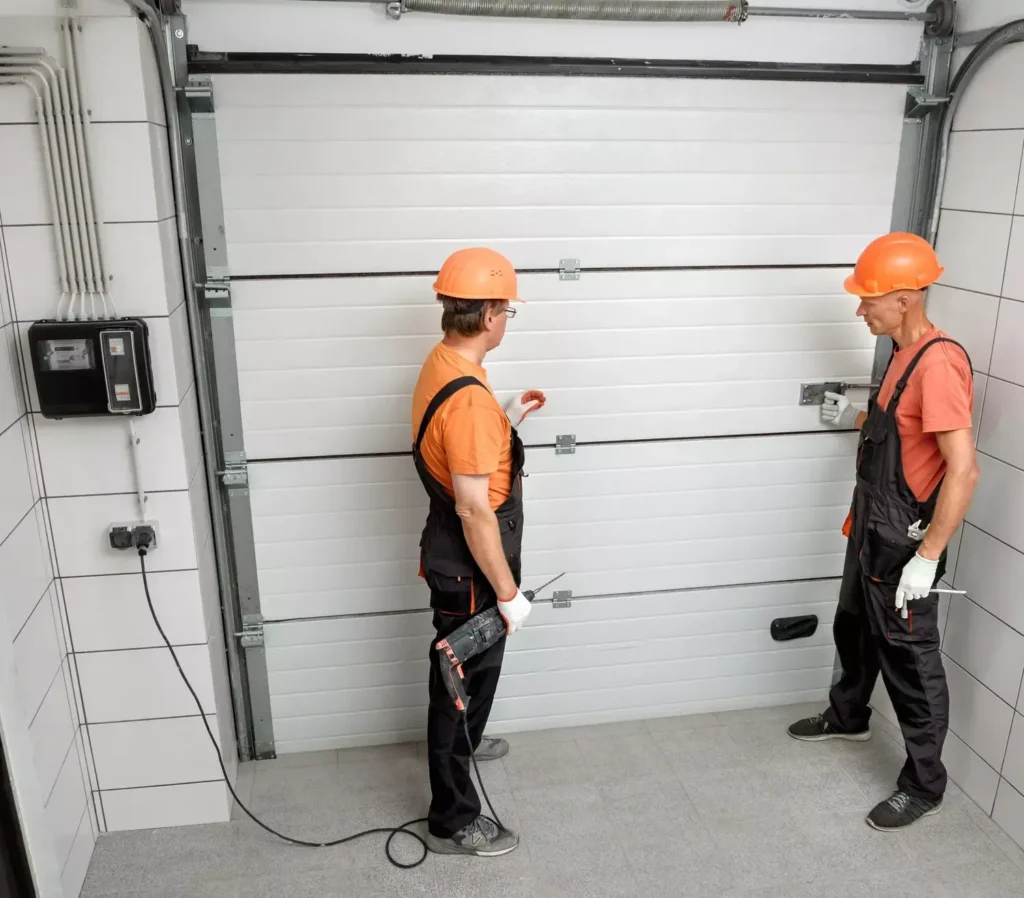
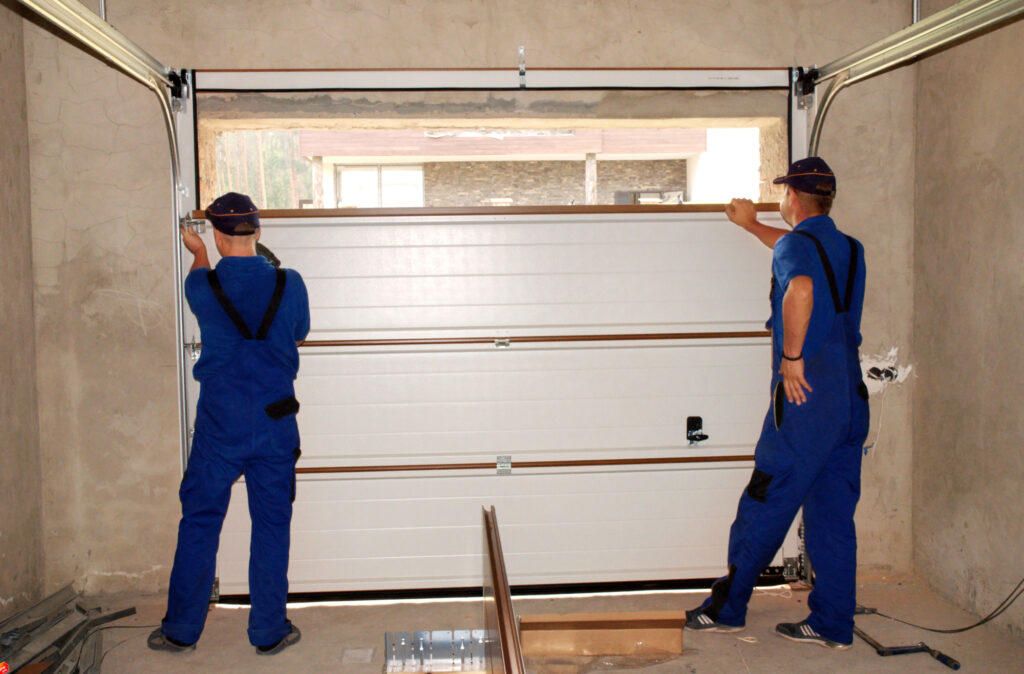
Repairing a torsion spring on a Garage Door Repair Volo IL can be a challenging task due to the high tension involved. It’s essential to approach this repair with caution and follow proper safety procedures to avoid injury. In this comprehensive guide, I’ll walk you through the steps to safely and effectively fix a torsion spring on a garage door, from identifying the problem to replacing the spring and testing the door’s operation.

Step 1: Assess the Situation

  1. Inspect the Spring: Carefully examine the torsion spring to determine the extent of the damage or wear. Look for signs of rust, corrosion, cracks, or gaps in the spring coils.
  2. Check for Balance: Test the balance of the garage door by manually opening and closing it halfway. If the door feels heavy or doesn’t stay in place when partially open, the torsion spring may be broken or damaged.

Step 2: Gather Necessary Tools and Materials

  1. Safety Gear: Wear safety goggles, work gloves, and sturdy footwear to protect yourself from potential injury.
  2. Replacement Spring: Obtain a new torsion spring that matches the specifications of the original spring. Refer to the manufacturer’s guidelines or consult a professional for assistance in selecting the correct replacement spring.
  3. Winding Bars: Use winding bars to safely unwind and wind the tension on the torsion spring. Winding bars are typically sold separately and come in various sizes.
  4. Vise Grips: Secure the torsion spring and prevent it from unwinding unexpectedly by clamping vise grips onto the shaft.
  5. Socket Wrench: Use a socket wrench to loosen and remove the bolts securing the torsion spring to the torsion tube.

Step 3: Disconnect Power and Release Tension

  1. Disconnect Power: Before starting any repairs, disconnect power to the garage door opener to prevent accidental activation.
  2. Release Tension: Use winding bars to unwind the tension on the torsion spring by inserting them into the winding cones located at each end of the spring. Slowly and carefully turn the winding bars in the opposite direction of the spring’s winding until the tension is fully released.

Step 4: Remove the Old Spring

  1. Loosen Set Screws: Use a socket wrench to loosen the set screws securing the torsion spring to the torsion tube. Be cautious as the spring may still have residual tension.
  2. Slide Off Spring: Carefully slide the old torsion spring off the torsion tube and set it aside.

Step 5: Install the New Spring

  1. Slide On Spring: Slide the new torsion spring onto the torsion tube, ensuring it is positioned correctly with the winding cones facing outward.
  2. Secure Set Screws: Use a socket wrench to tighten the set screws on the winding cones, securing the torsion spring to the torsion tube.

Step 6: Wind the New Spring

  1. Insert Winding Bars: Insert winding bars into the winding cones on both ends of the torsion spring.
  2. Wind the Spring: Turn the winding bars in the direction indicated by the manufacturer’s instructions to wind the tension onto the torsion spring. Follow the recommended number of turns specified for your garage door’s weight and size.

Step 7: Test the Door’s Operation

  1. Reconnect Power: Once the new torsion spring is installed and wound to the appropriate tension, reconnect power to the garage door opener.
  2. Test Opening and Closing: Manually test the garage door’s operation by opening and closing it several times to ensure smooth and balanced movement.
  3. Adjust Tension if Needed: If the door feels too heavy or doesn’t open and close smoothly, adjust the tension on the torsion spring by adding or removing turns as necessary.

Step 8: Perform Regular Maintenance

  1. Inspect Regularly: Periodically inspect the torsion spring and other components of the garage door for signs of wear, damage, or corrosion.
  2. Lubricate Moving Parts: Keep the torsion spring and other moving parts of the garage door well-lubricated to reduce friction and prevent premature wear.
  3. Schedule Professional Inspection: Consider scheduling an annual inspection by a professional garage door technician to ensure that the torsion spring and other components are in good condition and functioning properly.

Conclusion:

If you’re uncomfortable or unsure about performing the repair yourself, consider hiring a professional Garage Door Repair Volo IL technician for assistance.

EDM Garage Doors, LLC

596 Richard Brown Blvd, Volo, IL 60073, United States

1-847-416-3036

https://maps.app.goo.gl/rfVASBCTvHNeKq7q9

How To Build A Garage Door – EDM Garage Doors, LLC

Building a Garage Door Repair Volo IL is a complex and challenging task that requires advanced carpentry skills, knowledge of door mechanics, and access to specialized tools and materials. While it’s possible to construct a custom garage door, it’s essential to approach the project with careful planning and attention to detail to ensure safety, functionality, and durability.

In this guide, I’ll provide an overview of the steps involved in building a garage door from scratch, along with considerations, materials, and techniques required for the project.

1. Planning and Design:

Before you begin building your garage door, carefully plan and design the door to meet your specific requirements and preferences:

  • Measurements: Measure the dimensions of the garage opening accurately to determine the size of the door.
  • Style and Design: Choose a style and design for your garage door that complements the architecture of your home and meets your aesthetic preferences.
  • Materials: Select suitable materials for constructing the door, considering factors such as durability, weather resistance, and maintenance requirements.

2. Gather Materials and Tools:

Once you’ve finalized the design and specifications for your garage door, gather the necessary materials and tools for the project:

  • Materials: Common materials for building a garage door include wood (such as cedar, redwood, or mahogany), aluminum, steel, or composite materials.
  • Tools: You’ll need a variety of tools for cutting, shaping, and assembling the door, including saws, drills, sanders, clamps, and measuring tools.

3. Construct the Frame:

Begin by constructing the frame of the garage door using sturdy and dimensionally stable lumber or metal:

  • Cutting and Assembly: Cut the frame components to size according to your measurements and assemble them using appropriate joinery techniques, such as mortise and tenon joints or dowel joints.
  • Reinforcement: Strengthen the frame by adding cross braces or metal reinforcement plates to provide structural integrity and prevent warping or sagging.

4. Install Panels or Slats:

Depending on the design of your garage door, install panels or slats to fill the frame and create the door surface:

  • Panel Construction: Cut panels from plywood, solid wood, or composite materials to fit within the frame and attach them securely using screws or adhesive.
  • Slatted Design: Alternatively, construct a slatted design by attaching horizontal or vertical slats to the frame with spacing between them to allow for ventilation and aesthetic appeal.

5. Add Hardware and Accessories:

Complete the garage door assembly by adding hardware and accessories for functionality and aesthetics:

  • Hinges and Rollers: Install heavy-duty hinges and rollers to allow the door to move smoothly along the tracks.
  • Handles and Locks: Attach handles and locks to provide secure access to the garage and enhance the appearance of the door.
  • Weather Stripping: Apply weather stripping along the edges of the door to seal gaps and prevent drafts, moisture, and pests from entering the garage.

6. Finishing Touches:

Finish the garage door with paint, stain, or sealant to protect the wood and enhance its appearance:

  • Surface Preparation: Sand the door surface to smooth out any rough areas and remove imperfections before applying finish.
  • Paint or Stain: Apply a coat of exterior-grade paint or stain to protect the wood from the elements and add color or enhance the natural beauty of the material.
  • Sealant: Seal the door with a clear sealant or polyurethane finish to provide additional protection against moisture, UV rays, and wear.

7. Installation:

Once the garage door is complete, install it in the opening following the manufacturer’s instructions and local building codes:

  • Track Installation: Mount the tracks securely to the walls and ceiling of the garage, ensuring proper alignment and clearance for smooth operation.
  • Spring System: Install the appropriate spring system (such as torsion springs or extension springs) to counterbalance the weight of the door and assist with opening and closing.

8. Testing and Adjustment:

After installation, test the garage door to ensure it operates smoothly and safely:

  • Manual Operation: Open and close the door manually to check for smooth movement and proper alignment.
  • Automatic Operation: Test the door with the garage door opener to ensure it operates correctly and responds to remote commands.

Safety Considerations:

  • Structural Integrity: Ensure the garage door frame and components are structurally sound and capable of supporting the weight of the door.
  • Safety Features: Install safety features such as automatic reversal mechanisms and photoelectric sensors to prevent accidents and injuries.
  • Professional Assistance: If you’re unsure about any aspect of building or installing a garage door, consult with a qualified contractor or garage door technician for guidance and assistance.

By following these steps and considerations, you can build a custom Garage Door Repair Volo IL that meets your specific needs and enhances the appearance and functionality of your home. However, it’s essential to approach the project with caution and attention to detail to ensure safety and long-term durability. If you’re unsure about your ability to complete the project, consider hiring a professional contractor or garage door specialist to assist with the design, construction, and installation process.

EDM Garage Doors, LLC

596 Richard Brown Blvd, Volo, IL 60073, United States

1-847-416-3036

How To Close A Garage Door With A Broken Spring – EDM Garage Doors, LLC


Garage Door Repair Volo IL It’s essential to proceed with caution and follow proper procedures to avoid injury or damage to the door and surrounding property.

Here’s a comprehensive guide on how to close a garage door with a broken spring in 1000 words:

Assess the Situation:

Before attempting to close the garage door, it’s essential to assess the condition of the broken spring and the overall state of the door. Look for signs of damage or misalignment, such as loose cables, bent tracks, or broken rollers, that could affect the door’s operation. If the door appears to be severely damaged or if you’re unsure how to proceed safely, it’s best to seek professional assistance from a qualified garage door technician.

Gather Necessary Tools and Equipment:

To safely close the garage door with a broken spring, you’ll need the following tools and equipment:

  1. Protective gloves
  2. Safety goggles
  3. A sturdy ladder or step stool
  4. Vice grips or locking pliers
  5. C-clamps or locking pliers
  6. A winding bar or sturdy metal rod

Release the Emergency Release Cord:

Most garage door openers are equipped with an emergency release cord or handle that disengages the opener mechanism and allows you to operate the door manually. Locate the emergency release mechanism, typically located near the opener motor or on the garage door track, and pull it down to disengage the opener.

Secure the Door in the Open Position:

Before attempting to close the garage door manually, it’s essential to secure it in the open position to prevent it from falling unexpectedly. Use locking pliers or C-clamps to secure the door tracks or rollers, ensuring that the door remains stable and stationary while you work.

Disconnect the Opener from the Door:

Once the door is securely open, disconnect the garage door opener from the door to prevent it from engaging accidentally during the closing process. This typically involves pulling the release cord or handle until you hear a clicking sound, indicating that the opener has been disconnected.

Support the Weight of the Door:

With the opener disconnected, you’ll need to support the weight of the garage door manually as you lower it to the closed position. Enlist the help of a friend or family member to assist you in supporting the door, especially if it’s large or heavy.

Lower the Door Carefully:

Using caution and working slowly, begin to lower the garage door manually by carefully guiding it downward. Use your hands to guide the door along the tracks, ensuring that it moves smoothly and evenly without binding or catching on any obstacles.

Use Vice Grips to Secure the Door:

As you lower the door, use vice grips or locking pliers to secure the door tracks or rollers at regular intervals along the track. This will help prevent the door from sliding back up unexpectedly and provide added stability as you work.

Avoid Putting Pressure on the Broken Spring:

When manually closing the garage door, it’s essential to avoid putting pressure on the broken spring or attempting to operate the door using the spring system. Doing so could cause further damage to the spring or compromise the door’s stability and safety.

Test the Door’s Operation:

Once the garage door is fully closed, test its operation by manually lifting and lowering it a few times to ensure that it moves smoothly and evenly along the tracks. Check for any signs of binding, sticking, or misalignment that could indicate underlying issues with the door or track system.

Secure the Door in the Closed Position:

After confirming that the garage door is functioning correctly, secure it in the closed position using locking pliers or C-clamps to prevent it from opening unexpectedly. Make sure that the door is securely closed and latched before releasing the weight of the door.

Schedule Repairs or Replacement:

Closing the garage door manually with a broken spring is only a temporary solution, and it’s essential to schedule repairs or replacement as soon as possible to restore the door’s proper function and safety. Contact a reputable garage door repair company to assess the damage and recommend the appropriate course of action.

Exercise Caution and Follow Safety Guidelines:

Throughout the process of closing the garage door with a broken spring, it’s crucial to exercise caution and follow proper safety guidelines to avoid injury or damage. Wear protective gloves and safety goggles to protect your hands and eyes from potential hazards, and enlist the help of a friend or family member to assist you in supporting the door safely.

Seek Professional Assistance if Needed:

If you encounter any difficulties or concerns while closing the garage door with a broken spring, don’t hesitate to seek professional assistance from a qualified garage door technician. They have the knowledge, experience, and equipment to address the issue safely and effectively, ensuring that your garage door is repaired or replaced promptly and correctly.


Garage Door Repair Volo IL Remember to schedule repairs or replacement promptly to restore the door’s proper function and ensure continued safety and security.

EDM Garage Doors, LLC

596 Richard Brown Blvd, Volo, IL 60073, United States

1-847-416-3036

How To Program A Chamberlain Garage Door Opener Remote – EDM Garage Doors, LLC

Programming a Chamberlain Volo Garage Door Repair is a straightforward process that allows you to control your garage door conveniently.

Whether you are setting up a new remote or adding an additional one to your existing system, following these steps will guide you through the programming process. Before you begin, make sure to consult your specific Chamberlain garage door opener model’s manual, as instructions may vary slightly.

1. Identify Your Chamberlain Garage Door Opener Model:

  • Knowing your garage door opener model is essential, as programming steps can vary between different Chamberlain models. Refer to your owner’s manual for accurate instructions specific to your opener.

2. Prepare the Remote:

  • Ensure that the battery in the remote is fresh and properly installed. A weak or dead battery can affect the programming process.

3. Locate the “Learn” Button on the Garage Door Opener:

  • Every Chamberlain garage door opener has a “Learn” button, typically located on the motor unit or near the antenna wire. The color of the button may vary (red, yellow, green, or purple).

4. Clear Existing Codes (if necessary):

  • If you are adding a new remote or troubleshooting existing issues, it’s a good practice to clear the memory of the opener before programming. Press and hold the “Learn” button until the indicator light on the opener blinks, indicating that the memory has been cleared.

5. Press the “Learn” Button:

  • Press the “Learn” button on the garage door opener once. The indicator light will illuminate, indicating that the opener is ready to accept a new remote code.

6. Program the Remote:

  • Press and hold the button on the remote that you want to program. Hold it close to the garage door opener. You may need to hold the remote button for a few seconds until the indicator light on the opener blinks or changes.

7. Test the Remote:

  • Press the programmed button on the remote to test if the garage door responds. The door should move as expected. If it doesn’t, repeat the programming steps.

8. Program Additional Remotes (if needed):

  • If you have multiple remotes to program, repeat steps 6 and 7 for each additional remote. Most Chamberlain openers can accommodate multiple remote controls.

9. Homelink Integration (if applicable):

  • If you have a vehicle with a Homelink system, you may need to program your Chamberlain garage door opener remote to work with it. Refer to your vehicle’s owner’s manual for Homelink programming instructions.

10. Security+ 2.0 Technology (if applicable):

  • Some Chamberlain openers use Security+ 2.0 technology for enhanced security. If your opener is equipped with this feature, programming may involve additional steps. Follow the specific instructions in your manual for Security+ 2.0 technology.

11. Troubleshooting:

  • If the programming process is unsuccessful, consider the following:
    • Ensure the remote is within range of the opener.
    • Confirm the battery in the remote is functional.
    • Check for interference from other devices that might disrupt the programming process.
    • Repeat the steps carefully, ensuring the timing and sequence are correct.

12. Finalize Programming (if necessary):

  • Some Chamberlain models may require a final step to confirm the programming. Check your manual for any additional instructions to complete the process.

13. Additional Features (if applicable):

  • Explore additional features on your Chamberlain garage door opener, such as adjusting the travel limits, setting up timer-to-close functions, or integrating with smart home systems. Consult your manual for details on these advanced features.

14. Keep the Manual for Future Reference:

  • Once you have successfully programmed your Chamberlain garage door opener remote, keep the manual in a safe place for future reference. It contains valuable information about troubleshooting, maintenance, and additional features.

Conclusion:

  • Programming a Chamberlain Volo Garage Door Repair is a relatively simple process that enhances the convenience and accessibility of your garage door. Following the manufacturer’s instructions and paying attention to specific details for your model ensures a successful programming experience. If you encounter any challenges, refer to your owner’s manual or contact Chamberlain customer support for assistance.

EDM Garage Doors, LLC

596 Richard Brown Blvd, Volo, IL 60073, United States

1-847-416-3036

How To Frame For A Garage Door Opening – EDM Garage Doors, LLC

Framing a Garage Door Repair Volo IL is a crucial step in the construction process, as it provides structural support for the door and ensures proper installation.

Whether you’re building a new garage or replacing an existing door, follow this comprehensive guide for step-by-step instructions on how to frame for a garage door opening.

1. Gather Necessary Tools and Materials:

  • Before you begin, gather the tools and materials you’ll need for framing. This may include a circular saw, framing square, level, hammer, nails, screws, and pressure-treated lumber.

2. Measure and Mark the Opening:

  • Measure the width and height of the garage door, taking into account the manufacturer’s specifications and recommendations for the rough opening size. Mark the centerline of the garage door on the header.

3. Determine Header Size:

  • The header is a critical component that provides support above the garage door opening. Consult the garage door manufacturer’s specifications for the recommended header size based on the door width and any additional load requirements.

4. Mark the Header Location:

  • Use a framing square to mark the location of the header above the garage door opening. Make sure it is level and centered based on the centerline mark.

5. Install the King and Jack Studs:

  • The king studs are vertical framing members on either side of the garage door opening, while the jack studs support the header. Cut the king studs to the height of the rough opening and secure them on either side of the opening. Install the jack studs inside the king studs, leaving space for the header.

6. Cut and Install the Header:

  • Cut the header to the width of the rough opening and install it between the jack studs. Ensure it is level, using shims if necessary. Nail or screw the header to the king and jack studs.

7. Install the King and Jack Studs on the Opposite Side:

  • Repeat the process on the opposite side of the garage door opening, installing king and jack studs to provide symmetrical support.

8. Add Support for the Header:

  • Depending on the size of the garage door and header, additional support may be required. Install cripple studs between the header and the top plate to add stability.

9. Install the Sole Plate:

  • The sole plate is the bottom horizontal member of the framing. Install it on the garage floor, securing it with anchors or fasteners. Ensure it is level and aligns with the marks for the rough opening.

10. Check for Square:

  • Use a framing square to check that the corners are square. Adjust as needed by tapping the framing members with a hammer.

11. Frame the Sides of the Opening:

  • Install additional studs on each side of the garage door opening to complete the framing. These vertical members, known as the king and jack studs, provide support for the door tracks and framing around the door.

12. Install Horizontal Blocking:

  • Install horizontal blocking between the studs to add stability and provide attachment points for the garage door tracks.

13. Check for Plumb and Level:

  • Use a level to ensure that all framing members are plumb and level. Make any necessary adjustments to achieve proper alignment.

14. Add Additional Support if Needed:

  • Depending on the design and load requirements, you may need to add additional framing elements, such as headers or braces, for stability and support.

15. Consider Insulation:

  • If your garage door opening requires insulation, you can install it between the framing members before attaching the exterior materials.

16. Secure the Framing:

  • Secure all framing members with nails or screws, following local building codes and manufacturer recommendations. Use appropriate fasteners for the type of lumber used.

17. Verify with Local Building Codes:

  • Before proceeding, check with local building authorities to ensure that your framing meets all applicable codes and regulations. Obtain necessary permits if required.

18. Install Additional Structural Elements:

  • Depending on the design and load requirements, you may need to install additional structural elements, such as headers, braces, or other framing components.

19. Install Exterior Materials:

  • Once the framing is complete and verified, you can proceed to install the exterior materials, such as sheathing and siding, around the garage door opening.

20. Install the Garage Door:

  • With the framing in place, you can now proceed to install the garage door according to the manufacturer’s instructions. Follow proper procedures for attaching tracks, springs, and other components.

21. Consider Professional Assistance:

  • If you’re unsure about any aspect of framing a garage door opening or if your project requires advanced framing techniques, consider seeking professional assistance. Experienced contractors or carpenters can provide expertise and ensure a structurally sound result.

Conclusion:

Framing a Garage Door Repair Volo IL requires careful planning and precise execution to ensure proper support and alignment. By following these step-by-step instructions, you can frame a garage door opening effectively. Always adhere to local building codes, manufacturer recommendations, and safety guidelines throughout the framing process. If you’re uncertain or if your project involves complex structural elements, consider consulting with a professional contractor or carpenter for guidance.

EDM Garage Doors, LLC

596 Richard Brown Blvd, Volo, IL 60073, United States

1-847-416-3036

How Do I Reset A Genie Garage Door Opener – EDM Garage Doors, LLC


Resetting a Garage Door Repair Volo IL is akin to a technical ritual, weaving together the threads of technology to restore harmony.

In this expansive guide, we’ll navigate the intricate steps of resetting your Genie garage door opener, ensuring a seamless transition from confusion to clarity.

: Preliminary Preparations

Before delving into the reset process, take a moment to ensure that your surroundings are safe and conducive to the operation. Make sure the garage door is closed, and clear any obstacles from its path. Safety is paramount in this technological endeavor.

: Identifying the Reset Button

Locate the reset button on your Genie garage door opener. This button is often situated on the motor unit and may be labeled “Learn Code” or “Set Program.” The reset button is your gateway to a clean slate, where new codes can be imprinted.

: Press and Hold

With determination, press and hold the reset button. Hold it down until the LED light on the motor unit blinks, indicating that the reset process has commenced. This action clears any existing codes and prepares the opener for a fresh programming session.

: Release and Await

Once the LED light blinks, release the reset button. Now, await a moment—let the technological energies realign. During this brief interlude, the Genie garage door opener is resetting its internal mechanisms, readying itself for the next chapter.

: Keypad Convergence

If your Genie garage door opener is equipped with a wireless keypad, it’s time to bring it into the fold. Enter the desired code on the keypad and press the “Enter” button within a specified timeframe. This syncs the keypad with the freshly reset garage door opener.

: Remote Reunion

Now, let’s reunite the remote control with its garage door opener companion. Take your remote control and press the button you wish to program. Hold it down until the LED light on the motor unit blinks once again, acknowledging the successful transmission of the new code. Your remote control is now synchronized with the reset Genie garage door opener.

: Sensor Sentinel Check

As custodians of safety, the garage door opener’s sensors play a crucial role. Take a moment to inspect the alignment and condition of these sentinels near the floor. Ensure they are unobstructed and aligned properly for a secure and flawless operation.

: Test the Waters

With the reset complete and the codes harmonized, it’s time to conduct a test. Stand back, press the programmed button on your remote control or keypad, and witness the graceful ascent of your garage door. This test ensures that the reset has been successful, and your Genie garage door opener is now in sync with your commands.

: Troubleshooting Touch

In the rare event that your garage door exhibits resistance to your commands, approach the situation with the finesse of a troubleshooter. Double-check the alignment of sensors, verify the codes on your remote control and keypad, and ensure that each step of the reset process was executed accurately.

: Bask in Technological Triumph

With the reset saga complete, bask in the triumph of technological mastery. Your Genie garage door opener has been reset, codes synchronized, and harmony restored. Enjoy the seamless access to your garage, knowing that you’ve navigated the technological labyrinth with finesse.

In conclusion, this comprehensive guide is your roadmap through the reset journey. For model-specific nuances and additional insights, always refer to your Garage Door Repair Volo IL manual—a treasure trove of wisdom for the intrepid garage door enthusiast.

EDM Garage Doors, LLC

596 Richard Brown Blvd, Volo, IL 60073, United States

1-847-416-3036

Powered by WordPress & Theme by Anders Norén