Local Services in Texas

Tag: garage door repair temple tx

How To Program Subaru Garage Door – Temple Overhead & Garage Doors

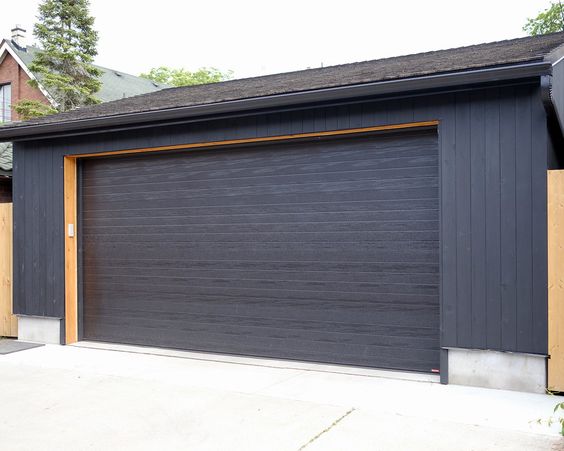
Programming the Garage Door Repair Temple TX involves a series of steps to synchronize it with your home’s garage door system.

This comprehensive guide will walk you through each step in detail, ensuring a successful and hassle-free programming experience.

: Prepare Your Garage Door Opener Remote

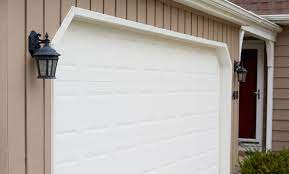
Before you start programming your Subaru’s garage door opener, make sure you have the remote control for your garage door readily available. Additionally, ensure that you have access to the garage door opener motor unit as you might need to locate a “Learn” or “Program” button.

: Locate the Homelink Buttons in Your Subaru

In your Subaru, the Homelink buttons are typically located on the ceiling near the rearview mirror. These buttons are designed to integrate with various home automation systems, including garage door openers.

: Clear Existing Codes (if applicable)

If there are any existing codes programmed in your Homelink system, it’s a good idea to clear them before proceeding. This ensures a clean slate for programming your garage door opener. To clear existing codes, press and hold the outer two Homelink buttons (often referred to as button 1 and button 3) for about 20 seconds until the indicator light starts blinking rapidly.

: Turn the Ignition On

Ensure that your Subaru’s ignition is in the “On” position. You don’t need to start the engine, but the ignition should be active.

: Press and Hold the Homelink Button

Choose one of the Homelink buttons you want to program for your garage door opener. Hold down the chosen button and the garage door opener remote simultaneously. Keep both buttons pressed until the Homelink indicator light starts flashing slowly. This process might take around 20 seconds.

: Release the Buttons and Test

After the Homelink indicator light starts flashing slowly, release both buttons. Now, grab your garage door opener remote and press the button you want to program into the Homelink system. Return to your Subaru and press the programmed Homelink button. If the garage door responds by moving, the programming was successful.

: Repeat for Additional Doors or Buttons

If you have more than one garage door or want to program additional buttons for different devices, repeat the process using a different Homelink button for each device.

: Program Home Automation Systems (if applicable)

If your garage door opener is part of a larger home automation system, you might need additional steps to integrate it fully. Refer to the user manual of your home automation system or consult the manufacturer for specific instructions.

: Final Testing

After programming, conduct a final test by pressing the programmed Homelink button to ensure the garage door opens or closes as expected. Repeat this process for each programmed button to confirm all devices are functioning correctly.

: Troubleshooting (if needed)

If you encounter any issues during the programming process or the garage door doesn’t respond as expected, consult the Homelink troubleshooting section in your Subaru’s owner’s manual. It might provide specific guidance for common issues.

: Secure Your Vehicle

Once you’ve successfully programmed your Subaru’s Homelink system, ensure the vehicle is securely parked, and the garage door opener remote is stored in a safe location.

You’ve now successfully programmed your Subaru’s Garage Door Repair Temple TX, providing you with the convenience of controlling your garage door directly from your vehicle. If you encounter any challenges, refer to the owner’s manual or contact Subaru’s customer support for assistance.

Temple Overhead & Garage Doors

1079 Spring Terrace Loop, Temple, TX 76502, United States

1-817-813-6380

Garage Door Buying Mistakes to Avoid: Learn From Common Errors – Garage Door Repair Temple TX

As a homeowner who recently went through the process of purchasing a new garage door, I can attest that it’s not a decision to be taken lightly. Your garage door is not only a functional element of your home but also a significant contributor to its curb appeal and security. During my own journey, I learned valuable lessons from the mistakes I observed and the pitfalls I avoided.

By following Garage Door Repair Temple TX, I’ll share some common garage door buying mistakes to steer clear of, helping you make a wise and informed decision.

1. Neglecting to Measure Properly

One of the most critical steps when buying a new garage door is measuring your existing space accurately. I learned that assuming all garage doors are of standard size can lead to a costly mistake. Garages come in various dimensions, and an improperly sized door won’t fit or function correctly. Always measure the width, height, and depth of your garage opening before shopping for a new door, and consult with a professional if you’re unsure.

2. Overlooking Insulation Needs

Your garage door plays a crucial role in maintaining your home’s energy efficiency. I made the mistake of initially overlooking the insulation factor when purchasing a garage door. Depending on your climate and how you use your garage, insulation can be vital. An insulated garage door can help regulate temperature, making it more comfortable in extreme weather and potentially reducing heating and cooling costs. Don’t forget to consider your insulation needs when selecting your door.

3. Focusing Solely on Aesthetics

While it’s natural to want a garage door that enhances your home’s curb appeal, I found that fixating solely on aesthetics can lead to other important factors being overlooked. Aesthetics are undoubtedly essential, but don’t sacrifice functionality and quality for appearance alone. Ensure that the door you choose meets your security, safety, and durability requirements while complementing your home’s style.

4. Not Considering Material Carefully

Garage doors come in various materials, each with its advantages and disadvantages. I made the mistake of not thoroughly considering which material would best suit my needs. Steel doors are durable and low-maintenance, while wooden doors offer a classic, traditional look. Aluminum doors are lightweight and resistant to rust. It’s crucial to research the pros and cons of different materials and choose one that aligns with your priorities.

5. Forgetting About Professional Installation

Thinking I could save a few bucks, I initially contemplated installing the garage door myself. However, I soon realized that professional installation is paramount. Garage doors are complex systems, and improper installation can lead to a range of issues, from safety hazards to functional problems. Hiring a reputable installer ensures that the door is correctly set up and operates smoothly.

6. Ignoring the Importance of Security Features

Garage door security is a top concern for homeowners. I learned not to overlook the importance of robust security features when selecting a garage door. Look for doors with advanced locking mechanisms, reinforced panels, and secure remote control systems. Your garage is a potential entry point for intruders, so investing in a secure door is a wise choice for your home’s safety.

7. Skipping Professional Guidance

Perhaps the most significant mistake I almost made was not seeking professional guidance. Garage door experts can provide valuable insights into choosing the right door for your specific needs and budget. They can help you navigate the various options, materials, and features available, ensuring that you make an informed decision.

8. Not Factoring in Long-Term Costs

The initial cost of a garage door is just one part of the equation. I realized that neglecting to consider long-term costs could lead to financial surprises down the road. Think about factors like maintenance, repairs, and potential energy savings. A slightly higher upfront cost for a quality door can pay off in the long run with lower maintenance expenses and energy efficiency.

9. Failing to Read Reviews and Get Recommendations

Finally, I learned the value of reading reviews and seeking recommendations from friends and family. Don’t solely rely on advertisements or sales pitches. Reviews from other homeowners can provide valuable insights into the performance and durability of different garage door models and brands.

In conclusion, as stated in Garage Door Repair Temple TX, buying a new garage door is a significant decision that can impact your home’s functionality, security, and aesthetics. By avoiding these common mistakes and approaching the process with careful consideration and professional guidance, you can ensure that you make a wise investment in a garage door that meets your needs and enhances your home’s overall value.

Temple Overhead & Garage Doors

1079 Spring Terrace Loop, Temple, TX 76502, United States

817-813-6380

How To Fix Dented Garage Door – Temple Overhead & Garage Doors

A dented Garage Door Repair Temple TX can be an unsightly and potentially problematic issue for homeowners. Not only does it affect the aesthetic appeal of your home, but it can also impact the functionality of the door.

However, the good news is that many dents in garage doors can be repaired without the need for professional assistance. In this comprehensive guide, we will walk you through the steps to fix a dented garage door, providing you with a cost-effective solution to restore both the appearance and functionality of your garage door.

Materials and Tools You’ll Need

Before you start the repair process, gather the following materials and tools:

  1. Safety Equipment: Safety goggles, work gloves, and ear protection to ensure your safety during the repair.
  2. Ladder: A sturdy ladder will help you access the dented area of the garage door safely.
  3. Wooden Block: A small wooden block, preferably 2×4 inches, will be used to support the dented area from the inside.
  4. C-clamps or Locking Pliers: These will help secure the wooden block in place.
  5. Hammer: A rubber or wooden mallet works best to avoid causing further damage to the door.
  6. Heat Source: A heat gun or a hairdryer can be used to apply heat to the dented area.
  7. Dry Ice (Optional): Dry ice can help in situations where the dent is deep and difficult to access.

Step-by-Step Guide to Fixing a Dented Garage Door

  1. Safety First: Always prioritize safety. Wear safety goggles, gloves, and ear protection before starting any repair work.
  2. Assess the Damage: Examine the garage door to assess the extent of the damage. Determine whether the dent is shallow or deep and if there are any sharp or protruding edges.
  3. Prepare the Work Area: Ensure the area around the garage door is clear of any obstacles, and position the ladder securely beneath the dent.
  4. Access the Dent: If possible, remove any decorative panels or covers that may be concealing the dent. This will give you direct access to the affected area.
  5. Apply Heat: If the dent is shallow, you can often fix it by applying heat. Use a heat gun or hairdryer to warm the dented area for several minutes. This will make the metal more malleable and easier to work with.
  6. Use Dry Ice (Optional): In cases where the dent is deep and difficult to access, you can use dry ice to shrink the metal, making it easier to pop back into place. Simply rub the dry ice over the dent for a few minutes.
  7. Work from the Inside: If possible, open the garage door to access the backside of the dented area. Place the wooden block behind the dent to support it from the inside.
  8. Apply Pressure: Using a rubber or wooden mallet, gently tap the dented area from the outside. Start from the edges of the dent and work your way toward the center. Be patient and use moderate force, gradually increasing if necessary.
  9. Use C-Clamps or Locking Pliers: To ensure the wooden block remains in place behind the dent, use C-clamps or locking pliers to secure it to the garage door.
  10. Check Progress: Periodically check your progress by stepping back and examining the dent. Continue tapping and applying pressure until the dent is no longer visible.
  11. Test the Door: After the dent has been repaired to your satisfaction, operate the garage door to ensure it opens and closes smoothly without any obstructions.
  12. Clean and Restore: Clean the area around the repaired dent and restore any removed decorative panels or covers.
  13. Preventative Measures: To prevent future dents, consider installing bumpers or padding in areas where the door may come into contact with objects or vehicles.

Conclusion:

Fixing a dented Garage Door Repair Temple TX can be a satisfying DIY project that saves you money and restores the appearance and functionality of your door. By following the steps outlined in this guide and taking the necessary safety precautions, you can successfully repair most dents in your garage door. However, if you encounter a particularly stubborn or extensive dent, or if you are unsure about the repair process, it’s advisable to seek professional assistance to avoid further damage. Regular maintenance and preventative measures can also help prolong the life of your garage door and reduce the likelihood of future dents.

Temple Overhead & Garage Doors

1079 Spring Terrace Loop, Temple, TX 76502, United States

1-817-813-6380

Are Belt Drive Garage Door Openers Quieter-Temple Garage Doors & Gate

Belt drive Garage Door Repair Temple TX openers have gained popularity among homeowners for their quieter operation compared to other types of garage door openers. This technology utilizes a reinforced rubber belt to lift and lower the garage door, providing a smooth and quiet operation.

In this essay, we will explore the advantages of belt drive garage door openers in terms of noise reduction and the various factors that contribute to their quieter performance.

Noise reduction is a significant concern for homeowners when it comes to garage door openers. Traditional chain drive openers, which employ a metal chain to move the door, can produce a considerable amount of noise during operation. This noise can be disruptive, especially if the garage is located near living areas or bedrooms. Belt drive openers offer a solution to this problem by employing a flexible rubber belt instead of a chain. The belt’s design helps to dampen vibrations and minimize noise transmission, resulting in a quieter and more peaceful garage door operation.

One of the primary reasons belt drive openers are quieter is the material used for the belt itself. The reinforced rubber belt is designed to be both durable and flexible. The rubber absorbs vibrations and prevents the transfer of noise generated during the operation of the garage door. This design feature significantly reduces the overall noise level, making belt drive openers a more appealing option for homeowners who value a quiet and peaceful living environment.

Another factor contributing to the quiet operation of belt drive openers is the absence of metal-to-metal contact. In chain drive openers, the metal chain can create noise as it moves along the metal gears and sprockets. In contrast, the rubber belt in belt drive openers operates smoothly without any metal-to-metal contact. This eliminates the grinding and clanking noises commonly associated with chain drive openers, resulting in a much quieter operation.

Furthermore, belt drive openers often come with additional features and technologies that contribute to their quiet operation. Many models include insulation and sound-dampening materials around the motor and other moving parts to further reduce noise transmission. Additionally, some belt drive openers are equipped with advanced motor systems that are designed to operate quietly without sacrificing performance. These features work in synergy to ensure a smooth and silent operation of the garage door.

The quiet operation of belt drive openers offers several benefits to homeowners. First and foremost, it provides a more comfortable living environment. Whether it’s an early morning departure or a late-night return, the quiet operation of a belt drive opener minimizes disturbances to household members, particularly those who may be sleeping or trying to concentrate. Additionally, the reduced noise level can be beneficial for homes with attached garages, as it prevents noise from seeping into adjacent living spaces.

Furthermore, a quieter garage door opener can enhance the overall value of a home. When selling a property, prospective buyers often consider the quality of life aspects, including noise levels. A belt drive opener, with its quiet operation, can be an attractive feature that sets a home apart from others on the market.

It is worth noting that while belt drive openers are generally quieter than chain drive openers, they may not be completely silent. Factors such as the quality of installation, regular maintenance, and the condition of the garage door itself can also influence the noise level. However, compared to other types of openers, belt drive systems offer a significant improvement in noise reduction.

In conclusion, belt drive Garage Door Repair Temple TX openers provide homeowners with a quieter alternative to traditional chain drive openers. The use of a reinforced rubber belt, the absence of metal-to-metal contact, and additional noise-reducing features contribute to their quiet operation. This not only enhances the comfort and convenience of daily life but also adds value to a home. For those seeking a peaceful and tranquil living environment, belt drive openers are a reliable choice.

Temple Garage Doors & Gate

1410 W Ave C #6, Temple, TX 76504

1-254-221-8805

Steps to Program Your LiftMaster Garage Door Opener Keypad – Temple Garage Doors & Gate

I’d be happy to walk you through how to program your LiftMaster garage door opener keypad as stated in Temple Garage Door.

First, I’ll assume that you’ve already purchased the LiftMaster keypad and have it in your hands.

Step 1: Clear the Keypad Memory To start programming your LiftMaster garage door opener keypad, you should clear the keypad memory to erase any previously programmed codes. To do this, locate the “Learn” button on your LiftMaster opener motor and press and release it. You should see the indicator light on the motor blink twice, indicating that the memory has been cleared.

Step 2: Choose a 4-Digit Code Next, you’ll need to choose a 4-digit code that you’ll remember easily but isn’t too obvious. I recommend avoiding simple combinations like “1234” or “0000” as they can be easily guessed.

Step 3: Enter the Code on the Keypad Once you have your 4-digit code, it’s time to program it into the keypad. To do this, enter the code on the keypad and then press and hold the “Enter” button. The indicator light on the keypad should turn on.

Step 4: Press the “Learn” Button on the Motor While still holding down the “Enter” button, press and release the “Learn” button on your LiftMaster opener motor. The indicator light on the motor should turn on.

Step 5: Release the “Enter” Button on the Keypad Finally, release the “Enter” button on the keypad. The indicator light on the motor should blink once, indicating that the programming was successful.

Step 6: Test the Keypad Now it’s time to test your newly programmed keypad. To do this, enter the 4-digit code you programmed earlier and press the “Enter” button. Your garage door should open or close. If it doesn’t work, try repeating the programming process or consult your LiftMaster owner’s manual for troubleshooting tips.

If you need to program multiple codes for different family members or temporary access, simply repeat the above steps with different 4-digit codes. Most LiftMaster keypads can store up to four different codes.

In summary, according to Temple Garage Door, programming your LiftMaster garage door opener keypad is a simple and quick process that can be done in just a few minutes. By following the steps above, you’ll be able to program your keypad with ease and enjoy convenient access to your garage.

Temple Garage Doors & Gate

Temple, TX

254-221-8805

Powered by WordPress & Theme by Anders Norén