Local Services in Texas

Month: November 2023 Page 3 of 7

Lubricating Moving Parts: Preventing Wear and Ensuring Smooth Operation – Rancho Park Garage & Overhead Doors

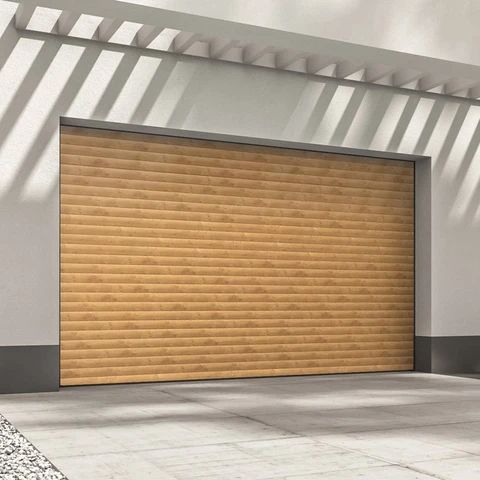
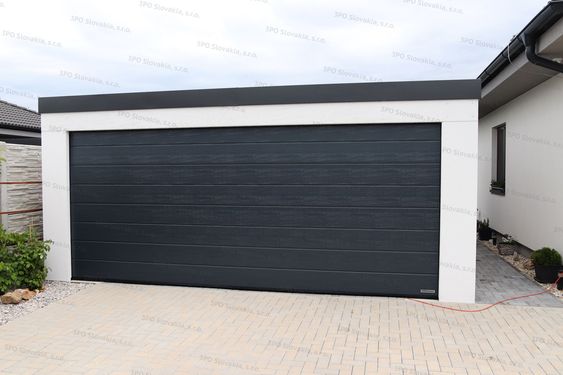
As a homeowner, the daily symphony of life often revolves around the seamless operation of my garage door. A gateway to convenience and security, the garage door is a silent sentinel that demands attention to maintain its efficiency.

I delve into the importance of lubricating moving parts, exploring the preventative measures that ward off wear and tear while ensuring a harmonious and smooth operation by following Garage Door Repair.

The Role of Lubrication: Nurturing the Heartbeat of the Garage Door

Before we embark on the journey of lubricating moving parts, it’s essential to understand the critical role that lubrication plays in the overall functionality of a garage door. The various moving components—springs, rollers, hinges, and tracks—work in unison to create the effortless dance of a smoothly operating garage door. Over time, these parts undergo wear and tear due to friction and environmental factors, making regular lubrication a key aspect of maintenance.

Signs that Call for Lubrication: Listening to the Whispers of Wear

Recognizing the signs that indicate the need for lubrication is crucial for maintaining the health of your garage door system. Common indicators include:

  1. Squeaking or Grinding Noises: Unusual sounds during garage door operation, such as squeaking, grinding, or creaking, often signify friction and the need for lubrication.
  2. Difficulty in Operation: If your garage door becomes increasingly difficult to open or close, it could be a result of increased friction in the moving parts.
  3. Uneven Movement: A garage door that moves unevenly or hesitates during operation may be experiencing resistance due to lack of lubrication.
  4. Visible Signs of Wear: Inspect the moving parts for visible signs of wear, such as rust, corrosion, or debris accumulation. Lubrication helps prevent these issues.
  5. Slow Response to Commands: If your automatic garage door opener exhibits delays or struggles to respond to commands, it may be a signal that the moving parts need attention.

Safety First: Preparing for Lubrication

Before we dive into the process of lubricating moving parts, safety should be a top priority. Here are crucial safety precautions to take:

  1. Disconnect the Power: If your garage door is equipped with an automatic opener, disconnect the power source to prevent accidental activation during lubrication.
  2. Secure the Door: Ensure that the garage door is propped open securely using a sturdy object or enlist the help of a second person to hold it in place.
  3. Wear Protective Gear: Safety goggles, gloves, and, if needed, a dust mask provide protection against potential injuries from sharp edges, dust, or debris.

Identifying Key Moving Parts: Know Your Symphony Players

To conduct effective lubrication, it’s essential to identify and understand the key moving parts of your garage door system:

  1. Springs: Torsion springs and extension springs play a crucial role in counterbalancing the weight of the garage door. Lubricate the springs to reduce friction and prolong their lifespan.
  2. Rollers: These small, cylindrical components move along the tracks, allowing the garage door to open and close smoothly. Lubricate the rollers to prevent friction and ensure effortless movement.
  3. Hinges: Hinges facilitate the folding and unfolding of the garage door sections. Lubricate the hinges to prevent stiffness and ensure flexibility in movement.
  4. Tracks: The tracks guide the rollers, providing a pathway for the garage door’s movement. Lubricate the tracks to reduce friction and maintain a smooth operation.

Choosing the Right Lubricant: The Art of Compatibility

Selecting the right lubricant is crucial for ensuring optimal performance and longevity of the moving parts. Consider the following factors:

  1. Silicone-Based Lubricants: Silicone-based lubricants are versatile and suitable for most garage door components. They provide long-lasting lubrication and are less likely to attract dust and debris.
  2. White Lithium Grease: White lithium grease is ideal for metal-to-metal applications, such as hinges and springs. It offers excellent lubrication and helps protect against rust and corrosion.
  3. Teflon-Based Lubricants: Teflon-based lubricants provide a dry and clean lubrication, making them suitable for components where residue build-up is a concern. They are effective for rollers and tracks.

Lubricating Moving Parts: A Step-by-Step Guide

Now, let’s explore the step-by-step process of lubricating the key moving parts of your garage door:

Step 1: Gather Your Tools and Lubricant

  1. Silicone-based lubricant or appropriate lubricant for specific components.
  2. Rag or cloth for wiping excess lubricant.
  3. Step ladder for easy access to high components.
  4. Safety goggles and gloves.

Step 2: Disconnect the Power

  1. Turn off the power to the garage door opener to ensure safety during the lubrication process.

Step 3: Lubricate the Springs

  1. Apply a small amount of lubricant to each torsion spring and extension spring.
  2. Use a rag to spread the lubricant evenly along the length of the springs.

Step 4: Lubricate the Rollers

  1. Apply lubricant to the roller axles, ensuring that the lubricant reaches the bearings inside the rollers.
  2. Roll the garage door back and forth to distribute the lubricant evenly.

Step 5: Lubricate the Hinges

  1. Apply lubricant to each hinge pivot point.
  2. Open and close the garage door to allow the lubricant to work into the hinge joints.

Step 6: Lubricate the Tracks

  1. Apply lubricant along the length of each track.
  2. Wipe away any excess lubricant to prevent build-up.

Step 7: Test the Door Operation

  1. Reconnect the power to the garage door opener.
  2. Test the garage door by operating it manually and using the automatic opener.
  3. Listen for any improvement in sounds and observe the smoothness of the door’s movement.

Step 8: Fine-Tune Lubrication as Needed

  1. If certain parts still exhibit stiffness or resistance, reapply lubricant as needed.
  2. Wipe away excess lubricant to prevent accumulation.

Professional Intervention for Complex Lubrication Needs

In some cases, lubricating moving parts may not be sufficient to address underlying issues. Seeking professional intervention is advisable in situations such as:

  1. Persistent Issues: If lubrication does not resolve persistent problems such as excessive noise, difficulty in operation, or uneven movement, a professional inspection is recommended.
  2. Component Damage: If any of the moving parts show signs of significant wear or damage, a professional technician can assess the extent of the issue and recommend appropriate repairs or replacements.
  3. Track Misalignment: Misaligned tracks can contribute to garage door issues. A professional can assess and correct track alignment for optimal performance.

Common Issues and Troubleshooting Tips: Navigating Challenges

During the lubrication process, certain issues may persist or arise, necessitating additional attention. Here are common scenarios and troubleshooting tips:

  • Excessive Noise: If the garage door continues to produce excessive noise after lubrication, inspect for loose hardware, worn components, or other issues that may require tightening or replacement.
  • Persistent Stiffness: If certain parts remain stiff after lubrication, there may be underlying issues such as rust or corrosion. Address these issues and reapply lubricant as needed.
  • Professional Inspection: If issues persist or if there are signs of wear, such as frayed cables or damaged components, it’s advisable to consult a professional technician for a thorough inspection and necessary repairs.

Final Checks and Observations: Reveling in a Harmonious Entryway

After successfully lubricating the moving parts of the garage door, conducting final checks and observations ensures that the entire system operates seamlessly. Perform the following steps:

  1. Operate the Door Manually and Automatically:
    • Open and close the garage door manually to assess its smoothness and alignment.
    • Test the automatic opener to ensure it responds promptly and without hesitation.
  2. Listen for Unusual Sounds:
    • Pay attention to the operation of the garage door, listening for any unusual sounds. A well-lubricated system should operate quietly.
  3. Inspect for Visible Wear:
    • Examine the moving parts for any signs of wear, such as rust or damage. Address any issues promptly to prevent further damage.
  4. Perform Safety Checks:
    • Test the safety features, such as the auto-reverse mechanism, to confirm proper functionality.
    • Check for any remaining signs of wear or resistance in the moving parts.
  5. Observe for Persistent Issues:
    • If any issues persist or if there are signs of wear, such as frayed cables or damaged components, it’s advisable to consult a professional technician for a thorough inspection and necessary repairs.

Conclusion: Nurturing the Heartbeat of Homeownership

As I stand before my garage door, now humming with the silent efficiency of well-lubricated moving parts, I am reminded of the significance of this small yet impactful maintenance task. Lubricating garage door components is not just a chore; it’s a nurturing act that sustains the heartbeat of my home.

Overall, as per Garage Door Repair and in the intricate tapestry of homeownership, the garage door serves as a gateway to comfort and security. By understanding the language of its whispers—squeaks, creaks, and groans—and responding with the artful application of lubrication, I’ve ensured that the daily symphony of my garage door remains a harmonious and effortless experience for years to come.

Rancho Park Garage & Overhead Doors

2522 Aiken Ave, Los Angeles, CA 90064, United States

213-214-2651

Are Genie Garage Door Openers Good – Ontario Garage & Overhead Doors

Garage Door Repair have been a staple in the realm of home security and convenience for decades. With a legacy dating back to the 1950s, Genie has established itself as a reputable and reliable brand in the garage door opener industry.

One of the standout features of Genie openers is their commitment to innovation. Over the years, they have consistently introduced cutting-edge technologies to enhance the user experience. From the early days of the first mass-produced screw drive opener to the latest smart garage door openers, Genie has stayed at the forefront of technological advancements.

Durability is another key aspect of Genie garage door openers. Built with high-quality materials and precision engineering, Genie openers are designed to withstand the test of time and provide reliable performance. This durability is especially crucial given the frequent use and exposure to varying weather conditions that garage door openers endure.

Genie offers a diverse range of garage door openers to cater to different needs and preferences. Whether you prefer the traditional chain drive, the smoother and quieter belt drive, or the efficient and low-maintenance screw drive, Genie has options to suit your specific requirements. This variety allows homeowners to choose the opener that best fits their garage setup and personal preferences.

The introduction of smart technology has further elevated Genie garage door openers. With the advent of Wi-Fi connectivity and smartphone integration, users can now control and monitor their garage doors remotely. This added layer of convenience not only enhances the overall user experience but also contributes to the security of the home.

Installation and user-friendliness are also areas where Genie excels. Many Genie garage door openers come with easy-to-follow instructions, making the installation process relatively straightforward for both DIY enthusiasts and professional installers. Additionally, user-friendly features such as illuminated buttons, automatic lighting control, and programmable remotes contribute to a seamless and hassle-free operation.

Genie’s commitment to safety is evident in the incorporation of various safety features in their garage door openers. From sensors that detect obstructions to auto-reverse mechanisms, Genie prioritizes the well-being of users and their property.

In conclusion Garage Door Repair have earned their reputation as a reliable and innovative choice for homeowners. With a focus on durability, variety, technological advancements, user-friendliness, and safety, Genie continues to be a trusted brand in the ever-evolving world of garage door openers. Whether you’re looking for a basic and reliable model or a smart opener with advanced features, Genie likely has a product that aligns with your needs.

Ontario Garage & Overhead Doors

1353 E 7th St, Ontario, CA 91764, United States

1-909-442-4206

Adjusting Limit Switches: Fine-Tuning the Opening and Closing Points – Highland Garage Doors & Gate

As a homeowner, the rhythmic hum of my garage door opening and closing has become the soundtrack to daily life. However, there are moments when this symphony of motion needs a conductor’s touch – a precise adjustment to ensure that the opening and closing points are perfectly harmonized.

In reference to Garage Door Repair, I delve into the world of garage door maintenance, focusing specifically on the often-overlooked yet crucial task of adjusting limit switches. This intricate process, akin to fine-tuning a musical instrument, ensures that my garage door operates with precision, minimizing wear and tear while optimizing safety and performance.

Understanding the Limit Switch: The Maestro of Garage Door Motion

At the heart of every garage door opener system lies the limit switch, a small but mighty device that dictates the travel distance of the door. Consisting of two main components – the “up” limit switch and the “down” limit switch – this device is responsible for telling the garage door when to stop moving in each direction. Adjusting these limit switches becomes an essential task, ensuring that the door opens and closes with accuracy and efficiency.

The Importance of Precision: A Symphony of Safety and Performance

A garage door that opens too far or closes too quickly not only poses a safety risk but also accelerates wear on the door and its components. Conversely, a door that doesn’t open fully or closes abruptly can lead to inconvenience and potential damage. The limit switches act as the conductors in this symphony of motion, orchestrating the precise opening and closing of the garage door to ensure optimal performance and longevity.

Identifying the Limit Switches: Unveiling the Maestro’s Baton

Locating the limit switches is the first step in the adjustment process. These switches are typically found on the garage door opener unit, often near the motor or on the motor housing itself. The “up” limit switch is responsible for determining how far the door opens, while the “down” limit switch dictates the closing distance.

Safety First: Preparing for the Adjustment Process

Before delving into the adjustment process, safety takes center stage. Ensuring that the garage door is fully closed and disconnected from the opener system prevents any unexpected movements during the adjustment. Disconnecting the power to the opener unit further adds a layer of safety, ensuring that no accidental activations occur while fine-tuning the limit switches.

Tools of the Trade: What You’ll Need

Adjusting limit switches doesn’t require an extensive toolkit, but having the right tools on hand simplifies the process. A flathead screwdriver is a common and versatile tool used for tweaking the limit switch settings. Some garage door opener models may also have specific adjustment screws that can be turned with a Phillips screwdriver.

Fine-Tuning the “Up” Limit Switch: Achieving the Perfect Crescendo

  1. Locate the “Up” Limit Switch: Using the flathead screwdriver, locate the adjustment screw for the “up” limit switch. This is typically labeled on the garage door opener unit.
  2. Test the Door’s Movement: With the garage door closed, activate the opener to open the door. Observe the door’s movement and take note of when it stops. If the door doesn’t open fully, or if it opens too far, adjustments are needed.
  3. Adjust the Screw Incrementally: Turn the adjustment screw in small increments. Clockwise usually decreases the travel distance, while counterclockwise increases it. Make gradual adjustments until the door opens to the desired height without going too far.
  4. Perform Multiple Tests: After each adjustment, run the door through several cycles to ensure that the opening point is consistently accurate. Repeat the process until the desired “up” limit is achieved.

Fine-Tuning the “Down” Limit Switch: Navigating the Decrescendo

  1. Locate the “Down” Limit Switch: Similar to the “up” limit switch, find the adjustment screw for the “down” limit switch using the flathead screwdriver.
  2. Test the Door’s Movement: Close the garage door and activate the opener to close it. Observe the door’s movement and note when it stops. If the door doesn’t close fully or if it closes too abruptly, adjustments are necessary.
  3. Adjust the Screw Incrementally: Turn the adjustment screw in small increments, using the same clockwise and counterclockwise principles. Make gradual adjustments until the door closes to the desired point without slamming shut.
  4. Conduct Multiple Tests: As with the “up” limit switch, run the door through several cycles after each adjustment to ensure consistent and accurate closing. Repeat the process until the desired “down” limit is achieved.

Balancing Act: Achieving Symmetry in Motion

Fine-tuning the limit switches is not just about achieving the desired opening and closing points individually; it’s also about ensuring balance in the door’s overall movement. The goal is to have a garage door that opens and closes smoothly, without any abrupt stops or jerky movements. Adjustments to one limit switch may impact the overall balance, so it’s essential to strike a harmonious equilibrium.

Common Issues and Troubleshooting: Navigating the Sonata of Solutions

During the adjustment process, certain issues may arise that require troubleshooting. Here are some common scenarios and their solutions:

  • Door Doesn’t Close Fully: If the door doesn’t close completely, adjust the “down” limit switch by turning the screw counterclockwise in small increments until the desired closing point is achieved.
  • Door Closes Too Quickly: If the door closes too abruptly, increasing the downward travel distance can alleviate the issue. Adjust the “down” limit switch by turning the screw counterclockwise.
  • Door Opens Too Far: If the door opens too far, adjust the “up” limit switch by turning the screw clockwise in small increments until the desired opening point is achieved.
  • Door Reverses Immediately: If the door reverses immediately after closing, the sensitivity setting may need adjustment. Consult the garage door opener manual for instructions on adjusting the force or sensitivity settings.

Final Checks and Observations: Ensuring a Flawless Performance

After the adjustment process is complete, it’s crucial to conduct a final set of tests to ensure that the garage door operates flawlessly. Run the door through multiple open and close cycles, observing its movement and ensuring that it stops at the desired points consistently. Additionally, listen for any unusual sounds or vibrations that may indicate further adjustments or maintenance are needed.

Conclusion: A Symphony of Precision and Performance

As I stand back and witness my garage door gracefully opening and closing, the fine-tuning of limit switches reveals itself as a subtle yet significant act of maintenance. In this symphony of precision and performance, the adjustment process ensures not only the longevity of my garage door but also the safety and convenience of its daily operation.

Overall, based from Garage Door Repair, just like a skilled conductor guides a musical ensemble to create a harmonious masterpiece, adjusting limit switches transforms the mechanical movements of a garage door into a symphony of precision. Through the careful orchestration of these adjustments, I find reassurance in knowing that my garage door, the unsung hero of my daily routine, operates with the finesse and accuracy befitting a maestro.

Highland Garage Doors & Gate

28355 Base Line St, Highland, CA 92346, United States

909-315-4678

Residential Garage Door Options – Hesperia Overhead & Garage Doors

As a homeowner, the facade of our residence often sets the tone for the entire property. One significant element contributing to this curb appeal is the garage door. Beyond its functional purpose, a garage door serves as a canvas for personal style and architectural expression.

In this exploration of residential garage door options, I’ll guide you through the diverse choices available, considering materials, styles, and additional features that can transform your garage into a visual masterpiece while meeting your practical needs by following Garage Door Repair.

1. Material Matters: Wood, Steel, Aluminum, and More

Wood Garage Doors: There’s an undeniable timeless elegance associated with wood garage doors. Crafted from various wood species such as cedar, redwood, or mahogany, these doors offer a warm and inviting aesthetic. Wood doors can be customized with different finishes, stains, or paints to match your home’s exterior.

Steel Garage Doors: For a sleek and modern look, steel garage doors are a popular choice. Durable and low-maintenance, steel doors come in a variety of styles and can be insulated for energy efficiency. They are also resistant to warping, cracking, and rotting, making them an excellent option for long-term durability.

Aluminum Garage Doors: If a lightweight and corrosion-resistant option is on your radar, aluminum garage doors are worth considering. They are available in various styles, including modern, contemporary, and classic designs. Aluminum doors are also relatively low-maintenance and can be powder-coated to resist rust.

Fiberglass Garage Doors: Fiberglass garage doors are known for their versatility. They can mimic the appearance of wood but without the susceptibility to weather-related damage. Fiberglass is resistant to dents, cracks, and rust, making it an ideal choice for coastal areas where exposure to moisture is a concern.

2. Style and Design: From Classic to Contemporary

Traditional Raised Panel: The classic raised-panel design is a staple in residential garage doors. This timeless style, characterized by rectangular panels that project slightly from the door’s surface, complements a wide range of architectural designs.

Carriage House Style: Emulating the charm of historic carriage house doors, this style often features decorative handles and hinges, giving the illusion of doors that swing open. Carriage house-style doors add a touch of rustic elegance to both traditional and modern homes.

Contemporary and Modern: Clean lines, minimalist design, and unconventional materials characterize contemporary and modern garage doors. Flush panels, large windows, and sleek finishes contribute to a sophisticated and urban look that complements modern architectural styles.

Glass and Full-View Doors: For those seeking an infusion of natural light into the garage space, glass and full-view garage doors are a popular choice. These doors can feature a frame with large glass panels, creating a seamless connection between indoor and outdoor spaces.

3. Insulation: Efficiency Meets Comfort

As energy efficiency becomes a priority for homeowners, choosing an insulated garage door can have a significant impact on both comfort and utility bills. Insulated doors regulate temperature, providing a buffer against extreme heat or cold, and contribute to the overall energy efficiency of your home.

4. Smart Technology Integration

In an era where smart homes are becoming the norm, why should your garage door be left behind? Many residential garage door options now come equipped with smart technology features. From Wi-Fi-enabled openers that allow remote operation via smartphone apps to integration with voice-activated assistants like Alexa or Google Assistant, these smart features offer convenience and peace of mind.

5. Customization for Personal Expression

Your home is a reflection of your personality, and your garage door can be a canvas for personal expression. Many garage door manufacturers offer customization options, allowing you to choose from a variety of colors, finishes, and decorative elements. Whether you prefer a bold statement or a subtle complement to your home’s exterior, customization options abound.

6. Maintenance Considerations

The level of maintenance your garage door requires is a crucial factor in the decision-making process. Wood doors, for instance, may need periodic refinishing or repainting, while steel and aluminum doors are generally low-maintenance. Consider your lifestyle and the amount of time you’re willing to invest in maintaining your garage door when making your choice.

7. Cost Considerations: Balancing Budget and Quality

Residential garage door options come with varying price points, and it’s essential to strike a balance between your budget and the quality of the door. While certain materials and features may come with a higher upfront cost, the long-term benefits in terms of durability, energy efficiency, and curb appeal can make them a worthwhile investment.

8. Local Climate and Environmental Factors

Consider your geographical location and the specific environmental factors your garage door will face. If you live in an area with high humidity or salt exposure, corrosion-resistant materials like aluminum or fiberglass may be preferable. Insulated doors are particularly beneficial in regions with extreme temperatures.

9. Professional Installation for Optimal Performance

Regardless of the garage door option you choose, professional installation is key to ensuring optimal performance and longevity. A skilled technician will not only handle the physical installation but also provide insights into maintenance practices, adjustments, and troubleshooting.

10. Seeking Inspiration: Showrooms and Visual Tools

To aid in the decision-making process, explore local showrooms or utilize online visual tools provided by garage door manufacturers. Seeing different styles and materials in person or virtually can help you visualize how a particular door will complement your home.

Conclusion: Elevating Your Home’s Facade with the Right Garage Door

In conclusion, residential garage door options offer a spectrum of choices, allowing homeowners to blend functionality with style seamlessly. From the choice of materials and styles to considerations of insulation, smart technology integration, and customization, every aspect contributes to the overall aesthetic and functionality of your home.

As a homeowner, based from Garage Door Repair, the process of selecting a garage door is not just about enhancing curb appeal; it’s an opportunity to make a statement about your home and lifestyle. With the right residential garage door, you can effortlessly elevate the facade of your residence, adding a touch of personality and charm that resonates with your unique taste and preferences.

Hesperia Overhead & Garage Doors

18361 Bear Valley Rd # 4, Hesperia, CA 92345, United States

760-990-1054

Raynor Garage Doors: Innovative Solutions for Modern Homes – Braintree Garage & Overhead Doors

In the quest to enhance the curb appeal and functionality of my home, I stumbled upon Raynor Garage Doors, a brand synonymous with innovation and cutting-edge solutions.

Intrigued by the promise of modern design and advanced technology, I delved into the realm of Raynor Garage Doors, and in this article, I share my discoveries and insights into the innovative solutions they bring to modern homes by following Garage Door Repair.

Chapter 1: The Art of First Impressions

As I contemplated the significance of a garage door in shaping the first impressions of a home, Raynor’s commitment to aesthetic appeal stood out. Their doors are not just functional barriers; they are statements of style and sophistication. With a range of designs, materials, and finishes, Raynor offers homeowners the opportunity to express their unique taste and elevate the overall aesthetics of their homes.

Chapter 2: Material Mastery

Raynor Garage Doors showcase a mastery of materials, blending durability with elegance. Whether opting for the timeless charm of wood, the low-maintenance convenience of steel, or the modern allure of aluminum, Raynor ensures that each material is meticulously crafted to withstand the test of time. This commitment to material excellence guarantees not only visual appeal but also longevity, making Raynor doors a wise investment for any homeowner.

Chapter 3: Advanced Insulation Technologies

In the pursuit of energy efficiency and climate control, Raynor has integrated advanced insulation technologies into their garage doors. Recognizing the garage as a space that significantly impacts a home’s overall energy efficiency, Raynor’s insulated doors provide a barrier against extreme temperatures. This not only creates a more comfortable environment but also contributes to energy savings, aligning with the growing demand for sustainable home solutions.

Chapter 4: Smart Home Integration

Embracing the era of smart homes, Raynor Garage Doors seamlessly integrate with modern technology. Home automation enthusiasts will appreciate the compatibility with smart garage door openers, allowing for remote operation and monitoring via smartphones. The convenience of checking and controlling the garage door’s status from anywhere adds an extra layer of security and peace of mind for homeowners constantly on the move.

Chapter 5: Whisper-Quiet Operation

In my exploration of Raynor’s offerings, the emphasis on quiet operation captured my attention. The innovative features designed to minimize noise during opening and closing make Raynor Garage Doors an ideal choice for homeowners who value a peaceful living environment. The whisper-quiet operation adds a touch of luxury to the daily routine, eliminating the jarring sounds associated with traditional garage doors.

Chapter 6: Customization Options

Raynor understands that every home is unique, and their commitment to customization options reflects this understanding. From choosing the perfect color to selecting window styles and decorative hardware, homeowners can tailor their garage doors to complement the architectural character of their homes. The array of options empowers homeowners to create a cohesive and personalized look for their residences.

Chapter 7: Security Reinvented

Security is a paramount concern for homeowners, and Raynor Garage Doors address this with innovative security features. From robust locking mechanisms to secure remote access, Raynor prioritizes the safety of both property and residents. The integration of modern security technology provides an additional layer of protection, contributing to the overall peace of mind that comes with choosing Raynor.

Chapter 8: Durability in Design

Raynor’s commitment to durability is evident in the thoughtful design and construction of their garage doors. Each component is engineered to withstand the rigors of daily use and the challenges posed by diverse weather conditions. The durability of Raynor doors not only ensures a long lifespan but also minimizes the need for frequent maintenance, allowing homeowners to enjoy a reliable and resilient product.

Chapter 9: Environmental Responsibility

As sustainability becomes a focal point in contemporary living, Raynor Garage Doors align with environmental responsibility. Their dedication to eco-friendly practices includes the use of materials with low environmental impact and energy-efficient design principles. This commitment resonates with homeowners seeking not just quality and style but also a brand that shares their values in promoting a greener future.

Chapter 10: The Raynor Experience

In conclusion, according to Garage Door Repair, my exploration into Raynor Garage Doors revealed a brand that goes beyond mere functionality. Raynor embodies the spirit of innovation, seamlessly blending style with advanced technology to offer homeowners an unparalleled experience. From the moment one sets eyes on their doors to the daily interactions with their quiet and efficient operation, Raynor Garage Doors redefine the standards of what a modern garage door can and should be. Choosing Raynor becomes not just a practical decision but a step towards a more sophisticated, secure, and sustainable home.

Braintree Garage & Overhead Doors

0 Campanelli Dr, Braintree, MA 02184, United States

781-678-4910

How Much Weight Can a Garage Door Opener Lift – Denzels Garage Doors

Garage Door Repair are essential components for the smooth operation of your garage door, taking the hassle out of manually lifting and lowering it.

One of the key considerations when choosing a garage door opener is its lifting capacity.

The lifting capacity of a garage door opener is typically measured in horsepower (HP) or Newtons. Horsepower is a common unit of power, and in the context of garage door openers, it refers to the motor’s strength. Newtons, on the other hand, represent force.

For standard residential garage doors, which can weigh between 150 to 250 pounds or more, a 1/2 HP garage door opener is often sufficient. This type of opener can handle the regular lifting and lowering of common garage doors. However, if you have a heavier or custom door, you might want to consider a more robust opener.

Garage door openers with 3/4 HP or 1 HP motors are available for those situations where a bit more lifting power is required. These higher horsepower openers are designed to effortlessly handle the increased weight of heavier doors.

It’s essential to check the manufacturer’s specifications and recommendations for your specific garage door opener model. Exceeding the recommended weight limit can strain the opener’s motor and other components, potentially leading to malfunctions or premature wear and tear.

In conclusion, the lifting capacity of a Garage Door Repair depends on its horsepower and design. Choosing the right opener for your garage door’s weight ensures smooth and reliable operation, making your daily comings and goings hassle-free.

Denzels Garage Doors

1-619-496-9419

Symptoms of a Faulty Garage Door Opener Capacitor – Riverside Garage & Overhead Doors

In the symphony of home mechanics, the garage door opener capacitor plays a vital yet often overlooked role. As a homeowner, the discovery that this seemingly inconspicuous component could be the source of my garage door troubles prompted a journey into understanding the symptoms of a faulty capacitor.

This article chronicles my personal exploration, from the puzzling symptoms that first manifested to the diagnosis and resolution of the capacitor-related issues according to Garage Door Repair.

The Prelude: A Symphony of Unease

The initial signs of trouble manifested as disconcerting aberrations in the otherwise seamless operation of my garage door. What was once a harmonious ascent and descent had transformed into a cacophony of hesitations, jerks, and occasional refusal to cooperate. The realization dawned that beneath the apparent simplicity of the garage door opener lay a network of components, with the capacitor at the center of this mechanical orchestra.

Chapter 1: Understanding the Capacitor’s Role

To comprehend the symptoms, I needed to first understand the role of the capacitor in the garage door opener ensemble. The capacitor serves as a temporary energy storage device, providing the initial burst of power needed to kick-start the motor into action. This surge of energy is crucial during the door’s starting motion, ensuring a smooth and efficient operation.

As I delved into this fundamental understanding, the capacitor emerged not merely as a passive participant but as a linchpin in the delicate dance of garage door mechanics.

Chapter 2: The Dissonance Unveiled

The journey into capacitor symptoms began with an unsettling dissonance during the garage door’s operation. Hesitations and jerks, akin to a struggling engine, punctuated what was once a fluid motion. The door’s ascent and descent, previously marked by a reassuring hum, had morphed into an audible struggle.

The first symptom, a departure from the familiar symphony, raised questions about the health of the garage door opener’s capacitor. It became evident that the capacitor, despite its diminutive size, wielded significant influence over the entire orchestra of mechanical components.

Chapter 3: Auditory Clues of Capacitor Distress

As the symptoms persisted, my exploration extended beyond visual cues to the realm of auditory clues. A distinct change in the sound profile during the garage door’s operation became an unmistakable indicator of capacitor distress. Instead of the usual hum or smooth mechanical sounds, there were audible strains, clicks, or even silence in certain instances.

This auditory testimony suggested that the capacitor, responsible for initiating the motor’s motion, was struggling to discharge its stored energy effectively. The garage door opener, once a silent ally, was now vocalizing its ailment through these audible anomalies.

Chapter 4: Intermittent Operation and Unreliable Responses

A pivotal symptom that intensified my concern was the erratic behavior of the garage door opener. Intermittent operation and unreliable responses to remote control commands signaled a deeper issue within the system. There were instances where the door would only partially open or abruptly halt mid-motion, refusing to comply with my directives.

This inconsistency in performance highlighted the capacitor’s struggle to consistently deliver the necessary energy to the motor. It became clear that a faltering capacitor was compromising the reliability and predictability of the garage door’s operation.

Chapter 5: Diagnostic Tools and Multimeter Explorations

Armed with the knowledge of potential capacitor symptoms, my journey transitioned into the realm of diagnostics. A multimeter, the tool of choice for scrutinizing the electrical health of components, became my ally. Testing the voltage across the capacitor terminals during operation allowed me to gauge its ability to discharge and store energy effectively.

A reading below the specified voltage or erratic fluctuations during operation became conclusive evidence of capacitor distress. The multimeter served as a diagnostic wand, transforming the abstract symptoms into tangible data that pointed directly to the capacitor as the culprit.

Chapter 6: The Decision to Replace

As the diagnostic phase concluded, the choice to replace the capacitor emerged as the logical next step. Armed with the understanding that a faulty capacitor compromised not only the garage door’s performance but the longevity of the entire system, the decision was made to seek a replacement.

Navigating the market for a compatible capacitor, considering factors such as voltage rating and capacitance, became a meticulous process. The goal was not only to remedy the symptoms but to ensure the sustained health and efficiency of the garage door opener.

Epilogue: A Harmonious Restoration

The replacement of the capacitor marked the climax of my exploration. With the new capacitor seamlessly integrated into the garage door opener, the symptoms that had once plagued the system dissipated. The dissonance transformed into a harmonious symphony, and the garage door resumed its role as a reliable and predictable ally.

Conclusion: Empowered by Knowledge

My journey through the symptoms of a faulty garage door opener capacitor was not merely a repair saga; it was a voyage of empowerment through knowledge. Understanding the subtle cues of capacitor distress transformed the garage door opener from an enigmatic device into a comprehensible system.

Overall, based from Garage Door Repair, as I now witness the smooth operation of my garage door, I reflect on the lessons learned. The capacitor, though small in stature, holds significant sway over the functionality of the entire system. The homeowner armed with knowledge becomes not just a passive observer but an active participant in the orchestration of a smoothly functioning garage door opener.

Riverside Garage & Overhead Doors

3410 Torrey St, Riverside, CA 92503, United States

951-494-6436

How To Erase Garage Door Opener In Car – Denzel Garage Door Repair

Erasing a Garage Door Repair Carlsbad CA is a common task, especially when you need to remove an old code or if you’ve recently moved into a new home.

The process may vary slightly depending on the make and model of your car and the garage door opener. Here’s a detailed guide to help you erase a garage door opener code from your car:

: Identify the Car’s HomeLink or Universal Remote System

Many modern cars come equipped with a built-in garage door opener system known as HomeLink or a universal remote system. This system allows you to program your car to open and close your garage door. Consult your car’s manual to locate and understand the features of the HomeLink or universal remote system.

: Locate the HomeLink Buttons

In your car, find the HomeLink buttons. These are usually located on the rearview mirror, visor, or overhead console. The number of buttons may vary, but they are typically designed for programming different devices, including garage door openers.

: Clear Existing Codes

Before programming a new code, it’s essential to clear any existing codes stored in your car’s HomeLink system. To do this, press and hold the desired HomeLink button until the indicator light begins to flash slowly. Continue holding the button until the light changes from slow to rapid flashing. This indicates that the existing codes have been erased.

: Locate the Learn Button on the Garage Door Opener

Next, you need to locate the “Learn” or “Smart” button on your garage door opener motor. This button is typically located on the back or side of the opener unit. Consult your garage door opener manual if you’re having trouble finding it.

: Press the Learn Button on the Garage Door Opener

Press and release the “Learn” or “Smart” button on the garage door opener motor. You usually have about 30 seconds to a minute to perform the next steps.

: Program a New Code in Your Car

Return to your car and press the HomeLink button you want to program. Hold the button until the indicator light changes from a slow flash to a rapid flash. This indicates that your car has successfully learned the new garage door opener code.

: Test the New Code

Test the newly programmed code by pressing the programmed HomeLink button. The garage door should respond by opening or closing. If the door doesn’t respond, repeat the programming steps.

: Repeat for Additional Buttons

If your car has multiple HomeLink buttons, repeat the process for each button to program additional garage door openers or other devices.

: Clearing All Programmed Codes

If you want to erase all programmed codes from your car’s HomeLink system, consult your car’s manual for specific instructions. Some cars may require a specific sequence of button presses to clear all codes.

: Consult Car and Garage Door Opener Manuals

Always refer to your car’s manual and the manual of your garage door opener for model-specific instructions. Different car manufacturers and garage door opener brands may have unique procedures.

Conclusion:

Erasing a Garage Door Repair Carlsbad CA from your car involves using the HomeLink or universal remote system integrated into your vehicle. Clearing existing codes, locating the Learn button on the garage door opener, and programming a new code are essential steps in this process. Always refer to your car and garage door opener manuals for model-specific instructions and troubleshooting tips. With these steps, you can easily manage and update your garage door opener codes for enhanced security and convenience.

Denzel Garage Door Repair

2380 Camino Vida Roble, Carlsbad, CA 92011, United States

1-760-970-8179

How To Change Code On Genie Garage Door Opener – Denzel Garage Door of Long Beach

Changing the code on your Genie Garage Door Repair Long Beach CA is a task that can be easily accomplished with a few straightforward steps.

This process is crucial for maintaining the security of your home and ensuring that only authorized individuals have access to your garage. In this detailed guide, we will walk you through the step-by-step procedure to change the code on your Genie garage door opener.

1. Identify the Learn Button: The first step in changing the code is to locate the Learn Button on your Genie garage door opener. This button is typically situated on the motor unit and may be colored red, green, or yellow. Its purpose is to facilitate the programming of new codes.

2. Clear Existing Codes: Before entering a new code, it’s essential to clear any existing codes from the opener’s memory. To do this, press and hold the Learn Button until the indicator light on the opener turns off. This action ensures a clean slate for the new code.

3. Choose a New Code: Take a moment to decide on a new and secure code for your garage door opener. Opt for a combination that is not easily guessable, such as avoiding sequential numbers or common birthdays.

4. Access the Keypad or Remote: If your garage door opener is equipped with a keypad or remote control, locate the device. Check for a programming button or keypad cover, as this is where you will initiate the process of changing the code.

5. Enter Programming Mode: If you are working with a keypad, enter your existing PIN and then press the “Program” or “Learn” button. For remote controls, press and hold the button you want to program until the indicator light starts blinking. This action signifies that the device is ready for programming.

6. Input the New Code: With the keypad or remote in programming mode, enter the new code that you selected earlier. Take care to input the digits accurately. For remote controls, release the button after entering the code.

7. Test the New Code: To ensure that the new code is successfully programmed, press the corresponding button on the keypad or remote. Observe the garage door’s response – it should open or close accordingly. If the door does not respond, repeat the code entry process to rule out any errors.

8. Repeat for Additional Devices: If you have multiple remotes or keypads, it is essential to repeat the programming process for each device. This step ensures that all your devices are synchronized with the updated code.

9. Resetting Remotes: Should the need arise to deactivate a remote, press and hold the Learn Button until the indicator light blinks rapidly. Subsequently, press the button on the remote you wish to deactivate. This action clears the specific remote’s code from the opener’s memory.

10. Additional Security Features: Certain Genie models come equipped with advanced security features such as rolling code technology. If your model includes this feature, refer to the user manual for specific instructions tailored to your garage door opener. Following these instructions ensures the proper programming of advanced security features.

11. Battery Check: If your keypad or remote operates on batteries, check their power levels. Weak batteries can impede the programming process, so replace them if necessary to ensure optimal performance.

12. Final Checks: Once you have completed the programming process, conduct a comprehensive test by using all programmed remotes and keypads. This step ensures that every device works correctly with the newly programmed code. If any issues persist, consult the user manual or contact Genie customer support for further assistance.

13. Secure the Manual: Safeguard the garage door opener manual in a secure location for future reference. The manual contains model-specific information and troubleshooting tips that may prove valuable in addressing any issues that may arise in the future.

14. Consider Professional Assistance: In the event that you encounter difficulties during the code-changing process or if you prefer professional guidance, do not hesitate to reach out to Genie customer support or enlist the services of a qualified technician. These experts can provide tailored assistance based on your specific garage door opener model.

By following these detailed instructions, you should be able to successfully change the code on your Genie Garage Door Repair Long Beach CA. This process not only enhances the security of your home but also ensures that your garage door operates smoothly and reliably.

Denzel Garage Door of Long Beach

1635 Cedar Ave, Long Beach, CA 90813, United States

1-562-337-3432

How To Build Swing Out Garage Doors – Denzel Garage Door Repair

Building swing-out Victorville Garage Door Repair is a challenging yet rewarding DIY project that can add a touch of traditional charm to your home.

Swing-out doors, also known as carriage doors, open outward like double doors, providing a unique and aesthetically pleasing entrance to your garage. In this comprehensive guide, we’ll walk you through the steps of building swing-out garage doors, covering the materials, tools, and techniques needed for a successful project.

1. Gather Materials and Tools:

Before you begin, gather the necessary materials and tools for building swing-out garage doors. This includes:

  • Wood for Door Panels: Choose high-quality lumber suitable for outdoor use, such as cedar or redwood. The thickness of the wood will depend on your design preferences and the desired sturdiness of the doors.
  • Wood for Frame: Select sturdy wood for the door frame, such as 2×4 or 2×6 boards.
  • Wood Screws: Get a variety of screws, including both wood screws for assembly and lag screws for mounting the doors.
  • Wood Glue: High-quality wood glue helps reinforce joints for added strength.
  • Miter Saw or Circular Saw: Use a saw to cut the wood to the desired dimensions.
  • Drill with Bits: A drill is essential for making pilot holes and driving screws.
  • Hinges: Choose heavy-duty exterior hinges that can withstand outdoor conditions.
  • Latch Mechanism: Select a durable latch or locking mechanism for securing the doors.
  • Weather Stripping: To enhance insulation and weather resistance, consider adding weather stripping to the door frames.
  • Paint or Stain: Finish the doors with a suitable exterior paint or stain to protect the wood from the elements.

2. Measure and Plan:

Measure the dimensions of your garage door opening to determine the size of the swing-out doors. Consider the desired width, height, and depth of each door. Plan the design, including the number of panels, any decorative elements, and the positioning of hinges and handles.

3. Cut Wood to Size:

Using a miter saw or circular saw, cut the wood to the measured dimensions. Ensure that all pieces are cut accurately for a precise fit. Cut the door panels, frame pieces, and any additional decorative elements.

4. Assemble the Door Frame:

Assemble the door frame using the 2×4 or 2×6 boards. Use wood glue and screws to secure the corners. Ensure that the frame is square and sturdy.

5. Attach Door Panels:

Attach the wood panels to the frame using wood screws. Ensure that the panels are evenly spaced and level. If you’re using tongue-and-groove boards, join them together for a seamless look.

6. Add Decorative Elements (Optional):

If you desire a more decorative look, consider adding additional elements such as X-braces or trim. Secure these elements to the door frame using wood screws.

7. Sand and Finish:

Sand the entire door to smooth any rough edges and create a finished surface. Apply paint or stain based on your preference. Allow the finish to dry completely before moving on to the next steps.

8. Install Hinges:

Attach the hinges to the door frame. Place the hinges at the desired locations, typically along the vertical edges of each door panel. Ensure that the hinges are securely fastened to both the frame and the door panels.

9. Mount the Doors:

With the hinges in place, mount the doors to the garage opening. Use lag screws to secure the hinges to the garage framing. Ensure that the doors swing smoothly and align properly.

10. Install Latch Mechanism:

Install a durable latch or locking mechanism to keep the swing-out doors securely closed. Ensure that the latch is positioned correctly and functions smoothly.

11. Add Weather Stripping (Optional):

To improve insulation and weather resistance, consider adding weather stripping to the door frames. This helps seal the gaps between the doors and the garage opening.

12. Test and Adjust:

Test the swing-out doors by opening and closing them multiple times. Check for smooth operation, proper alignment, and secure closure. Make any necessary adjustments to hinges or latch mechanisms to ensure optimal functionality.

13. Finishing Touches:

Consider adding any finishing touches to enhance the aesthetic appeal of your swing-out doors. This may include decorative hardware, paint details, or additional trim elements.

Tips and Considerations:

  • Select Durable Wood: Choose wood that can withstand outdoor conditions, such as cedar or redwood. Apply a weather-resistant finish for added protection.
  • Check Local Building Codes: Before starting the project, check local building codes and regulations to ensure compliance with any requirements for garage door construction.
  • Ensure Proper Clearance: Confirm that there is sufficient clearance for the swing-out doors to open without obstruction.
  • Choose Appropriate Hinges: Select heavy-duty exterior hinges that can withstand the weight of the doors and provide smooth operation.
  • Consider Automation (Optional): If desired, you can automate your swing-out doors by adding a garage door opener system. This involves additional components and considerations, so research and plan accordingly.
  • Safety First: Ensure that the swing-out doors are securely mounted, and that the hinge and latch mechanisms are properly installed. This is crucial for both functionality and safety.

Building swing-out Victorville Garage Door Repair requires careful planning, precise measurements, and attention to detail. With the right materials and tools, along with a systematic approach, you can create custom swing-out doors that enhance the curb appeal of your home while providing functional access to your garage.

Denzel Garage Door Repair

12127 Mall Blvd SUITE A251, Victorville, CA 92392, United States

1-760-377-8735

Page 3 of 7

Powered by WordPress & Theme by Anders Norén