Local Services in Texas

Month: October 2023 Page 2 of 7

How To Adjust Auto Reverse On Garage Doors – Lake Arlington Gates & Garage Doors

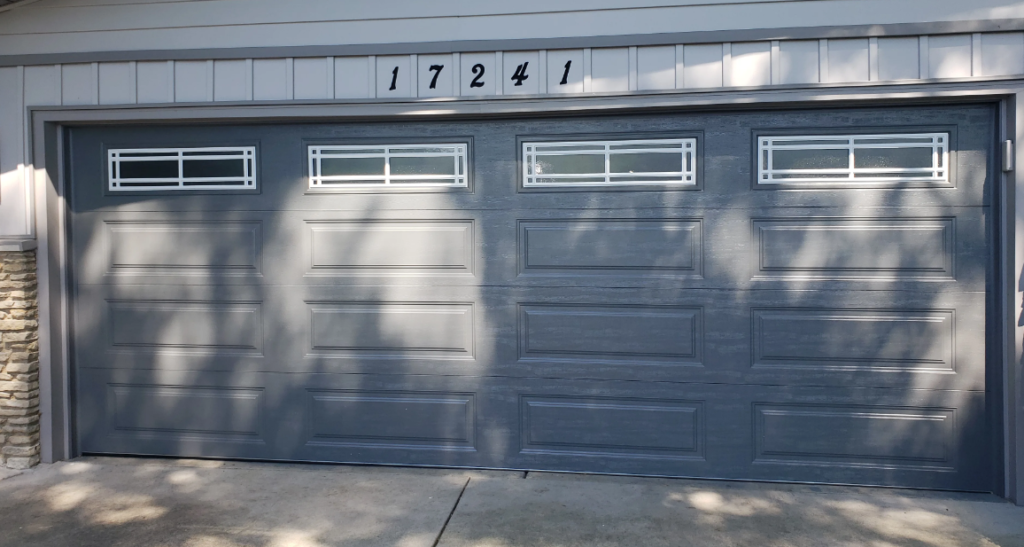
Adjusting the auto-reverse function on a Garage Door Repair Lake Arlington TX is a crucial safety measure to prevent accidents and injuries.

Follow these steps to ensure your garage door’s auto-reverse mechanism is properly adjusted:

: Understand the Auto-Reverse Mechanism

Before adjusting anything, it’s essential to understand how the auto-reverse mechanism works. Typically, garage doors are equipped with photoelectric sensors and mechanical force settings to detect obstacles in the door’s path. Familiarize yourself with these components.

: Check Photoelectric Sensors

The photoelectric sensors are often located near the floor on both sides of the garage door. Ensure they are clean and properly aligned. If they are misaligned or obstructed, the auto-reverse feature may not function correctly.

  1. Clean the sensors with a soft, dry cloth.
  2. Adjust the sensors to face each other directly. They should have a clear line of sight.

: Test the Auto-Reverse Function

Before making any adjustments, test the auto-reverse function to see if it’s working properly. Place a small obstacle, like a piece of wood, in the door’s path and close the garage door. The door should automatically reverse when it comes into contact with the obstacle.

If the door doesn’t reverse, there may be an issue with the force settings.

: Adjust Force Settings

Most garage door openers have force adjustment settings that control how much force the door uses when closing. If set too high, it can prevent the auto-reverse feature from working correctly.

  1. Locate the force adjustment knobs on your garage door opener. They are usually labeled as “up force” and “down force.”
  2. Gradually reduce the force settings by turning the knobs in small increments.
  3. Test the door after each adjustment by closing it onto an obstacle. Continue adjusting until the door reliably reverses when encountering an obstacle.

: Test Regularly

After making adjustments, it’s important to regularly test the auto-reverse function to ensure it continues to work correctly. Perform tests at least once a month to keep your garage door’s safety features in optimal condition.

: Consult the Manual

If you’re unsure about any specific adjustments or if your garage door opener model has unique features, refer to the manufacturer’s manual. The manual provides detailed instructions tailored to your specific opener.

: Professional Assistance

If, after following these steps, the auto-reverse feature still doesn’t work correctly, or if you’re uncomfortable making adjustments, consider seeking professional assistance. Garage door technicians have the expertise to diagnose and fix issues with the auto-reverse mechanism.

Remember, ensuring the proper function of your Garage Door Repair Lake Arlington TX feature is essential for the safety of you, your family, and anyone else using your garage. Regular maintenance and periodic checks can prevent accidents and prolong the life of your garage door system.

Lake Arlington Gates & Garage Doors

4101 W Green Oaks Blvd #305-318, Arlington, TX 76016, United States

1-817-993-6623

Window Installation and Its Impact on Home Resale Value – NTHE Window Replacement Mansfield

As a homeowner, I’ve always been keenly aware of the role that home improvements play in enhancing not only the comfort of your living space but also its resale value. When it came to considering window installation, I embarked on a journey that not only improved the aesthetics and energy efficiency of my home but also had a significant impact on its resale value.

In this article, I’ll share my personal experiences and insights into the world of window installation and its effects on home resale value by following Window Replacement Mansfield TX.

The Significance of Window Installation

Windows are a fundamental component of any home, offering a portal to the outside world and providing crucial elements of comfort and functionality. Quality windows are essential for various reasons, including:

  1. Energy Efficiency: Well-installed and insulated windows play a vital role in regulating indoor temperatures, reducing energy consumption, and ultimately lowering utility bills.
  2. Aesthetics: New windows can enhance the visual appeal of your home, inside and out. They offer an opportunity to update your home’s style and create a cohesive look.
  3. Natural Light: Properly placed windows flood your home with natural light, creating a warm and inviting ambiance.
  4. Resale Value: Window installation, when done right, can increase the resale value of your home. It’s an investment that often pays dividends when it’s time to sell.

Understanding the Impact on Resale Value

When I considered replacing my home’s windows, I knew that it was more than just a personal improvement project; it was an investment in my home’s future resale value. Here are some key factors that explain the impact of window installation on home resale value:

  1. Curb Appeal: New, well-maintained windows enhance your home’s curb appeal. When prospective buyers first approach your home, the condition and style of the windows are among the first things they notice.
  2. Energy Efficiency: Energy-efficient windows, such as those with low-E coatings and double or triple glazing, contribute to lower utility bills. Potential buyers appreciate the cost-saving potential of energy-efficient windows.
  3. Modern Aesthetics: Replacing outdated windows with modern designs can instantly update the look of your home. Modern aesthetics are often more attractive to buyers than older, less stylish windows.
  4. Natural Light: Properly placed windows that optimize natural light make your home feel more spacious and inviting. This positive atmosphere can be a selling point for potential buyers.
  5. Maintenance: New windows often require less maintenance and come with warranties. This can be a selling point, assuring buyers that they won’t have to deal with immediate window-related expenses.
  6. Functionality: New windows are easier to operate and provide better security features. Homebuyers appreciate the convenience and safety of updated windows.

Choosing the Right Windows for Resale Value

Selecting the right windows is crucial to maximize their impact on resale value. Here are some key considerations when choosing windows for your home:

  1. Energy Efficiency: Look for windows with energy-efficient features like low-E coatings and double or triple glazing. Energy-efficient windows are attractive to buyers concerned about utility costs.
  2. Style and Aesthetics: Choose window styles that complement your home’s architecture and offer a timeless look. Modern styles can also be appealing if they match the overall design.
  3. Quality Materials: Opt for high-quality materials that offer durability and longevity. Materials like vinyl, wood, and fiberglass are popular choices.
  4. Professional Installation: Proper installation is crucial for the functionality and efficiency of your windows. It’s essential to work with experienced professionals to ensure a seamless installation process.
  5. Warranties: Consider windows that come with warranties. These warranties provide assurance to potential buyers that the windows are reliable and well-maintained.

The Resale Value of My Window Installation

I decided to invest in new windows for my home, considering the long-term benefits for both my comfort and resale value. After the installation, I observed some significant changes:

  1. Increased Interest: When my home was listed for sale, I noticed that potential buyers expressed more interest in the property due to the newly installed windows. They recognized the value of modern, energy-efficient windows.
  2. Higher Offers: My real estate agent indicated that the new windows played a role in the competitive offers we received for the property. Buyers were willing to pay a premium for a home with updated windows.
  3. Faster Sale: The home sold relatively quickly, and I believe that the modern windows contributed to the swift sale. Buyers were attracted to the move-in-ready condition of the property.
  4. Positive Feedback: During showings, buyers often commented on the aesthetic appeal and natural light provided by the new windows. It was evident that these features influenced their perception of the property.

The Value of Window Installation

Overall, according to Window Replacement Mansfield TX and in my personal experience, window installation was an investment that not only improved the comfort and aesthetics of my home but also had a substantial impact on its resale value. The modern, energy-efficient windows attracted more buyers and ultimately led to a faster sale at a higher price. As a homeowner who values the overall worth of my property, I’ve come to appreciate the value of well-considered window installation. It’s an investment that not only enhances your daily life but also positions your home as an attractive and valuable asset when the time comes to sell.

NTHE Window Replacement Mansfield

1771 Calender Rd, Mansfield, TX 76063, United States

817-592-8450

How To Reset Pin On Garage Door Keypad – Trophy Club Overhead & Garage Doors

Resetting the PIN on your Garage Door Repair Trophy Club TX is a straightforward process that ensures the security of your home.

This comprehensive guide will walk you through the steps, taking into account the general procedure applicable to various garage door opener models.

: Locate the Learn Code or Program Button

Start by finding the Learn Code or Program button on your garage door opener motor unit. This button is typically located on the back or side of the motor unit. It’s crucial to identify this button as it is integral to the PIN reset process.

Enter Programming Mode

To initiate the PIN reset, enter your existing PIN on the keypad and press the Program or Enter button. This action activates the programming mode, allowing you to make changes to the PIN.

: Press the Learn Code or Program Button on the Motor Unit

Within 30 seconds of entering programming mode, locate and press the Learn Code or Program button on the motor unit. This action signals the garage door opener to accept a new PIN.

: Enter Your New PIN

While the motor unit is in programming mode, enter your new desired PIN on the keypad. Ensure that your new PIN is both secure and easy for you to remember. Follow any specific guidelines regarding PIN length and complexity provided by your garage door opener’s user manual.

: Test the New PIN

Exit programming mode by pressing the Program or Enter button on the keypad again. Test the new PIN by entering it on the keypad and checking if the garage door responds appropriately. This step ensures that the new PIN has been successfully programmed.

: Repeat for Additional Keypads (If Applicable)

If your garage door system has multiple keypads, repeat the above steps for each one to synchronize all keypads with the new PIN.

: Resetting to Factory Settings (Optional)

If you ever need to return the keypad to its factory settings, consult your garage door opener’s user manual for specific instructions. This usually involves pressing a combination of buttons or holding down the Program button for an extended period.

: Troubleshooting

If you encounter any issues during the PIN reset process, consult your garage door opener’s user manual for troubleshooting tips. You can also contact the manufacturer’s customer support for assistance.

In conclusion, resetting the PIN on your Garage Door Repair Trophy Club TX involves locating the Learn Code or Program button, entering programming mode, pressing the corresponding button on the motor unit, entering a new PIN, and testing the updated code. Always refer to your specific garage door opener’s user manual for model-specific instructions and troubleshooting assistance.how to reset pin on garage door keypad

Trophy Club Overhead & Garage Doors

2412 Trophy Club Dr, Trophy Club, TX 76262, United States

1-817-646-5315

How To Reset Sears Garage Door Opener – Arlington Overhead & Garage Doors

Resetting a Sears Garage Door Repair Arlington TX is a detailed process that involves several steps to ensure a successful reset and proper functionality.

This comprehensive guide will walk you through the process with clarity and precision.

1. Locate the Control Panel: To begin the reset process, find the control panel of your Sears garage door opener. Typically, this panel is mounted on the wall near the garage door or directly on the motor unit.

2. Access the Settings Menu: Open the control panel and locate the settings or programming menu. This is where you will initiate the reset procedure.

3. Power Off the Opener: Before you proceed with the reset, disconnect the power supply to the garage door opener. This can be achieved by either unplugging the opener or turning off the circuit breaker dedicated to the garage.

4. Wait for a Few Minutes: Allow the opener to remain without power for at least five minutes. This waiting period ensures that any residual charge or memory is completely cleared.

5. Power On the Opener: After the waiting period, reconnect the power to the garage door opener. Turn on the circuit breaker or plug the opener back in.

6. Enter Programming Mode: Follow the specific instructions outlined in your Sears garage door opener manual to enter programming mode. This typically involves pressing a combination of buttons on the control panel.

7. Reset Remote Controls: If your garage door opener is equipped with remote controls, reprogram them during this process. This usually involves pressing a button on the remote and then a corresponding button on the opener.

8. Reset Keypad Codes: If your garage door opener features a keypad for entry, reset the codes as well. This step is crucial for enhancing the security of your garage.

9. Test the Opener: Perform a thorough test by opening and closing the garage door using both the remote controls and the keypad. This step ensures that the reset has been successful.

10. Adjust Settings if Necessary: Utilize the programming menu to adjust any additional settings, such as the travel limits and force settings. Refer to the manual for detailed guidance on these adjustments.

11. Final Checks: Double-check all settings and ensure that all remotes and keypads are functioning correctly. If any issues arise, consult the troubleshooting section of the manual for guidance.

12. Secure the Control Panel: Once you are satisfied with the reset and everything is in working order, close and secure the control panel. Ensure that it is out of reach of children and pets.

By diligently following these step-by-step instructions, you should successfully reset your Sears Garage Door Repair Arlington TX, restoring it to its default settings and ensuring reliable operation. In case of any difficulties, refer to the manual or contact Sears customer support for further assistance.

Arlington Overhead & Garage Doors

817-646-2532

How To Reset The Keypad For Garage Door – Haslet Gates & Garage Doors

Haslet Garage Door Repair have become an integral part of our daily lives, offering a secure and efficient means of accessing our homes.

Imagine the frustration of being locked out or experiencing issues with the keypad. Fear not! In this guide, we’ll walk you through the process of resetting your garage door keypad, ensuring you’re back to seamless entries in no time.

Understanding the Basics

Before delving into the reset process, let’s grasp the basics of how a garage door keypad operates. These devices are designed to communicate with your garage door opener, providing a secure entry method without the need for keys. Understanding this foundation is crucial for effective troubleshooting.

Reasons for Resetting

Why would you need to reset your garage door keypad? Various issues, from a forgotten code to technical glitches, can necessitate a reset. Addressing these issues promptly is essential to avoid more significant problems down the road.

Steps to Resetting the Keypad

Locating the Reset Button

Most garage door keypads have a reset button, typically located on the back or side of the device. Find this button before proceeding to ensure a smooth reset.

Different Methods for Different Models

Not all garage door openers are created equal. Depending on the model, the reset process may vary. Check your garage door opener’s manual for specific instructions tailored to your device.

Step-by-Step Guide

  1. Press and hold the reset button for 10 seconds.
  2. Release the button when the keypad’s lights start flashing.
  3. Enter a new code and press the “Enter” or “Set” button.

Follow these steps carefully for a successful reset, and enjoy hassle-free access to your garage.

Troubleshooting Tips

While resetting the keypad, you may encounter challenges. Fear not! Here are some common issues and their solutions:

Keypad Not Responding

If the keypad isn’t responding after the reset, check the battery and replace it if needed. Ensure the keypad is within the range of the garage door opener.

Forgotten Code

If you’ve forgotten your code, refer to your garage door opener’s manual or contact the manufacturer for guidance on code recovery.

Preventive Measures

Prevention is the key to avoiding frequent keypad issues. Perform regular maintenance checks, including cleaning the keypad and ensuring all buttons are functioning correctly.

Benefits of a Properly Functioning Keypad

A properly functioning garage door keypad offers more than just convenience. It enhances the security of your home by providing a keyless entry option, thwarting potential intruders.

User-Friendly Keypad Options

Explore modern keypad technologies that offer user-friendly features. From touch-sensitive keypads to wireless options, choose a keypad that suits your preferences and lifestyle.

Real-life Examples

To illustrate the effectiveness of a keypad reset, let’s delve into real-life examples. Readers share their experiences of successfully resetting their keypads, emphasizing the positive impact on their daily lives.

Conclusion:

In conclusion, a well-maintained and properly functioning Haslet Garage Door Repair is essential for a seamless entry experience. By understanding the basics, following the reset steps, and embracing preventive measures, you can ensure the longevity and reliability of your keypad. Don’t wait for issues to escalate; take action now for a worry-free access solution.

Haslet Gates & Garage Doors

817-482-3394

What are the Trends in Window Installation for 2023? – Window Replacement Experts Mckinney

As a homeowner who’s always looking for ways to enhance the comfort, energy efficiency, and aesthetics of my house, I’ve been following the evolving trends in window installation closely. Windows play a crucial role in defining the look and feel of a home, and their functionality can significantly impact daily life.

By following Window Replacement McKinney TX, I’ll share my first-person perspective on the exciting trends in window installation for 2023.

1. Energy Efficiency is Paramount

Energy efficiency has been a prominent trend in window installation for several years, and it’s not going away in 2023. I’ve learned that investing in energy-efficient windows is a smart move for long-term savings. The latest windows are designed with advanced technologies such as low-E coatings, multi-pane glazing, and insulating gas fills, all of which contribute to better insulation and reduced heating and cooling costs.

2. Smart and Automated Windows

Incorporating smart home technology into window systems is a trend I’ve eagerly embraced. Smart windows can be controlled remotely, allowing me to adjust the amount of natural light and ventilation in my home with just a few taps on my smartphone. This not only enhances convenience but also contributes to energy efficiency by optimizing indoor climate control.

3. Sustainable and Eco-Friendly Materials

Sustainability is a growing concern for many homeowners, myself included. Windows made from eco-friendly materials, such as sustainably sourced wood, fiberglass, and vinyl, are gaining popularity. I’ve discovered that these materials not only reduce the environmental impact but also offer excellent durability and insulation properties.

4. Versatile Window Styles

Window styles are evolving to meet diverse aesthetic preferences. In 2023, I’ve noticed an increased demand for versatile window designs that can seamlessly blend with various architectural styles. Whether you prefer the classic look of double-hung windows or the modern appeal of casement windows, there are options to suit your taste.

5. Large and Expansive Windows

The trend toward larger, more expansive windows continues in 2023. These oversized windows flood interiors with natural light and offer breathtaking views of the outdoors. Installing such windows can be transformative, making small spaces appear more spacious and creating a connection with the surrounding environment.

6. Dark-Colored Frames

Contrary to the traditional preference for light-colored window frames, dark-colored frames are gaining popularity. Dark frames create a striking contrast with the surrounding walls and draw attention to the views outside. I’ve found that this trend adds a touch of sophistication and elegance to the home’s interior and exterior.

7. Minimalist and Frameless Windows

Minimalist and frameless window designs are making a statement in modern architecture. These sleek and unobtrusive windows maximize views, emphasizing clean lines and simplicity. Although they may not be suitable for all homes, they can create a stunning focal point when appropriately integrated.

8. Privacy Solutions

As more homes are built in close proximity to one another, privacy is becoming a significant concern. I’ve observed that window manufacturers are offering innovative solutions, such as switchable glass and smart blinds, to address this issue. These features allow homeowners to control the level of privacy while maintaining an open and airy ambiance.

9. Soundproofing Technology

Noise pollution is an increasing concern for homeowners, especially those in urban areas. The incorporation of soundproofing technology in windows has become a trend I greatly appreciate. I’ve learned that these windows provide a peaceful indoor environment by blocking unwanted noise from the outside.

10. Impact-Resistant Windows

Living in an area prone to severe weather events, I’ve realized the importance of impact-resistant windows. These windows are designed to withstand strong winds and flying debris, providing an added layer of protection during storms. Impact-resistant windows are increasingly in demand, not only in hurricane-prone regions but also in areas susceptible to extreme weather conditions.

11. Customization Options

The ability to customize windows to suit individual preferences and architectural styles is a trend I’ve embraced. From selecting the frame color to choosing the type of glazing and hardware, customization options empower homeowners to create windows that align with their unique vision for their homes.

12. Increased Security Features

Enhanced security is a top priority for homeowners. The latest window installations feature advanced locking mechanisms, laminated or tempered glass, and reinforced frames, providing peace of mind and safeguarding against potential intruders.

13. Multi-Functional Windows

Windows are becoming multi-functional in 2023. I’ve noticed that manufacturers are offering options like windows with built-in blinds or shades. These windows not only enhance privacy but also offer convenience and energy efficiency benefits.

14. Window Restoration and Preservation

Preserving the historic charm of older homes is a trend that’s gaining traction. Rather than replacing old windows, homeowners are opting for restoration and preservation. This approach not only maintains the character of the home but also contributes to sustainability by reducing waste.

In conclusion, according to Window Replacement McKinney TX, 2023 brings a fascinating array of trends in window installation that cater to various needs and preferences. From energy efficiency and sustainability to customization and advanced technologies, there are options for every homeowner. Keeping up with these trends has allowed me to make informed decisions and create a more comfortable, stylish, and efficient living environment. Whether you’re building a new home or considering a window upgrade, these trends can help you make the right choices for your specific needs and lifestyle.

Window Replacement Experts Mckinney

9932 Prairie Dog Ln, McKinney, TX 75071, United States

972-895-8221

How To Reset Your Garage Door Remote – Bedford Gates & Garage Doors

Having a smoothly functioning Garage Door Repair Bedford TX is essential for the seamless entry and exit from your home.

One key component that ensures this convenience is the garage door remote. In this article, we’ll explore the intricacies of resetting your garage door remote, unraveling the mysteries behind its operation.

Understanding the Basics

A. Components of a Garage Door Remote

To comprehend the resetting process, it’s crucial to understand the basic components of a garage door remote. These typically include buttons for opening, closing, and sometimes additional functionalities like turning on lights.

B. Common Issues with Garage Door Remotes

Before diving into the reset procedure, let’s address common issues such as non-responsive buttons, intermittent signals, or a complete failure to operate.

Troubleshooting Techniques

A. Checking Batteries and Connections

The most common culprit behind a malfunctioning remote is often depleted batteries or loose connections. We’ll guide you through the steps of inspecting and replacing batteries and ensuring secure connections.

B. Resetting the Remote Code

For enhanced security, garage door remotes use unique codes to communicate with the opener. Learn how to reset this code to restore seamless functionality.

C. Verifying Range and Signal Strength

Sometimes, it’s not about the remote or the opener but the range and signal strength. Discover how to ensure optimal communication between the remote and the garage door opener.

Step-by-Step Guide to Resetting a Garage Door Remote

A. Locate the “Learn” Button on the Opener

The “Learn” button is the gateway to resetting your garage door remote. We’ll guide you on locating this button on your specific garage door opener.

B. Press and Hold the “Learn” Button

Learn the proper technique of pressing and holding the “Learn” button to initiate the reset process.

C. Press the Desired Button on the Remote

Following the initial steps, press the button on the remote that you wish to associate with the garage door.

D. Test the Remote

No guide is complete without a test run. We’ll provide insights on testing your newly reset remote to ensure it operates smoothly.

Additional Tips for Optimal Performance

A. Regular Maintenance of Garage Door and Remote

Explore the importance of periodic maintenance to keep both the garage door and remote in top-notch condition.

B. Upgrading to a Universal Remote

Consider the advantages of upgrading to a universal remote for compatibility with multiple garage door openers.

Advanced Troubleshooting

A. Dealing with Frequency Interference

Understand the nuances of frequency interference and how it can disrupt the communication between your remote and opener.

B. Consulting Professional Help

For complex issues beyond the scope of DIY troubleshooting, we’ll discuss the importance of seeking professional assistance.

The Future of Garage Door Technology

A. Smart Garage Door Openers

Delve into the world of smart technology and its integration with garage doors for enhanced functionality and security.

B. Integration with Home Automation Systems

Explore how garage doors are becoming an integral part of home automation systems, allowing for seamless control through various smart devices.

Conclusion:

In conclusion, resetting your Garage Door Repair Bedford TX is a manageable task with the right guidance. By understanding the basics, troubleshooting effectively, and exploring advanced options, you can ensure your garage door operates smoothly for years to come.

Bedford Gates & Garage Doors

817-886-3064

Low-Clearance Garage Door Installation: A Solution for Limited Space – Sanger Garage Door Experts

In the world of home improvements, we often find ourselves seeking innovative solutions to everyday challenges. As a homeowner, I’ve encountered my fair share of obstacles when it comes to maximizing space, and one of the most significant challenges I faced was installing a garage door in a limited clearance space.

By following Garage Door Repair Sanger TX , I’ll share my first-person perspective on low-clearance garage door installation and how it can be a game-changer for those dealing with space constraints.

The Dilemma of Limited Clearance

When my family and I moved into our current home, we were thrilled with the additional garage space. It was the perfect spot for storing not only our cars but also tools, sports equipment, and other belongings. However, this newfound storage space came with a significant limitation: limited overhead clearance. The standard garage door seemed impossible to install without sacrificing valuable storage space.

As I explored various solutions for this dilemma, I stumbled upon the concept of low-clearance garage doors. These doors are designed to fit in spaces with minimal headroom, making them an ideal solution for those facing clearance constraints.

Understanding Low-Clearance Garage Doors

Low-clearance, or low-headroom, garage doors are specially designed to operate efficiently in spaces with limited headroom above the door opening. They achieve this by using unique hardware and track systems that minimize the space required for the door to function smoothly.

One of the key components that enables low-clearance garage doors is the use of torsion springs positioned horizontally above the door, rather than the traditional vertical spring system. This design allows the door to roll up into a horizontal coil directly under the ceiling, significantly reducing the required clearance space.

Benefits of Low-Clearance Garage Doors

  1. Space Maximization: The primary advantage of low-clearance garage doors is their ability to maximize space in garages with low ceilings. These doors ensure that you can utilize the available overhead space to its full potential without compromising on safety or functionality.
  2. Versatility: Low-clearance doors are incredibly versatile and can be customized to suit your specific needs. Whether you have a single-car or double-car garage, these doors can be tailored to fit seamlessly, providing a customized and tailored solution.
  3. Ease of Operation: Despite their compact design, low-clearance garage doors operate smoothly and efficiently. The use of horizontal torsion springs ensures that the door opens and closes effortlessly, providing the convenience you expect from a standard garage door.
  4. Aesthetics: These doors are available in various styles and finishes, allowing you to choose a design that complements the overall aesthetics of your home. You don’t have to compromise on appearance to accommodate your limited clearance space.

My Experience with Low-Clearance Garage Doors

As someone who loves DIY home improvement projects, I decided to take on the challenge of installing a low-clearance garage door in my limited space. Here’s how it played out:

1. Assessment:

I began by assessing the available headroom in my garage. This involved measuring the distance between the top of the door opening and the ceiling to ensure that a low-clearance door would be a feasible option.

2. Professional Consultation:

Given the importance of safety and proper installation, I consulted with a professional garage door installer. They provided guidance on the best low-clearance door system for my specific needs and took precise measurements to ensure a perfect fit.

3. Customization:

The garage door was customized to my preferences, with options for style, color, and insulation. This allowed me to select a door that not only fit my space but also matched the overall look of my home.

4. Installation:

The installation process was swift and efficient. The use of horizontal torsion springs and specialized hardware ensured that the low-clearance door could operate smoothly in my confined space.

5. Space Transformation:

Once the low-clearance garage door was in place, I witnessed a remarkable transformation in my garage. The overhead space was fully utilized for storage, allowing me to keep my tools, outdoor gear, and other items neatly organized.

Conclusion

Overall, as stated in Garage Door Repair Sanger TX, low-clearance garage door installation has been a game-changer for those of us dealing with limited overhead space. It provides an effective and space-saving solution while maintaining the functionality and aesthetics we expect from a garage door. My experience with this installation has convinced me of its value, and I hope that by sharing my first-person perspective, other homeowners facing the same challenge will explore the benefits of low-clearance garage doors for themselves. Whether you have a single-car or double-car garage, a low-clearance door can open up a world of possibilities for maximizing your limited space.

Sanger Garage Door Experts

600 N Stemmons St, Sanger, TX 76266, United States

940-308-2092

Can I Repair my Garage Door Spring? – Coppell Gates & Garage Doors

As a homeowner, I’ve always been enthusiastic about tackling DIY projects around the house. From minor plumbing repairs to painting rooms, I’ve taken pride in my ability to handle various maintenance tasks. However, there are certain home repairs that require a significant level of expertise and safety precautions, and one such task that caught me off guard was the garage door spring repair.

In reference to Garage Door Repair Coppell TX, I’ll share my journey and insights into the question: “Can I repair my garage door spring?”

The Unexpected Issue

It all started on a seemingly ordinary day. I was getting ready to leave for work, pressed the button to open my garage door, and to my dismay, I heard a loud bang. The door struggled to open, and it was clear that something was amiss. After investigating, I found that one of the garage door springs had broken.

Step 1: Initial Assessment

The first step I took was to assess the extent of the damage. I’m no expert, but it was evident that the garage door spring was snapped in two. The door had become uneven, and the functioning was severely compromised.

My initial instinct was to consider a DIY approach. After all, I had successfully completed many home improvement projects in the past. However, I quickly realized that the garage door spring repair was not your average DIY task.

Step 2: Seeking Professional Advice

Understanding the gravity of the situation, I decided to contact a local garage door repair specialist. The technician arrived promptly, assessed the damage, and provided me with some crucial insights.

Here’s what I learned from the technician:

1. The Danger of Garage Door Springs:

The technician emphasized the inherent dangers associated with garage door springs. These springs are tightly wound, store a significant amount of energy, and can cause severe injuries or damage when mishandled.

2. The Importance of Balance:

A properly functioning garage door relies on a delicate balance between the two springs. When one spring breaks, it can throw this balance off, causing stress on the other components of the door.

3. Professional Expertise:

The technician explained that garage door spring repair is a specialized skill that requires training, knowledge, and specific tools. Attempting to repair or replace garage door springs without the necessary expertise can be extremely risky.

4. Safety Precautions:

The technician used protective gear and followed safety protocols while working on the garage door springs. He highlighted the significance of these precautions in preventing accidents.

Step 3: The Decision-Making Process

Given the technician’s insights and the potential risks involved, I faced a decision: should I attempt the garage door spring repair myself or entrust the task to a professional?

After careful consideration, I chose to have the technician repair the garage door spring. The primary reasons for this decision were:

1. Safety: The technician’s emphasis on safety and the potential hazards associated with garage door spring repair convinced me that the job should be handled by a professional.

2. Expertise: Garage door spring repair is a complex task that demands a deep understanding of the mechanics involved. Professionals have the expertise to carry out the repair efficiently and effectively.

3. Long-Term Reliability: By hiring a professional, I was confident that the repair would be of a high standard, ensuring the longevity and functionality of the garage door.

The Repair Process

The technician replaced the broken garage door spring with a new one. He meticulously calibrated the tension and ensured that the door was properly balanced. He also conducted a thorough inspection of the entire garage door system to confirm that there were no other issues.

Key Takeaways and Insights

My experience with the garage door spring repair taught me several important lessons:

1. Safety First: Safety should always be the top priority when dealing with garage door spring repairs. The risks associated with these springs are substantial, and any attempts to repair them should be approached with extreme caution.

2. Professional Expertise: Garage door spring repair is not a DIY project. Professionals have the knowledge, training, and tools to perform the repair safely and effectively.

3. Maintaining Balance: Garage door springs play a crucial role in maintaining the balance of the door. When one spring breaks, it’s essential to address the issue promptly to prevent further damage and ensure the door’s proper function.

4. Long-Term Reliability: Hiring a professional for the garage door spring repair ensures that the job is done correctly, promoting the long-term reliability of the garage door.

In conclusion, according to Garage Door Repair Coppell TX, the garage door spring repair experience was a stark reminder that some tasks around the house should be left to professionals. Safety, expertise, and the risk of further damage to the door are compelling reasons to opt for professional assistance. My journey into this complex repair left me with a greater appreciation for the specialized skills of garage door technicians and a heightened awareness of the importance of safety when dealing with potentially dangerous home maintenance tasks.

Coppell Gates & Garage Doors

755 Blue Jay Ln, Coppell, TX 75019, United States

972-449-7776

How Do I Reset My Garage Door Opener – Springtown Gates & Garage Doors

The hum of a well-functioning Springtown Garage Door Repair is synonymous with seamless living.

We all appreciate the ease it brings to our daily lives, but what happens when it starts acting up? This guide is your go-to resource for understanding the nuances of resetting a garage door opener.

Common Issues with Garage Door Openers

Garage door openers, like any mechanical device, can encounter issues. From erratic movements to strange noises, familiarize yourself with common problems to better navigate potential troubleshooting scenarios.

When to Consider Resetting

Knowing when to reset your garage door opener is crucial. We’ll explore signs that indicate a reset is necessary and provide insights on avoiding unnecessary resets that might disrupt your daily routine.

Step-by-Step Guide to Resetting a Garage Door Opener

Safety first! Before we dive into the reset process, let’s ensure we take necessary precautions. Then, we’ll guide you through the step-by-step process of resetting your garage door opener.

Understanding Garage Door Opener Technology

Garage door openers have evolved over the years. From traditional chain-driven models to sleek, smart openers, we’ll break down the technology behind these devices and explore recent advancements.

Troubleshooting Tips

Not all garage door opener issues require a complete reset. Discover simple DIY solutions for common problems, saving you time and effort.

Professional Help and When to Seek It

Some issues go beyond DIY solutions. Learn to recognize signs that it’s time to call in the professionals and why certified technicians are crucial for complex problems.

Routine Maintenance for Garage Door Openers

Prevention is the best medicine. We’ll provide practical tips for routine maintenance, ensuring your garage door opener operates at peak efficiency for years to come.

Choosing the Right Garage Door Opener

Looking to replace your current opener? Explore the factors to consider when purchasing a new one and the technological features that can enhance your overall experience.

Future Trends in Garage Door Opener Technology

What does the future hold for garage door openers? We’ll make predictions about upcoming advancements and discuss how technology might shape the future of garage security.

Real-life User Experiences

Embark on a journey with users who successfully reset their garage door openers. Gain insights from shared experiences and learn valuable lessons from those who’ve faced and conquered similar challenges.

Importance of Regular Testing

Don’t wait for a malfunction to test your garage door opener. Discover the importance of regular testing and how it ensures your opener is ready for any unexpected situation.

DIY Garage Door Opener Reset Kit

Explore the world of DIY reset kits available in the market. We’ll weigh the pros and cons, helping you make an informed decision about whether a kit is the right solution for you.

Conclusion:

In conclusion, a well-maintained Springtown Garage Door Repair is the unsung hero of our daily lives. By understanding the intricacies of resetting, troubleshooting, and maintaining these devices, you ensure a smooth and reliable experience.

Springtown Gates & Garage Doors

104 Adalida Ln, Springtown, TX 76082, United States

1-817-631-1036

Page 2 of 7

Powered by WordPress & Theme by Anders Norén