Local Services in Texas

Month: August 2023 Page 3 of 9

How To Adjust Garage Door Side Gap – Kokomo Overhead & Garage Doors

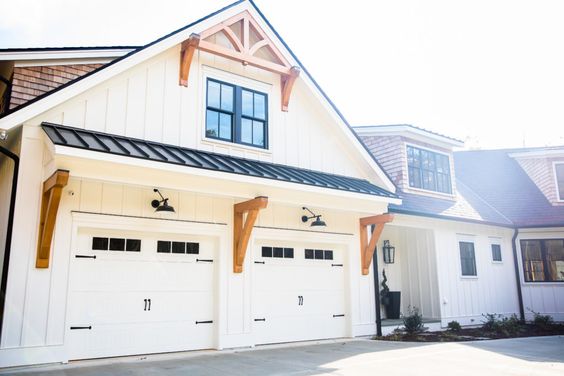
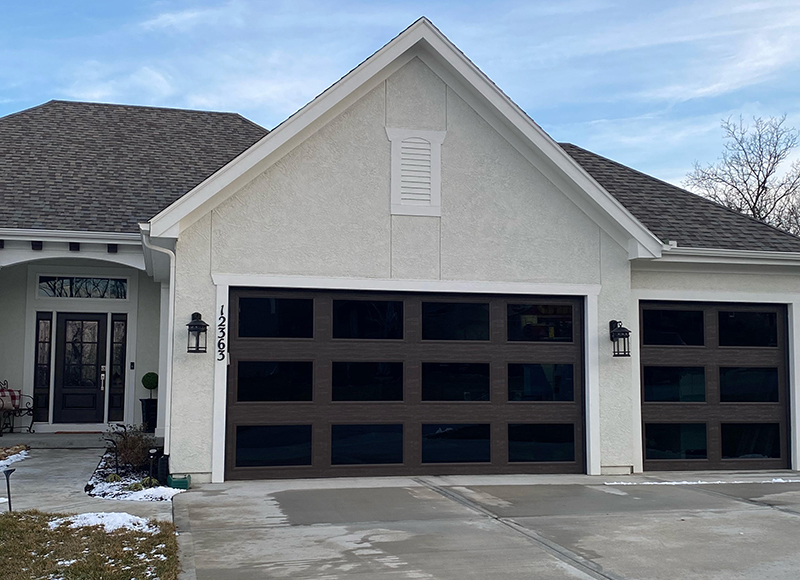
An uneven or inconsistent side gap on your Kokomo Overhead & Garage Doors can affect the appearance, security, and energy efficiency of your home. Adjusting the side gap requires careful adjustments to ensure proper alignment and functionality of the door.

Here’s a step-by-step guide on how to adjust the side gap of your garage door:

1. Safety Precautions:

  • Before attempting any adjustments, ensure your garage door is in good working condition and disconnect the power to the garage door opener to prevent accidental activation.

2. Gather Tools:

  • You’ll need a tape measure, level, wrenches, and possibly a rubber mallet for adjustments.

3. Inspect the Gap:

  • Examine both sides of the garage door to determine the extent of the gap and whether it’s consistent along the entire height of the door.

4. Adjust the Track Mounting Bolts:

  • Start by checking the track mounting bolts on both sides of the garage door. These bolts secure the vertical tracks to the wall. If the gap is wider at the top, loosen the bolts and tap the top of the track inward using a rubber mallet. If the gap is wider at the bottom, tap the bottom of the track outward. Tighten the bolts once the track is aligned.

5. Check Vertical Alignment:

  • Use a level to ensure that the vertical tracks are plumb. Adjust them as needed by tapping them with a rubber mallet until they are perfectly vertical.

6. Adjust Hinges and Rollers:

  • Misaligned hinges or rollers can also cause uneven gaps. Inspect the hinges and rollers on both sides of the door. If any are misaligned, loosen the bolts holding them in place, adjust them, and then tighten the bolts again.

7. Balance the Door:

  • An imbalanced door can lead to uneven gaps. Check the balance of the door by disconnecting it from the opener and manually opening it halfway. The door should remain in place. If it moves up or down, the springs need adjustment. Consult a professional if you’re not comfortable adjusting garage door springs.

8. Inspect Weather Stripping:

  • Ensure that the weather stripping on both sides of the door is properly aligned and in good condition. Adjust or replace it if necessary to achieve a consistent seal.

9. Test the Door:

  • After making adjustments, test the garage door’s operation by opening and closing it multiple times to ensure it moves smoothly and evenly.

10. Fine-Tuning:

  • Small adjustments may be necessary to achieve the desired side gap. Make minor changes and test the door’s operation after each adjustment.

11. Professional Help:

  • If you’re unsure about any aspect of the adjustment process, or if the problem persists after your attempts, it’s recommended to consult a professional garage door technician. Adjusting a garage door requires knowledge and expertise to ensure proper alignment and safe operation.

12. Regular Maintenance:

  • Regularly inspect and maintain your garage door to prevent issues like uneven gaps from occurring in the first place. Lubricate moving parts, check for wear and tear, and address any problems promptly.

Conclusion:

Adjusting the side gap of your Kokomo Overhead & Garage Doors requires careful attention to detail and precision. By following these steps, you can achieve a properly aligned and functional garage door that enhances the appearance and performance of your home. If you’re uncertain about any aspect of the adjustment process, it’s best to seek professional assistance to ensure safety and effectiveness.

Kokomo Overhead & Garage Doors

1910 Valerie Ct, Kokomo, IN 46902, United States

1-765-945-2524

How To Pop Dents Out Of Aluminum Garage Door – Arlington Overhead & Garage Doors

Aluminum Arlington Overhead & Garage Doors are susceptible to dents from various sources, such as impacts from vehicles, bicycles, or even severe weather conditions. Fortunately, you can often pop out minor dents in aluminum garage doors using a few simple tools and techniques.

Here’s a step-by-step guide on how to pop dents out of an aluminum garage door:

1. Assess the Damage:

  • Examine the dented area to determine the size and severity of the dent. Minor dents with no creases or paint damage are the best candidates for this DIY repair.

2. Gather Your Tools:

  • Rubber mallet or wooden block
  • Heat gun or hair dryer (optional)
  • Dry ice (optional)
  • Clean cloth
  • Boiling water (if using the heat method)

3. Choose a Method:

  • There are a few methods you can use to pop out dents from an aluminum garage door:
  • Method 1: Heat and Cold Method (for smaller dents):
    • Heat the dented area using a heat gun or hair dryer. Keep the heat moving to avoid damaging the paint.
    • After heating, immediately apply dry ice to the dent. The rapid change in temperature can cause the metal to contract and pop the dent out.
  • Method 2: Boiling Water Method (for larger dents):
    • Boil a pot of water and carefully pour it over the dented area. The heat will cause the aluminum to expand.
    • Once the area is hot, press a clean cloth against the dent and use your palm to push the dent out from the back of the door.
  • Method 3: Mallet and Wooden Block Method:
    • This method is suitable for minor dents that haven’t caused creases in the metal.
    • Place a wooden block or a thick piece of rubber over the dent to protect the surface of the door.
    • Gently tap the block with a rubber mallet. Start with light taps and gradually increase the force until the dent begins to pop out.

4. Apply Pressure Gradually:

  • Whichever method you choose, apply pressure gradually and with control. Avoid using excessive force, as this can cause further damage to the door.

5. Check Your Progress:

  • After attempting to pop out the dent, step back and evaluate your progress. If the dent hasn’t fully popped out, you may need to repeat the process.

6. Finish and Clean Up:

  • Once the dent is mostly or fully popped out, use a clean cloth to wipe off any residue from the methods you used.

7. Assess the Results:

  • Stand back and assess the results. If the dent is significantly improved but not fully gone, you can decide whether to attempt the process again or consult a professional for further repairs.

8. Prevent Future Dents:

  • To prevent future dents, consider installing protective padding or guards near potential impact points. Be cautious when using tools or equipment near the garage door, and remind family members to be mindful of their surroundings.

9. Consult a Professional:

  • For larger or more severe dents, or if you’re not comfortable attempting the repair yourself, it’s wise to consult a professional garage door technician. They have the expertise and tools to address more complex dent issues.

Conclusion:

Popping out minor dents from an aluminum Arlington Overhead & Garage Doors can be a satisfying DIY project. Depending on the size and severity of the dent, you can choose from different methods involving heat, cold, or pressure. Remember to exercise caution and avoid causing additional damage. If you’re unsure about the repair process or the dent is more severe, consider seeking help from a professional garage door technician to ensure the door is properly restored to its original condition.

Arlington Overhead & Garage Doors

700 Secretary Dr, Arlington, TX 76015, United States

1-817-646-2532

How To Erase Mercedes Garage Door Opener – Haslet Gates & Garage Doors

Erasing a Mercedes-Benz Haslet Gates & Garage Doors opener code is a simple process that involves clearing the programmed code from your vehicle’s memory. This can be useful if you no longer want the vehicle to have access to your garage door.

Here’s a step-by-step guide on how to erase a Mercedes garage door opener code:

Materials You’ll Need:

  • Mercedes-Benz vehicle
  • Owner’s manual (for specific instructions)
  • Garage door remote control (optional, for testing)

Step-by-Step Guide:

1. Locate the Garage Door Opener Buttons:

  • In your Mercedes-Benz vehicle, locate the buttons typically used for programming the garage door opener. These buttons are usually located on the rearview mirror, sun visor, or overhead console. They are often labeled with icons representing garage doors.

2. Open the Garage Door Opener Programming Section:

  • Consult your vehicle’s owner’s manual to find the specific procedure for accessing the garage door opener programming section. This may involve pressing and holding specific buttons or following a combination of steps.

3. Enter Programming Mode:

  • Follow the instructions in your owner’s manual to enter the programming mode for the garage door opener. This mode allows you to access and modify the codes stored in the vehicle.

4. Locate the Erase or Clear Option:

  • Within the garage door opener programming section, look for an option to erase or clear the programmed codes. This option may be labeled as “Erase,” “Clear,” “Delete,” or something similar.

5. Confirm the Erasure:

  • When prompted, confirm that you want to erase the programmed codes. Be sure to double-check that you are erasing the correct code, as this action cannot be undone.

6. Exit Programming Mode:

  • Once you’ve confirmed the erasure of the garage door opener code, exit the programming mode according to the instructions in your owner’s manual.

7. Test the Erasure (Optional):

  • To confirm that the code has been successfully erased, test the garage door opener to see if the Mercedes-Benz vehicle can still open the door. If the code was erased successfully, the vehicle should no longer have access.

8. Retain the Owner’s Manual:

  • Keep your vehicle’s owner’s manual in a safe place for future reference. It contains valuable information about programming and operating various features in your Mercedes-Benz.

9. Seek Professional Help (if needed):

  • If you encounter difficulties during the erasure process or if the code doesn’t seem to be erased, consider seeking assistance from a Mercedes-Benz dealership or a certified technician.

Conclusion:

Erasing a Mercedes Haslet Gates & Garage Doors opener code is a straightforward process that involves following the steps outlined in your vehicle’s owner’s manual. By accessing the garage door opener programming section, locating the erasure option, and confirming the action, you can successfully remove the programmed code from your vehicle’s memory. Always refer to your owner’s manual for specific instructions and guidelines related to programming and erasing garage door opener codes for your particular Mercedes-Benz model.

Haslet Gates & Garage Doors

817-242-5042

How To Connect Car To Genie Garage Door Opener – Bedford Gates & Garage Doors

Connecting your car to a Genie Bedford Gates & Garage Doors opener allows you to operate the garage door using your car’s built-in garage door opener buttons or a compatible remote control system. To do this, you’ll need to follow a few steps to program your car with the Genie garage door opener.

Here’s a step-by-step guide on how to connect your car to a Genie garage door opener:

Materials You’ll Need:

  • Genie garage door opener remote control
  • Vehicle owner’s manual
  • Step stool or ladder (if needed)
  • Safety goggles and gloves

Step-by-Step Guide:

1. Check Compatibility:

  • Before proceeding, make sure that your Genie garage door opener is compatible with the remote control system in your car. Refer to your garage door opener’s manual to determine compatibility.

2. Gather Information:

  • Collect your Genie garage door opener remote control and your vehicle owner’s manual. The vehicle owner’s manual will provide specific instructions on how to program the garage door opener buttons in your car.

3. Locate the Garage Door Opener Button in Your Car:

  • Your vehicle’s built-in garage door opener button is usually located on the rearview mirror, sun visor, overhead console, or in a dedicated compartment in the interior.

4. Clear Existing Codes (if needed):

  • If you’re reprogramming the garage door opener button in your car, you may need to clear any existing codes first. Refer to your vehicle’s owner’s manual for instructions on how to do this.

5. Open the Vehicle’s Owner’s Manual:

  • Follow the instructions in your vehicle’s owner’s manual to program the garage door opener button. This will involve a combination of button presses and sequences that vary depending on the car’s make and model.

6. Genie Garage Door Opener Remote:

  • Locate the “Learn” button on your Genie garage door opener. This button is usually located on the motor unit, which is attached to the ceiling of the garage.

7. Press the “Learn” Button:

  • Stand on a step stool or ladder if necessary to reach the Genie garage door opener motor unit. Press the “Learn” button, and an indicator light on the motor unit will start blinking.

8. Program the Car’s Garage Door Opener Button:

  • Following the instructions in your vehicle’s owner’s manual, press and hold the garage door opener button in your car. You may need to press it multiple times or hold it for a specific duration.

9. Test the Connection:

  • After programming the car’s garage door opener button, press it to test if it works. The garage door should open or close based on the button’s configuration.

10. Repeat for Other Buttons (if needed):

  • If your car has multiple garage door opener buttons, repeat the process to program each button with the Genie garage door opener.

11. Final Checks:

  • Test each programmed button multiple times to ensure consistent operation. If there are issues, refer to your vehicle’s owner’s manual or contact the manufacturer for troubleshooting.

12. Seek Professional Help (if needed):

  • If you encounter difficulties during the programming process or if your vehicle’s garage door opener system is not responding as expected, consider seeking help from a professional or your car dealership’s service center.

Conclusion:

Connecting your car to a Genie Bedford Gates & Garage Doors opener involves following the specific programming instructions provided in your vehicle’s owner’s manual. By following these steps and using the Genie garage door opener remote control, you can conveniently operate your garage door from the comfort of your car. Always refer to your vehicle’s owner’s manual for accurate and model-specific instructions on how to connect your car to the garage door opener.

Bedford Gates & Garage Doors

2201 Harwood Rd, Bedford, TX 76021, United States

1-817-886-3064

How To Adjust An Uneven Garage Door – Springtown Gates & Garage Doors

An uneven Springtown Gates & Garage Doors can cause operational issues, aesthetic concerns, and potential safety hazards. Adjusting an uneven garage door involves diagnosing the cause of the imbalance and making necessary adjustments to the components that affect the door’s alignment. Depending on the type of garage door you have—such as a sectional door or a single-piece door—the steps to adjust it may vary.

Here’s a comprehensive guide to help you understand how to adjust an uneven garage door:

Diagnosing the Issue:

  1. Visual Inspection: Begin by observing the garage door’s alignment from both the inside and outside. Look for any gaps, misalignment, or irregularities along the sides and bottom of the door.
  2. Check for Obstructions: Make sure there are no obstructions, debris, or items interfering with the door’s movement along the tracks.
  3. Examine Components: Inspect the door’s rollers, tracks, hinges, cables, and springs for signs of wear, damage, or misalignment.

Adjusting an Uneven Garage Door:

Note: The following steps are general guidelines. Consult your garage door’s manual and follow manufacturer recommendations for your specific door type.

For Sectional Garage Doors:

  1. Check Track Alignment: Ensure that the tracks on both sides of the door are properly aligned and parallel to each other. Use a level to verify their alignment.
  2. Tighten Loose Hardware: Check and tighten any loose bolts, nuts, or screws on the tracks, hinges, rollers, and other components.
  3. Adjust Roller Positions: If the door is higher on one side, you may need to adjust the roller positions. Loosen the roller brackets on the uneven side and carefully adjust the roller position up or down as needed. Retighten the brackets.
  4. Check Spring Balance: An imbalanced garage door could be due to a problem with the torsion springs. If the springs are damaged or not properly tensioned, the door may be uneven. Adjusting or replacing springs requires experience and specialized tools, so it’s best to consult a professional technician.

For Single-Piece Garage Doors:

  1. Examine Hinges and Hardware: Inspect the hinges, rollers, and hardware on the door for any signs of wear or misalignment. Tighten loose components.
  2. Adjust Hinge Positions: If the door is uneven, you can adjust the hinge positions to correct the alignment. Loosen the hinge screws slightly and move the hinges up or down as needed. Retighten the screws.
  3. Check Cable Tension: Single-piece garage doors usually have extension springs and cables. Check the tension of the cables on both sides and adjust them equally to ensure balanced lifting.

Testing the Adjustments:

  1. Operate the Door: Test the garage door’s operation multiple times to ensure it moves smoothly along the tracks without binding or sticking.
  2. Balance Test: Perform a balance test by manually opening the door halfway. The door should stay in place without falling or rising on its own. If it moves, the springs may need adjustment.

Safety Considerations:

  1. Caution: Adjusting garage door components, especially springs, can be dangerous. Torsion springs store a significant amount of tension and should only be adjusted by experienced professionals.
  2. Professional Assistance: If you’re unsure about making adjustments or encounter difficulties, it’s recommended to seek assistance from a professional garage door technician. They have the expertise and tools to safely adjust and repair garage doors.

Conclusion:

Adjusting an uneven Springtown Gates & Garage Doors involves diagnosing the cause of the imbalance and making necessary adjustments to components such as tracks, rollers, hinges, springs, and cables. It’s important to perform careful inspections, follow manufacturer guidelines, and prioritize safety. While some adjustments can be done by homeowners, more complex tasks, such as adjusting springs, are best left to professional garage door technicians. A balanced and properly aligned garage door ensures smooth operation, enhances safety, and prolongs the lifespan of the door and its components.

Springtown Gates & Garage Doors

104 Adalida Ln, Springtown, TX 76082, United States

1-817-631-1036

How Does A Screw Drive Garage Door Opener Work – Shelbyville Gates & Garage Doors

A screw drive Shelbyville Gates & Garage Doors opener is a type of garage door opener mechanism that uses a threaded metal rod (screw) to lift and lower the garage door. This type of opener is known for its durability, minimal maintenance requirements, and smooth operation. It operates using a motor that turns the threaded rod, which, in turn, moves a trolley along the length of the rod to open and close the garage door.

Here’s a comprehensive explanation of how a screw drive garage door opener works:

Components of a Screw Drive Garage Door Opener:

  1. Motor Unit: The motor unit is the heart of the screw drive opener system. It houses the motor, gears, and other necessary components to generate the power needed to operate the garage door.
  2. Threaded Rod: The threaded rod is a long metal rod with helical threads that resemble those of a screw. It is positioned vertically above the garage door and is attached to the motor unit.
  3. Trolley: The trolley is a carriage-like device that runs along the length of the threaded rod. It is connected to the garage door itself through an arm or linkage. The trolley moves along the threaded rod as it turns, causing the garage door to open and close.
  4. Rail or Channel: The rail or channel is a track attached to the ceiling of the garage. It provides guidance and support for the trolley as it moves along the threaded rod.

How a Screw Drive Garage Door Opener Works:

  1. Opening the Garage Door: a. Motor Activation: When you press the button on your remote control or wall-mounted keypad, the motor in the motor unit is activated. b. Motor Rotation: The motor’s rotational motion is transferred to the threaded rod through a set of gears. As the motor turns, it rotates the threaded rod. c. Trolley Movement: The trolley is engaged with the threaded rod’s helical threads. As the rod turns, it pushes or pulls the trolley along its length, depending on the direction of rotation. d. Arm Movement: The trolley is connected to an arm or linkage, which is in turn connected to the garage door. As the trolley moves along the threaded rod, it pulls the garage door upward along the rail. e. Opening Completion: As the trolley reaches the end of the threaded rod or its designated stopping point, the garage door fully opens. The motor is then deactivated, and the door remains in the open position until you choose to close it.
  2. Closing the Garage Door: a. Motor Activation: When you press the button to close the garage door, the motor is once again activated. b. Motor Rotation: The motor’s rotation is reversed, causing the threaded rod to turn in the opposite direction. c. Trolley Movement: The trolley moves along the threaded rod in the opposite direction, pushing the garage door downward. d. Arm Movement: The garage door arm or linkage follows the trolley’s movement, gradually lowering the garage door. e. Closing Completion: As the trolley reaches the bottom of the threaded rod or its designated stopping point, the garage door fully closes. The motor is then deactivated, and the door remains closed until the next opening cycle.

Advantages of a Screw Drive Garage Door Opener:

  1. Durability: Screw drive openers have fewer moving parts compared to chain or belt drive openers, making them less susceptible to wear and tear.
  2. Minimal Maintenance: Screw drive openers require less maintenance since they don’t have chains or belts that need regular lubrication or replacement.
  3. Smooth Operation: The helical design of the threaded rod provides smooth and quiet operation, with fewer vibrations and jerky movements.
  4. Noisy Reduction: Screw drive openers are generally quieter than chain drive openers due to their design and lack of metal-on-metal contact.

Considerations and Maintenance:

  • While screw drive openers offer durability and less maintenance, they may not be suitable for areas with extreme temperature fluctuations, as temperature changes can affect the opener’s performance.
  • Regular lubrication of the threaded rod and trolley’s moving parts can help maintain smooth operation and extend the lifespan of the opener.
  • If you experience any issues with your screw drive garage door opener, such as grinding noises, irregular movements, or failure to open or close, it’s recommended to consult the manufacturer’s manual or seek professional assistance for diagnosis and repairs.

Conclusion:

A screw drive Shelbyville Gates & Garage Doors opener uses a threaded metal rod and a trolley to open and close the garage door. The motor’s rotation drives the trolley’s movement along the rod, which in turn operates the garage door. This mechanism offers durability, minimal maintenance, and smooth operation, making it a popular choice for homeowners seeking a reliable and long-lasting garage door opener solution.

Shelbyville Gates & Garage Doors

1567 Greenland Park Cir, Shelbyville, KY 40065

502-513-6328

Steel vs. Aluminum Garage Doors: Which is Right for You? – Redlands Garage Door & Gates

Being a homeowner, I know that choosing the right garage door is a decision that can’t be taken lightly. The battle between steel and aluminum often takes center stage, with each material having its own set of pros and cons. As someone who values durability, aesthetics, and functionality, I fully understand the importance of making an informed choice.

I’ll delve into the factors that set steel and aluminum garage doors apart, helping you determine which material is the perfect fit for your specific needs and preferences according from Garage Door Near Me.

Durability Showdown: Steel vs. Aluminum

Steel Garage Doors: A Fortress of Strength

Steel is synonymous with strength and longevity, making it an excellent contender for garage doors that need to stand up to years of wear and tear. Constructed from thick, galvanized steel panels, these doors are designed to resist dents and dings with remarkable efficiency. This sturdiness is especially beneficial for homeowners living in regions prone to severe weather conditions, as steel doors offer reliable protection against impacts from hail, debris carried by strong winds, and more.

However, it’s important to remember that steel can be vulnerable to rust if not properly cared for. Many modern steel garage doors are treated with protective coatings, such as zinc or polymer, to ward off rust and corrosion. Regular maintenance, including timely repainting, goes a long way in extending the lifespan of a steel garage door.

Aluminum Garage Doors: Lightweight and Resistant to Rust

Aluminum garage doors shine due to their lightweight nature and rust resistance. The material naturally fends off corrosion, making it a top choice for regions with coastal or humid climates, where salty air could otherwise wreak havoc on other materials. Aluminum doors sport a sleek appearance and modern aesthetic, which can add a contemporary touch to the overall look of your home’s exterior.

However, it’s worth noting that while aluminum doesn’t rust, it may not be as intrinsically robust as steel. Opting for thicker gauge aluminum panels can help alleviate this concern, although they might not offer the same level of impact resistance as their steel counterparts. Additionally, aluminum doors might be susceptible to dents and dings, which is something to consider if your garage door faces potential impacts.

Selecting Based on Aesthetic Appeal

Steel Garage Doors: A Palette of Design Possibilities

Steel garage doors open the door to a wide range of design options, allowing you to choose a style that harmonizes with your home’s architectural style and your personal taste. Whether you’re drawn to traditional raised-panel designs or contemporary flush-panel options, steel doors come in diverse styles, colors, and finishes. They can be painted to match your home’s color scheme, resulting in a cohesive integration with your overall exterior design.

Aluminum Garage Doors: The Allure of Modern Elegance

Aluminum garage doors are celebrated for their modern and minimalist aesthetic. Often showcasing clean lines and sleek finishes, these doors can lend a sophisticated and contemporary vibe to your home’s exterior. If you’re aiming for a chic and trendy appearance, aluminum garage doors can be an excellent addition.

Deciding Based on Maintenance

Steel Garage Doors: A Bit More Attention

Steel garage doors may require more regular maintenance compared to aluminum doors due to their susceptibility to rust. Regularly inspecting for any signs of rust or damage and addressing them promptly is crucial to extending the life of your steel door. Timely repainting can also help prevent rust and maintain the door’s appearance.

Aluminum Garage Doors: The Low Maintenance Advantage

Aluminum garage doors are celebrated for their low maintenance requirements. Their inherent resistance to rust eliminates the need for regular repainting or surface treatments. Occasional cleaning with mild soap and water is typically enough to keep aluminum doors looking their best.

Considering Energy Efficiency

Both steel and aluminum garage doors can be insulated to enhance energy efficiency. Insulated garage doors help regulate the temperature inside the garage, creating a more comfortable environment and potentially reducing energy costs. When evaluating energy efficiency, it’s essential to take into account the insulation properties of the specific garage door models you’re interested in.

Weighing the Cost

The cost of steel and aluminum garage doors can vary based on factors such as design, insulation, and manufacturer. Generally, aluminum doors tend to be pricier than steel doors. While the initial higher cost of aluminum can be offset by its resistance to rust and lower maintenance needs, steel doors can offer a budget-friendly option without compromising on durability.

Ultimately, the decision between steel and aluminum garage doors hinges on your unique priorities and circumstances. If you value strength and impact resistance, especially in regions prone to severe weather, steel might be the way to go. On the flip side, if rust resistance and a sleek modern aesthetic are your key considerations, aluminum could be the perfect match.

Overall, based from Garage Door Near Me, factors like your local climate, desired design, maintenance preferences, and budget should all play a role in your decision-making process. Both steel and aluminum garage doors bring distinct advantages that can elevate your home’s curb appeal, functionality, and overall value. As a homeowner who comprehends the significance of a well-chosen garage door, I’m confident that a thoughtful analysis of these factors will lead you to the optimal garage door material for your home.

Redlands Garage Door & Gates

1255 Devon Pl #7, Redlands, CA 92374, United States

909-675-1732

What Does A Garage Door Cost – Anderson Gates & Garage Doors

The cost of a Garage Door Repair Anderson IN can vary widely based on a multitude of factors, including the material, size, design, insulation, additional features, brand, and location. When considering the cost of a garage door, it’s essential to weigh these factors to make an informed decision that aligns with your budget and preferences.

Here’s a comprehensive guide to help you understand the various elements that contribute to the cost of a garage door:

1. Material:

Garage doors come in various materials, each with its own price range:

  • Steel: Steel doors are commonly chosen for their durability and affordability. They can start at around $500 for a basic single-car door and go up to $2,000 or more for high-end insulated steel doors.
  • Wood: Wooden garage doors offer a classic and elegant look. Basic wood doors can start around $1,000 to $2,000, while custom designs and premium wood types can range from $3,000 to $10,000 or more.
  • Aluminum: Aluminum doors are lightweight and resistant to rust. They typically start around $1,000 to $2,500.
  • Fiberglass: Fiberglass doors are durable and offer the appearance of wood without the maintenance. They can start around $1,000 to $2,500.
  • Vinyl: Vinyl doors are low-maintenance and resistant to dents and rust. They usually start around $800 to $2,500.

2. Size:

The size of the garage door significantly influences the cost. Single-car doors are generally less expensive than double-car doors due to the difference in materials and manufacturing.

  • Single-Car Door: Basic single-car garage doors can start around $500 to $800. Custom designs and high-quality materials can increase the cost.
  • Double-Car Door: Basic double-car garage doors may start around $800 to $1,500. Larger sizes and advanced features can lead to higher prices.

3. Design and Style:

The design and style of the garage door, including panels, windows, and decorative elements, impact the cost:

  • Basic Design: A simple, non-insulated garage door with minimal design elements will be more affordable.
  • Custom Design: Custom designs, unique panel layouts, and decorative hardware can increase the cost significantly.

4. Insulation:

Insulated garage doors provide better temperature control and energy efficiency. Insulation adds to the cost, but it can be a valuable investment in the long run:

  • Non-Insulated: Non-insulated garage doors are more budget-friendly and start around $500 to $800.
  • Insulated: Insulated doors start around $800 to $1,500 for basic designs. High-end insulated doors can range from $1,500 to $3,500 or more.

5. Additional Features:

  • Windows: Windows can enhance the appearance of the garage door but will add to the cost. Prices vary based on the number and style of windows.
  • Hardware: Decorative handles, hinges, and other hardware options can increase the overall cost.
  • Smart Features: Garage doors with smart technology and remote access capabilities tend to have higher price points.

6. Brand and Quality:

Well-known and reputable garage door brands may have higher prices due to their quality and reliability.

7. Location:

Costs can vary based on your geographical location and local market conditions.

8. Installation:

The cost of installation should be factored in as well. Professional installation ensures proper operation and safety.

Conclusion:

The cost of a Garage Door Repair Anderson IN can range from a few hundred dollars for a basic non-insulated steel door to several thousand dollars for a custom-designed, insulated wood door with advanced features. It’s crucial to carefully consider your preferences, budget, and requirements before making a decision. Research different materials, designs, brands, and additional features to determine the best garage door option for your home. Obtaining multiple quotes and consulting with garage door professionals can help you make an informed choice that enhances the curb appeal, functionality, and value of your property.

Anderson Gates & Garage Doors

2007 McKinley St, Anderson, IN 46016, United States

1-463-217-0904

Why Is My Garage Door Opening On Its Own – Murphy Gates & Garage Doors

Experiencing a Garage Door Repair Murphy TX that opens on its own can be concerning and potentially unsafe. There are several potential causes for this issue, ranging from technical malfunctions to environmental factors. Identifying the cause is crucial for addressing the problem and ensuring the security of your property.

Here’s a comprehensive guide on why your garage door may be opening on its own:

Step 1: Safety Precautions

  1. Disconnect Power: To prevent any further unexpected openings, disconnect the power to the garage door opener.

Step 2: Potential Causes and Solutions

  1. Remote Interference: Sometimes, nearby electronic devices or radio frequencies can interfere with the signals of your garage door opener, causing it to open unexpectedly.
  • Solution: Check if any new electronic devices have been introduced near the garage door opener. Move or remove any potential sources of interference. You might also consider reprogramming your remote controls to ensure they are functioning properly.
  1. Faulty Remote Control: A malfunctioning remote control or keypad could be sending intermittent signals to the garage door opener.
  • Solution: Replace the batteries in your remote controls and keypad. If the issue persists, try reprogramming the remote controls and keypad. If that doesn’t work, consider replacing the remote control or keypad.
  1. Worn or Damaged Wiring: Damaged wiring in the opener’s control circuit can lead to unexpected openings.
  • Solution: Inspect the wiring for any signs of wear, damage, or fraying. If you notice any issues, contact a professional garage door technician to repair or replace the wiring.
  1. Short Circuit or Electrical Issues: A short circuit or other electrical problems within the garage door opener’s circuitry can cause it to malfunction.
  • Solution: If you suspect an electrical issue, it’s advisable to consult a professional electrician or garage door technician to diagnose and fix the problem.
  1. Remote Signal Repetition: If your garage door opener receives repeated signals from a remote control (for example, if a button is stuck), it can cause the door to open unexpectedly.
  • Solution: Check the remote controls for any stuck buttons. If necessary, discontinue using the remote control until the issue is resolved.
  1. Keypad Malfunction: A malfunctioning keypad can also send incorrect signals to the garage door opener.
  • Solution: Check the keypad for any physical damage or stuck buttons. Reprogram the keypad according to the manufacturer’s instructions.
  1. Programming Errors: Incorrect programming of the opener or remotes can result in unexpected openings.
  • Solution: Double-check that all remote controls and keypads are programmed correctly according to the manufacturer’s instructions.
  1. Neighbor’s Opener: Sometimes, the signals from a neighbor’s garage door opener can inadvertently open your garage door if they are on the same frequency.
  • Solution: Change the frequency or code of your garage door opener to prevent interference from neighboring openers.
  1. Opener Malfunction: In some cases, the garage door opener itself may have a malfunction that is causing it to open on its own.
  • Solution: If you’ve exhausted all other troubleshooting steps and the issue persists, contact a professional garage door technician to inspect and repair the opener.

Step 3: Consult Professional Help

  1. Seek Expert Assistance: If you’re unable to determine the cause of the unexpected openings or if the issue continues despite your efforts, contact a professional garage door technician. They have the expertise to diagnose and address more complex problems.

In conclusion, a Garage Door Repair Murphy TX opening on its own can be due to various factors, including interference, remote control issues, wiring problems, and more. By identifying the cause and taking appropriate measures, you can address the issue and ensure the safety and security of your property. If you’re unsure or unable to resolve the problem yourself, consulting a professional technician is recommended to ensure a proper diagnosis and solution.

Murphy Gates & Garage Doors

223 FM 544 #16, Murphy, TX 75094

469-425-7816

How Can I Make Sure My Garage Door Is Closed – Garage Door Wizard

Ensuring that your Garage Door Repair Cypress TX is securely closed is crucial for the safety and security of your home.

While modern garage door openers often come with safety features and sensors, taking additional steps to verify the closure provides peace of mind. Here’s a comprehensive guide on how to make sure your garage door is closed:

1. Visual Confirmation: The simplest method is to visually confirm that the garage door is fully closed. Stand inside your garage or at a vantage point where you can clearly see the door. Verify that it is flush with the ground and securely in place.

2. Install a Garage Door Monitor: A garage door monitor is a device that provides real-time status updates on your garage door. It can be integrated into your smart home system, sending alerts to your smartphone when the door is open or closed. This technology adds an extra layer of assurance.

3. Use a Security Camera: Install a security camera in your garage to visually monitor the status of the door. Many modern cameras allow remote viewing through smartphone apps, enabling you to check the garage door status from anywhere.

4. Implement Smart Home Integration: Integrate your garage door opener with a smart home system. Smart garage door openers often offer features like remote monitoring and control through smartphone apps. You can receive notifications and remotely close the door if needed.

5. Upgrade to a Smart Garage Door Opener: If your current garage door opener doesn’t have smart features, consider upgrading to a smart garage door opener. These systems provide advanced monitoring capabilities and often include security features like automatic closure and alerts.

6. Use a Garage Door Timer: Some garage door openers come with built-in timer features. Set a timer to automatically close the garage door after a specific period, providing an added layer of security in case you forget to do so manually.

7. Attach a Reminder Sign: Place a visual reminder, such as a sign or sticker, near the entrance to your home. This can serve as a quick visual cue to check and ensure that the garage door is closed before leaving or going to bed.

8. Develop a Closing Routine: Establish a closing routine to make sure the garage door is closed every time. This may include visually checking the door, listening for the closing sound, or confirming closure through a monitoring device.

9. Install a Garage Door Sensor: Garage door sensors, placed at the bottom of the door, can detect whether the door is fully closed. If the sensor doesn’t receive a signal indicating closure, it can trigger an alert or notification.

10. Utilize Home Automation Rules: If you have a home automation system, create rules that automatically check and close the garage door at specific times or when certain conditions are met. This adds an automated layer of security to the process.

11. Regular Maintenance Checks: Perform regular maintenance checks on your garage door and opener. Inspect the hardware, including springs, tracks, and sensors, for any signs of wear or malfunction. Address issues promptly to ensure reliable operation.

12. Use a Backup Power Source: In the event of a power outage, your garage door opener may not function. Consider installing a backup power source, such as a battery backup, to ensure that you can close the garage door even during power failures.

13. Invest in a Geofencing System: Geofencing technology allows your smart home system to detect your location. Set up a geofence around your home, so when your smartphone leaves the designated area, the system can automatically check and close the garage door.

14. Install a Visual Indicator: Add a visual indicator inside your home, such as a light or display, that provides a clear signal when the garage door is open. This way, you can easily confirm the door’s status before leaving.

15. Check from Your Vehicle: Before exiting your vehicle, take a moment to visually confirm that the garage door is closing. This habit ensures that you actively participate in the process of securing your garage.

16. Secure the Entry Door: If your garage has an entry door, ensure it is securely closed and locked. This adds an extra layer of security even if the garage door is closed.

17. Set Personal Reminders: Use your smartphone or other personal devices to set reminders to check and close the garage door. Regular prompts can help establish a habit of ensuring closure.

18. Educate Family Members: Ensure that all family members are aware of the importance of closing the garage door securely. Teach them the proper procedures and encourage everyone to participate in maintaining the security of the home.

19. Implement Audible Alerts: Configure audible alerts on your smart home system to notify you when the garage door is left open. Audible reminders can be effective in prompting immediate action.

20. Consider a Wi-Fi Garage Door Controller: Wi-Fi garage door controllers allow you to check and control your garage door remotely. These devices often come with additional security features and can be integrated into existing smart home setups.

In conclusion, ensuring that your Garage Door Repair Cypress TX is closed involves a combination of visual checks, technology integration, and proactive measures. By implementing these strategies, you can establish reliable routines and utilize modern technologies to enhance the security of your garage door. Regular maintenance and awareness contribute to a comprehensive approach to ensuring the closure of your garage door, providing peace of mind for you and your family.

Garage Door Wizard

17302 House & Hahl Rd Suit 208, Cypress, TX 77433, United States

1-832-373-7681

Page 3 of 9

Powered by WordPress & Theme by Anders Norén