Local Services in Texas

Month: July 2023 Page 2 of 6

Wooden Garage Door Finishes: Choosing the Right Stain or Paint – Denzel Garage Door of Miami

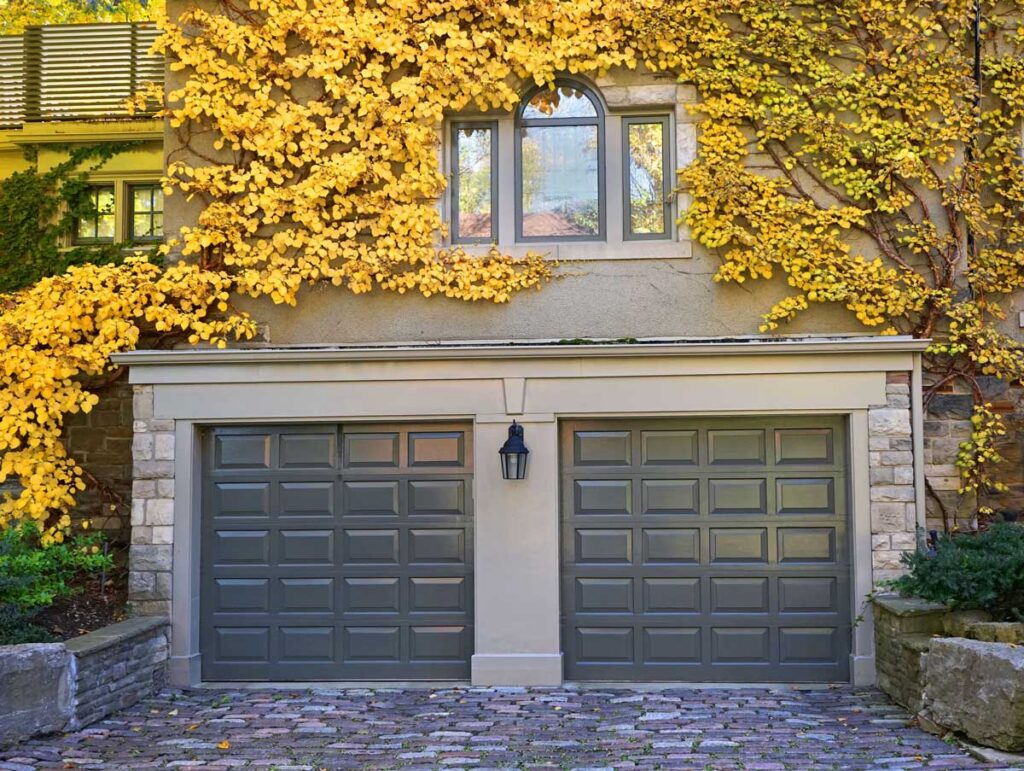
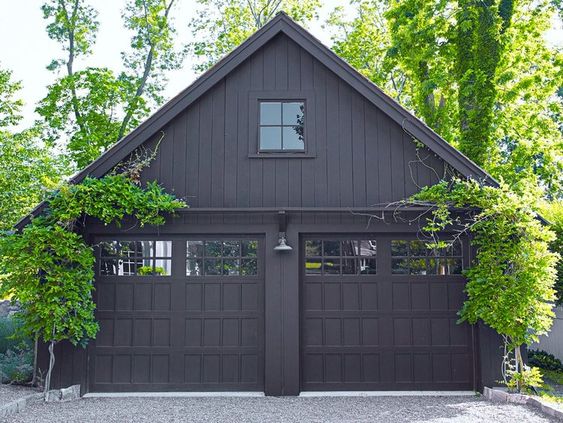
As a homeowner with a beautiful wooden garage door, I understand the importance of choosing the right stain or paint to protect and enhance its natural beauty. Wooden garage doors add a touch of elegance and warmth to a home’s exterior, but they require proper finishes to withstand the elements and maintain their appeal over time.

By following professionals from Denzel Garage Door of Miami, I will explore the different options for wooden garage door finishes, including stains and paints, and provide guidance on how to choose the right one for your garage door.

  1. Understanding the Importance of Wooden Garage Door Finishes

When I first installed a wooden garage door, I was captivated by its rustic charm and the way it complemented the overall aesthetics of my home. However, I soon realized that leaving the wood untreated would expose it to various environmental factors that could lead to damage and decay. That’s when I understood the significance of applying the right finish to my wooden garage door.

Wooden garage doors, like any other exterior wood elements, are exposed to changing weather conditions, including sunlight, rain, and humidity. These elements can cause the wood to expand, contract, and deteriorate over time. Additionally, harmful UV rays can fade the natural color of the wood, leaving it looking dull and weathered.

A proper finish not only protects the wood from moisture and UV damage but also enhances its natural beauty. It helps maintain the rich grain pattern and color of the wood, adding to the charm and appeal of the garage door. Moreover, the right finish can extend the lifespan of the wooden garage door, reducing the need for premature replacements.

  1. Stains for Wooden Garage Doors

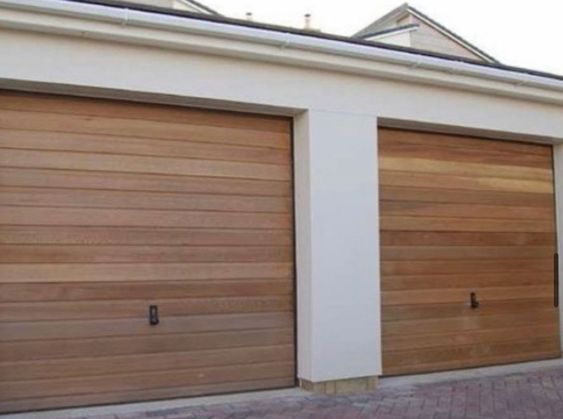
When it came to choosing the finish for my wooden garage door, I explored various options and ultimately decided to go with a stain. Stains appealed to me because they offer a range of finishes, from transparent to solid, and provide excellent protection while still allowing the natural beauty of the wood to shine through.

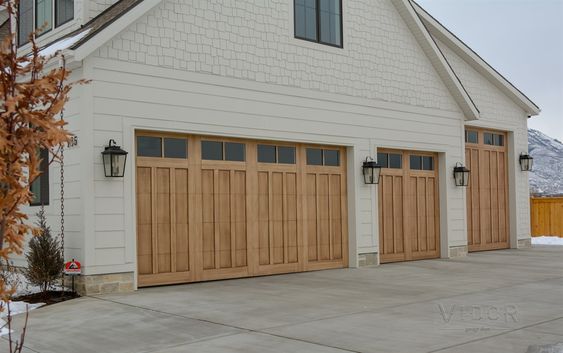
  • Transparent Stains: I found that transparent stains were perfect for showcasing the natural grain and color of the wood. They offered a more rustic and authentic look, which I loved. However, I considered the fact that transparent stains provide minimal protection against UV rays and water, so I would need to reapply them more frequently.
  • Semi-Transparent Stains: After weighing the pros and cons, I opted for a semi-transparent stain for my garage door. These stains strike a balance between transparency and protection. They allowed the wood’s grain and color to show through while providing better resistance to the elements. This type of stain was ideal for me as it offered both aesthetic appeal and improved durability.
  • Solid Stains: Solid stains were another option I considered, especially for older or weathered garage doors that needed a fresh look. Solid stains provide excellent protection and can conceal any imperfections in the wood. However, I decided against using solid stains as I wanted to preserve the natural beauty of the wood and showcase its grain pattern.
  1. Preparing and Applying the Stain

Once I chose the semi-transparent stain, I began the process of preparing my garage door for application. Proper preparation is crucial to ensure that the stain adheres well to the wood and provides the desired finish.

  • Cleaning the Surface: I started by cleaning the surface of my garage door to remove any dirt, dust, or debris. I used a soft brush and a mild detergent to clean the wood thoroughly. After cleaning, I allowed the door to dry completely before moving on to the next step.
  • Sanding: I noticed that my wooden garage door had some rough spots and imperfections. To create a smooth surface for the stain, I used fine-grit sandpaper and sanded the wood along the grain. Sanding also helped open up the wood’s pores, allowing the stain to penetrate more effectively.
  • Test Staining: Before applying the stain to the entire garage door, I conducted a test staining on a small, inconspicuous area. This allowed me to ensure that I was happy with the color and finish of the stain before proceeding with the entire door.
  • Applying the Stain: Once I was satisfied with the test staining, I began applying the semi-transparent stain to my garage door. I used a paintbrush to evenly coat the wood, making sure to follow the grain pattern for a consistent finish.
  • Multiple Coats: To achieve the desired color and depth, I applied multiple coats of the stain. Each coat enhanced the richness of the wood’s color and added to the overall beauty of the garage door.
  • Drying Time: After applying each coat, I allowed the stain to dry according to the manufacturer’s instructions. Proper drying time is essential to ensure that the stain sets properly and provides long-lasting protection.
  1. Maintaining the Stained Garage Door

After successfully staining my wooden garage door, I knew that regular maintenance was crucial to preserve its beauty and protect the wood.

  • Cleaning: I make it a point to clean my garage door regularly using a mild detergent and water. This helps remove dirt, grime, and any other surface contaminants that may accumulate over time.
  • Inspecting for Damage: I conduct periodic inspections to check for any signs of wear, cracking, or peeling. Early detection of any issues allows me to address them promptly before they escalate.
  • Reapplication: I understand that the frequency of reapplying the stain will depend on the type of stain used and the exposure of my garage door to the elements. I plan to reapply the semi-transparent stain every two to four years to ensure continued protection and maintain the wood’s beauty.
  • Protecting from the Elements: To minimize exposure to harsh weather conditions, I try to park my vehicle in a way that protects the garage door from direct sunlight and heavy rainfall. This simple precaution helps to preserve the stain’s color and protect the wood from potential damage.

In conclusion, according to Denzel Garage Door of Miami, choosing the right stain for my wooden garage door allowed me to protect its natural beauty while ensuring its longevity. The semi-transparent stain not only enhanced the wood’s grain and color but also provided the protection needed to withstand the elements. Proper preparation, application, and regular maintenance have made my wooden garage door a stunning focal point of my home’s exterior, contributing to its overall curb appeal and charm.

Denzel Garage Door of Miami

310 NW 25th St, Miami, FL 33127, United States

786-882-8745

How To Make A Temporary Garage Door – Gatesville Garage Door & Gates

Creating a temporary Garage Door Repair Gatesville TX can be a practical and cost-effective solution when you need to protect your vehicles or belongings from the elements for a short period.

This guide will walk you through the step-by-step process of building a temporary garage door using simple materials and tools. Please note that a temporary garage door may not be as robust or secure as a permanent one, so it’s essential to assess your needs and use it accordingly.

Title: Building a Temporary Garage Door: A DIY Guide

Introduction

When you need to store your car or other belongings outside but want to protect them from rain, snow, or harsh sunlight, a temporary garage door is an excellent solution. Temporary garage doors are versatile, easy to construct, and cost-effective. In this guide, we will demonstrate how to build a basic, functional temporary garage door that will serve its purpose for a limited period.

Materials Needed

Before starting the construction process, gather the following materials:

  1. Tarp or heavy-duty plastic sheet
  2. PVC pipes or lumber (2x4s)
  3. Screws or zip ties
  4. Hinges (optional, if you prefer a swinging door)
  5. Bungee cords or ropes
  6. Measuring tape
  7. Saw (if using lumber)
  8. Drill and screws (if using lumber)
  9. Duct tape (optional, for additional sealing)

Step 1: Measure and Plan

Determine the dimensions of your temporary garage door based on the size of the opening you need to cover. Measure the width and height of the area accurately. Keep in mind that you’ll need to leave some extra room on each side for attaching the tarp or plastic sheet to the frame.

Step 2: Frame Construction

Option 1: PVC Frame a) Cut the PVC pipes into appropriate lengths using a saw. You’ll need four pieces for the vertical sides and two pieces for the horizontal top and bottom. b) Assemble the PVC pipes into a rectangular frame using PVC connectors or elbow joints. c) Secure the joints by using screws or zip ties for added stability.

Option 2: Lumber Frame a) Cut the 2x4s to the required lengths for the frame’s sides, top, and bottom. b) Assemble the lumber pieces to form a sturdy rectangular frame. c) Pre-drill holes and use screws to fix the corners together securely.

Step 3: Attaching the Tarp or Plastic Sheet

a) Lay the tarp or heavy-duty plastic sheet over the frame, ensuring it covers the entire opening and has some overlap on each side. b) Use bungee cords, ropes, or strong adhesive tape to secure the tarp or plastic sheet to the frame. Ensure that it is tight and wrinkle-free to provide adequate protection.

Step 4: Adding Hinges

If you prefer a swinging garage door rather than a fixed one, you can add hinges to the frame and attach the tarp or plastic sheet to one side of the frame. This will allow you to open and close the door easily.

a) Attach the hinges to one side of the frame and the corresponding side of the tarp or plastic sheet. b) Securely fasten the hinges using screws or other appropriate hardware.

Step 5: Weatherproofing

To enhance the weather resistance of your temporary garage door, consider using duct tape to seal any gaps between the tarp or plastic sheet and the frame. This will prevent rain or wind from seeping through and provide better protection for your belongings inside.

Conclusion:

Building a temporary Garage Door Repair Gatesville TX is a practical and straightforward DIY project that can be completed in a few hours, depending on your skill level and the materials used. By following the steps outlined in this guide, you can create a functional and cost-effective solution to protect your vehicles or belongings from various weather conditions. Remember that temporary garage doors are not as durable as permanent ones, so it’s essential to use them for their intended purpose and monitor their condition regularly. When no longer needed, you can easily disassemble the structure and store it for future use.

Gatesville Garage Door & Gates

1-254-499-8815

How To Manually Close Garage Door Liftmaster – Southern Home Creations Garage Doors & Openers

Closing your Garage Door Repair Suwanee GA can be necessary in various situations, such as a power outage or if your automatic garage door opener malfunctions.

While it’s important to note that manually closing a garage door requires physical effort and caution, it’s a skill every homeowner with a garage door should be familiar with. In this comprehensive guide, I’ll provide step-by-step instructions on how to manually close a LiftMaster garage door, offering insights and tips to ensure a safe and effective process.

Before You Begin:

  1. Safety First:
    • Ensure that everyone, including pets and children, is clear of the garage door area.
    • Wear appropriate clothing, including closed-toe shoes and safety glasses.
  2. Disengage the Garage Door Opener:
    • Locate the emergency release cord hanging from the garage door opener. This cord is usually red and has a handle.
    • Pull the emergency release cord down and away from the door. This action disengages the opener from the door, allowing it to be operated manually.
  3. Check for Obstacles:
    • Inspect the garage door area for any obstructions or items that may interfere with the door’s movement.

Step-by-Step Guide to Manually Closing a LiftMaster Garage Door:

1. Position the Door:

  • If your garage door is partially open, carefully push it to the fully open position. This ensures that the door is balanced and makes the manual closing process smoother.

2. Release the Lock:

  • If your LiftMaster garage door has a manual locking mechanism, locate and release the lock. This is often a handle or lever near the bottom of the door.

3. Lower the Door Manually:

  • Stand on the inside of the garage facing the door.
  • Grasp the bottom of the door with both hands.
  • Lift the door slightly to release it from the fully open position.
  • Carefully and slowly lower the door to the fully closed position.

4. Use Both Hands:

  • When lowering the door, use both hands to maintain control and balance. Keep a firm grip on the door to prevent it from closing too quickly.

5. Inspect for Smooth Operation:

  • As you manually close the door, pay attention to its movement. Ensure that it moves smoothly along the tracks without any binding or unusual resistance.

6. Secure the Door:

  • Once the garage door is fully closed, engage the manual locking mechanism if your door is equipped with one. This adds an extra layer of security.

7. Re-engage the Garage Door Opener:

  • If you wish to re-engage the automatic opener, pull the emergency release cord toward the door until it clicks back into place.

Tips for Manually Closing a LiftMaster Garage Door:

  1. Use Proper Lifting Techniques:
    • When manually closing the garage door, use your leg muscles and bend your knees to lift, rather than putting excessive strain on your back.
  2. Maintain Control:
    • Keep a firm grip on the door with both hands to maintain control and prevent the door from closing too quickly.
  3. Inspect for Damage:
    • While manually closing the door, inspect the tracks and rollers for any signs of damage or obstructions. Address any issues before attempting to use the automatic opener again.
  4. Seek Professional Help if Needed:
    • If you encounter difficulties, the door is off-balance, or if there are issues with the manual closing process, it’s advisable to seek professional assistance.
  5. Keep the Area Clear:
    • Ensure that the garage door area is clear of people, pets, and objects while manually closing the door. This helps prevent accidents and injuries.
  6. Regular Maintenance:
    • Perform regular maintenance on your LiftMaster garage door, including lubricating moving parts and checking for any signs of wear or damage.

Conclusion:

Manually closing a LiftMaster Garage Door Repair Suwanee GA is a skill that every homeowner should be familiar with to handle situations like power outages or garage door opener malfunctions. By following this comprehensive guide and prioritizing safety, you can successfully and safely close your garage door manually when needed. Remember to engage the manual release cord, use proper lifting techniques, and inspect the door for smooth operation. If you encounter persistent issues or are unsure about any aspect of the manual closing process, it’s recommended to seek professional assistance to ensure the proper functioning of your garage door system.

Southern Home Creations Garage Doors & Openers

4110 Tench Rd Suite D, Suwanee, GA 30024

1-770-831-0301

Garage Door Opener Wall Control Panel Troubleshooting: Resolving Issues – Fort Lauderdale Garage & Overhead Doors

As a homeowner who relies on the convenience of a garage door opener, I understand the frustration that can arise when the wall control panel starts experiencing issues. The wall control panel serves as a vital interface between me and my garage door opener, allowing me to open and close the garage door with just a push of a button. However, when problems arise with this crucial component, it can disrupt the smooth operation of the garage door system.

Here are some common troubleshooting tips to help resolve issues with the garage door opener wall control panel, ensuring that it continues to function reliably and efficiently according to Garage Door Near Me.

Understanding the Importance of the Wall Control Panel

The wall control panel for the garage door opener plays a pivotal role in the overall functionality of the system. It is typically mounted on the interior wall of the garage, providing easy access to control the garage door without the need for a remote or keypad. The control panel allows me to open and close the garage door, as well as control additional features such as turning on the garage lights.

Common Wall Control Panel Issues

Before diving into troubleshooting, it’s essential to be aware of the common issues that may arise with the garage door opener wall control panel:

  1. Unresponsive Wall Control Panel

Sometimes, the wall control panel may become unresponsive, failing to open or close the garage door when the buttons are pressed. This issue can be frustrating, especially when you are in a hurry to leave or enter your home.

  1. Dim or Non-Functioning Lights

Many garage door opener wall control panels are equipped with lights to illuminate the garage when entering or exiting. If the lights are dim or not functioning at all, it can make using the garage at night a challenge.

  1. Intermittent Operation

Another common issue is intermittent operation, where the wall control panel works sporadically. Inconsistent performance can be puzzling and may make it difficult to identify the root cause of the problem.

  1. Error Codes or Blinking Lights

Some wall control panels are designed to display error codes or blinking lights when there is a problem with the garage door opener. Understanding these codes can be essential in diagnosing the issue.

Troubleshooting Steps for Wall Control Panel Issues

Now that we’ve identified the common problems, let’s explore some troubleshooting steps to address these issues and restore the functionality of the garage door opener wall control panel:

  1. Check Power Supply

The first step in troubleshooting any electrical component is to check the power supply. Ensure that the wall control panel is receiving power by verifying that it is properly plugged into a functional electrical outlet. If it is connected to a GFCI outlet, check to see if the GFCI has tripped and reset it if necessary.

  1. Inspect the Wiring

Inspect the wiring connections on the back of the wall control panel to ensure they are secure and free from any damage. Loose or damaged wires can cause issues with the panel’s performance. If any wires appear frayed or broken, they should be replaced.

  1. Check for Lock Mode

Some garage door openers have a lock mode feature that disables the wall control panel and remote controls. If the wall control panel is unresponsive, check the garage door opener’s user manual to see if it has a lock mode and how to disable it.

  1. Test the Wall Control Panel with a Different Remote

If the wall control panel is unresponsive, try testing it with a different remote control. If the garage door operates correctly using the remote but not the wall control panel, the issue may be with the control panel itself.

  1. Reset the Wall Control Panel

Resetting the wall control panel can often resolve minor glitches and restore its functionality. To reset the panel, disconnect it from power for a few minutes, then reconnect it and test its operation.

  1. Check for Interference

Electrical interference can sometimes disrupt the communication between the wall control panel and the garage door opener. Check for any new electronic devices in the garage or nearby areas that could be causing interference and relocate them if necessary.

  1. Inspect the Wall Control Panel Buttons

If specific buttons on the wall control panel are unresponsive, the buttons themselves may be worn out or damaged. Inspect the buttons for any signs of wear or debris and clean them if needed. If the buttons are damaged, the wall control panel may need to be replaced.

  1. Replace the Wall Control Panel

If all else fails and the wall control panel continues to exhibit issues, it may be time to consider replacing it. Most wall control panels are relatively affordable and easy to install, making it a practical solution to resolve persistent problems.

The garage door opener wall control panel is a crucial component that allows homeowners like me to operate the garage door with ease and convenience. When issues arise with the panel, it can disrupt the smooth operation of the garage door system and cause frustration. By understanding common wall control panel issues and following these troubleshooting steps, I was able to address problems effectively and restore the functionality of the control panel.

Overall, based from Garage Door Near Me, remember to always prioritize safety when troubleshooting garage door opener components. If you encounter any issues that seem beyond your expertise or involve electrical components, it is best to seek professional assistance from a qualified garage door technician. With proper troubleshooting and maintenance, the wall control panel can continue to serve as a reliable interface for operating your garage door efficiently and effortlessly.

Fort Lauderdale Garage & Overhead Doors

701 E Las Olas Blvd, Fort Lauderdale, FL 33301, United States

954-466-8785

The Impact of Garage Door Design on Home Architecture – Denzel Garage Door of Fort Lauderdale

As a homeowner who takes great pride in the appearance and aesthetics of my home, I understand the significant impact that garage door design can have on the overall architecture and curb appeal of my property. The garage door is not merely a functional element but also an essential design feature that can enhance or detract from the overall harmony and style of the home’s architecture.

By following the Garage Door Near Me, I will explore the various ways in which garage door design influences home architecture and the importance of choosing a design that complements the overall aesthetic of the property.

  1. Curb Appeal and First Impressions

As I drive up to my home or welcome guests to my property, the garage door is one of the first elements they notice in the front facade. Its prominent position means that the garage door design has a significant impact on the overall curb appeal and first impressions of my property.

An attractive and well-designed garage door can instantly elevate the visual appeal of my home, creating a positive and welcoming first impression. On the other hand, a garage door that clashes with the architectural style or lacks aesthetic appeal can detract from the overall beauty of the property.

When selecting a garage door design, I consider the architectural style of my home and choose a door that complements its features. For example, if my home has a traditional or colonial style, I might opt for a carriage-style garage door with decorative hinges and handles. For a modern or contemporary home, a sleek and minimalist garage door design with clean lines and large windows may be more suitable.

  1. Harmonizing with Home Architecture

I believe that a well-designed garage door seamlessly integrates with the overall architecture of my home, creating a harmonious and cohesive look. When the garage door design complements the architectural style, it enhances the overall sense of unity and balance in the home’s exterior design.

For instance, if my home features a rustic farmhouse style, I would choose a garage door design that reflects the charm and warmth of this aesthetic. A garage door with natural wood finishes and traditional paneling would align perfectly with the farmhouse theme and enhance the authenticity of the overall architectural style.

On the other hand, a contemporary home with clean lines and modern finishes may benefit from a garage door design that embraces a minimalist and sleek appearance. A garage door with aluminum or glass panels can harmonize with the modern architecture, creating a unified and sophisticated look.

  1. Adding Architectural Detail

I see the garage door as an opportunity to add an extra layer of design interest to my home’s exterior. Instead of treating the garage door as a mere utilitarian component, I view it as a chance to enhance the character and personality of my property.

For example, choosing a garage door with unique panel configurations, decorative hardware, or custom window designs can make a bold statement and become a focal point of the home’s facade. These design elements can elevate the overall architecture and make the garage door a standout feature.

  1. Enhancing Natural Light and Ventilation

I appreciate the significance of natural light and ventilation in my living spaces. Opting for a garage door with windows or glass panels allows sunlight to filter into the garage, reducing the need for artificial lighting during the day and creating a brighter and more inviting space.

Additionally, garage doors with ventilation features, such as slats or perforated panels, can promote airflow within the garage, reducing humidity and preventing potential issues like mold and mildew growth. Proper ventilation is especially important if the garage serves as a workshop or storage space for sensitive items.

  1. Impact on Property Value

As a homeowner who plans for the long-term, I am mindful of the impact that the design and condition of the garage door can have on the perceived value of my property. A well-maintained and aesthetically pleasing garage door can enhance the overall marketability and resale value of my home.

When potential buyers or appraisers assess my property, the appearance and functionality of the garage door become part of the equation. An outdated or damaged garage door can give the impression of neglect, potentially reducing the perceived value of the home.

By investing in a quality garage door design that complements the home’s architecture and ensures proper maintenance, I am making a smart investment in the long-term value of my property.

  1. Coordinating with Exterior Finishes

I understand the importance of coordinating design elements to create a cohesive and visually appealing exterior. The garage door design should coordinate with the exterior finishes of my home, including the color, texture, and material of the garage door in relation to the siding, roofing, and other exterior elements.

If my home features a combination of brick and siding, I would choose a garage door color that complements the brickwork and complements the siding tone. Additionally, the texture of the garage door should harmonize with the overall exterior finishes.

  1. Impact on Neighborhood Aesthetics

As part of a larger community, I recognize the importance of maintaining a cohesive and visually appealing streetscape. Choosing a garage door design that aligns with the prevalent architectural styles in my neighborhood helps maintain the overall harmony and enhances the collective curb appeal. It also demonstrates my commitment to being a responsible and considerate homeowner within the community.

In conclusion, based from Garage Door Near Me, the impact of garage door design on home architecture is undeniable. From enhancing curb appeal and harmonizing with the home’s style to adding architectural detail and influencing property value, the garage door plays a crucial role in shaping the overall aesthetics and functionality of my home. By choosing a garage door design that complements the architectural style, maximizes natural light and ventilation, and coordinates with exterior finishes, I can create a visually appealing and harmonious exterior that reflects my personal taste and adds value to my property. As a homeowner who takes pride in my home’s appearance, I understand the importance of selecting a garage door design that enhances the overall architecture and curb appeal of my property.

Denzel Garage Door of Fort Lauderdale

1782 NW 38th Ave, Fort Lauderdale, FL 33311, United States

954-287-2263

Garage Door Installation: Why Professional Service Matters – Hollywood Garage & Overhead Door Co.

As a homeowner who has experienced the challenges of DIY garage door installation, I cannot stress enough the importance of professional service for this complex task. When I decided to replace my garage door, I thought I could handle the installation myself, believing it to be a simple project. However, I quickly realized that installing a garage door is far more intricate than I had anticipated, and it required a level of technical expertise and experience that I lacked.

According to Garage Door Near Me, the technical aspects of a garage door system became apparent as I attempted to align the tracks, springs, and cables properly. Despite my best efforts, I struggled to achieve the precision required for smooth door operation. I knew that any mistakes in the installation could lead to safety hazards or premature wear and tear on the door components. That’s when I realized the significance of professional expertise.

Safety considerations were another critical factor that pushed me to seek professional service. Garage doors are heavy and operate under tension, making them potentially dangerous if not handled correctly. Attempting the installation on my own put me at risk of accidents or injuries, not to mention the potential damage to my property. Professional installers, on the other hand, are trained to handle the installation safely and follow all necessary safety protocols. They use specialized tools and equipment, ensuring that every step is completed securely.

Another aspect that highlighted the importance of professional service was the proper measurement and alignment required for a successful installation. Every home is unique, and accurate measurements are crucial to ensure the garage door fits perfectly to the opening. Professional installers are experienced in taking precise measurements and making adjustments to fit the door correctly. They also ensure that the tracks, cables, and springs are aligned accurately to prevent unnecessary strain on the door and opener.

Warranty and insurance were considerations that weighed heavily on my decision. During my DIY attempt, I had no warranty or insurance coverage for the work I performed. This meant that if any issues arose with the installation or if the door malfunctioned due to errors on my part, I would be solely responsible for the costs of repairs or replacements. This lack of coverage and protection left me feeling vulnerable and unsure about the longevity of the installation. In contrast, professional garage door installers typically offer warranties for their services, providing peace of mind knowing that any issues that arise within the warranty period will be addressed and resolved at no additional cost. Additionally, reputable installation companies carry insurance to protect against any potential accidents or damages during the installation process, providing added protection for both the homeowner and the installer.

Compliance with building codes was another crucial factor that highlighted the significance of professional installation. Garage door installation must adhere to local building codes and safety regulations. As a homeowner, I had little knowledge of these codes and ended up making mistakes that could have led to legal issues and safety hazards. Professional installers are familiar with these codes and ensure that the installation meets all necessary requirements, ensuring the safety and legality of the installation.

The timely completion of the installation was also a factor that influenced my decision to seek professional service. DIY projects can be time-consuming, especially for someone with limited experience in garage door systems. I realized that I didn’t want to spend an extended period trying to figure out the installation process and risk making mistakes along the way. A professional installation team, equipped with the necessary tools and expertise, could complete the job efficiently, saving me valuable time and effort.

Moreover, professional garage door installation services often provide customization options to meet specific homeowner preferences. They can help choose the right type of garage door that complements the architectural style of the home and suits individual needs. Additionally, many professional installers offer additional services such as garage door opener installation, maintenance, and repair, providing a comprehensive solution for all garage door needs.

In conclusion, based from Garage Door Near Me, my experience with DIY garage door installation has made me a strong advocate for professional service when it comes to this complex task. The technical expertise, experience, safety considerations, precise measurement, compliance with building codes, warranty and insurance coverage, and timely completion provided by professional installers have proven to be invaluable. Choosing professional garage door installation has not only saved me from potential headaches and safety risks but has also ensured that I have a well-installed, safe, and reliable garage door that enhances the functionality and curb appeal of my home.

Hollywood Garage & Overhead Door Co.

6592 Taft St, Hollywood, FL 33024, United States

954-716-8336

How Do You Change Code On Garage Door Opener – LMS Garage Door Sacramento


Changing the code on your Garage Door Repair Sacramento CA is a prudent measure to enhance the security of your home.

The process may vary based on the brand and model of your garage door opener, so it’s essential to consult your specific user manual for accurate instructions. Here’s a comprehensive guide that covers general steps applicable to many garage door openers:

: Identify Your Garage Door Opener Model

Locate the brand and model information on your garage door opener. This is usually found on the motor unit or in the user manual. If you don’t have the manual, you can often find it online by searching for the model number.

: Gather Tools and Materials

Ensure you have the necessary tools and materials for the task. Typically, you’ll need a ladder to reach the garage door opener unit and, in some cases, a screwdriver or other tools for removing the opener cover.

: Access the Garage Door Opener Unit

Using a ladder, carefully reach the garage door opener unit. If needed, remove the cover to expose the internal components.

: Locate the Learn or Program Button

Look for the “Learn” or “Program” button on the garage door opener unit. This button is crucial for resetting and reprogramming the access code.

: Clear Existing Codes

Press and hold the “Learn” button until the indicator light on the opener blinks or turns off. This action clears any existing codes stored in the system.

: Choose a New Code

Select a new access code for your garage door opener. Choose something memorable but not easily guessable for security reasons.

: Enter the New Code

On your keypad or remote control, enter the new code promptly after clearing the existing codes.

: Press the Learn Button Again

Press the “Learn” button on the garage door opener again. The indicator light should respond, indicating that the new code has been successfully programmed.

: Test the New Code

Test the new code by using the keypad or remote control. Ensure that the garage door opens and closes as expected. This step verifies that the new code is functioning correctly.

: Repeat for Multiple Devices

If you have multiple remotes or keypads, repeat the process for each one to ensure that all devices are synchronized with the new access code.

: Additional Security Features

Some garage door openers have advanced security features, such as a rolling code system. If your opener has this feature, follow the manufacturer’s instructions to sync the remote with the rolling code system.

: Consult the Manual

If you encounter any issues or if your garage door opener has specific instructions, refer to the user manual provided by the manufacturer. The manual will offer accurate and detailed guidance tailored to your opener model.

: Keep the New Code Secure

Maintain the security of your garage by keeping the new code confidential. Share it only with trusted individuals, and consider changing it periodically for added security.

: Professional Help (Optional)

If you’re unsure or uncomfortable with changing the code yourself, consider seeking professional assistance from a garage door technician. They can ensure that the process is completed correctly and provide additional insights into your specific opener model.

Conclusion:

Changing the code on your Garage Door Repair Sacramento CA is a proactive step toward maintaining the security of your home. By following these detailed steps, you can confidently reset your access code and enhance the overall safety and protection of your garage and living space. Always refer to your specific garage door opener manual for precise instructions tailored to your model.

LMS Garage Door Sacramento

1809 Capitol Ave, Sacramento, CA 95811

1-916-884-6047

How to Align Linear Garage Door Sensors – McClellan County Garage Doors & Gates

Garage door sensors are crucial safety features that prevent accidents and ensure smooth operation of your garage door. Properly aligned sensors are essential to their effective functioning.

Linear Garage Door Repair Hewitt TX sensors use infrared technology to detect obstacles in the path of the door, allowing it to stop and reverse if anything obstructs its movement.

In this guide, we will provide step-by-step instructions on how to align linear garage door sensors to ensure they work efficiently and protect your family and belongings.

Step 1: Understand the Components

Before you start aligning the sensors, familiarize yourself with the components. Linear garage door sensors typically consist of two units: a sending unit (transmitter) and a receiving unit (receiver). The sending unit emits an infrared beam, and the receiving unit picks up the beam. When this beam is interrupted by an obstacle, the door stops or reverses.

Step 2: Safety First

Safety should always be your top priority when working on your garage door. Ensure the door is fully closed before attempting to align the sensors. Additionally, disconnect the power source to the garage door opener to prevent accidental activation while working.

Step 3: Check for Obstructions

Inspect the area around the sensors for any obstructions that might interfere with their operation. Remove any debris, dirt, spider webs, or other objects that could block the infrared beam.

Step 4: Adjust the Receiving Sensor

The receiving sensor is the one located on the opposite side of the door from the motor unit. Loosen the mounting screws on the receiving sensor, but do not remove them completely. This allows you to adjust the sensor’s position.

Step 5: Align the Receiving Sensor

Using a level, make sure the receiving sensor is perfectly vertical. This is crucial for accurate detection. Gently move the sensor until it is level, and then tighten the mounting screws securely.

Step 6: Adjust the Sending Sensor

Now, move to the sending sensor, which is located on the same side as the motor unit. Just like with the receiving sensor, loosen the mounting screws without removing them.

Step 7: Align the Sending Sensor

With the level, adjust the sending sensor to be perfectly horizontal. This ensures the infrared beam is projected at the right height for proper communication with the receiving sensor. Once aligned, tighten the mounting screws.

Step 8: Verify Alignment

After adjusting both sensors, it’s essential to verify their alignment. Stand inside the garage and close the door using the wall-mounted control button or remote. As the door closes, observe the LED lights on both sensors. If the sensors are correctly aligned, the LED lights should stay solid without blinking. If they blink or go out, realignment is necessary.

Step 9: Fine-tune the Alignment

If the sensors’ LED lights aren’t staying solid, fine-tune the alignment by making minor adjustments to both the sending and receiving sensors. Continue this process until the lights remain solid throughout the door’s movement.

Step 10: Test the Reversal Mechanism

Once you are confident that the sensors are accurately aligned, it’s time to test the door’s reversal mechanism. Place an object, such as a cardboard box, in the door’s path before closing it using the control button or remote. The door should stop and reverse upon encountering the obstacle. If it doesn’t, repeat the alignment process until the reversal mechanism works flawlessly.

Step 11: Securely Mount the Sensors

Once you’re satisfied with the alignment and the door’s performance, ensure that both the sending and receiving sensors are securely mounted. Double-check the tightness of the mounting screws to prevent any accidental shifts in the future.

Conclusion:

Properly aligned linear Garage Door Repair Hewitt TX sensors are essential for the safe and efficient operation of your garage door. Taking the time to align the sensors correctly can prevent accidents and protect your family and possessions. Remember always to prioritize safety when working with your garage door, and if you encounter any issues beyond your expertise, consider seeking assistance from a professional garage door technician. With a well-aligned sensor system, you can have peace of mind knowing that your garage door operates reliably and safely.

McClellan County Garage Doors & Gates

508 Connie Dr #12, Hewitt, TX 76643, United States

1-254-232-5658

Why is Garage Door Opener Blinking-Lakeside Garage Door & Gates

In the modern world, the convenience of technology has brought numerous innovations, and the Garage Door Repair Lake Worth TX opener is no exception. Among the many features of this time-saving device, one peculiar aspect that has captivated the curiosity of homeowners and enthusiasts alike is the blinking light on the garage door opener. Beyond its utilitarian function of controlling the door’s movement, the enigmatic blinking light seems to hold a deeper significance that warrants exploration.

In this essay, we will delve into the various reasons behind the blinking phenomenon, from its practical applications to its role as a symbolic manifestation of the intertwined relationship between technology.

I. Functionality and Safety:

At the core of the blinking garage door opener lies its functional significance. The blinking light often serves as a visual indicator of the device’s activity, aiding users in determining whether the door is in the process of opening or closing. Moreover, the blinking light acts as a safety feature, warning individuals nearby that the garage door is in motion and cautioning them to stay clear of its path. This simple yet effective feature has played a pivotal role in preventing accidents and ensuring the security of both property and individuals.

II. Troubleshooting and Diagnostics:

Beyond its basic functionalities, the blinking light also serves as an essential tool for troubleshooting and diagnostics. When a garage door opener experiences malfunctions or technical issues, the blinking pattern of the light can convey valuable information to users or technicians. Deciphering the blinking codes enables individuals to identify specific problems and take appropriate actions for repairs, saving time and money in the process.

III. Remote Control Communication:

The advent of wireless technology has revolutionized the garage door opener, allowing for remote control functionality. The blinking light serves as a visual cue to signify the transmission and reception of signals between the remote control and the garage door opener. Understanding this communication process not only deepens our appreciation for the device’s design but also highlights the seamless integration of human intent with machine action.

IV. Energy Efficiency and Power Management:

In the pursuit of sustainable living, energy efficiency has become a paramount concern. The blinking garage door opener plays a role in power management by indicating when the device is in standby mode or actively consuming energy during door operation. By promoting awareness of energy consumption patterns, users can make informed decisions about optimizing their energy usage.

V. Psychological Impact on Users:

Beyond its pragmatic roles, the blinking garage door opener holds an intriguing psychological impact on users. The rhythmic blinking of the light, often synchronized with the door’s movement, creates a sense of anticipation and excitement. For homeowners, this small yet captivating detail may evoke feelings of accomplishment, reinforcing the emotional connection between the individual and their home environment.

VI. The Intersection of Technology and Human Life:

The blinking garage door opener symbolizes the intricate relationship between technology and human life. As technology continues to pervade every aspect of our daily routines, the blinking light serves as a subtle reminder of how human actions are intertwined with the mechanisms of modern convenience. The garage door opener, once a mere tool, has evolved into an extension of human intention, reflecting our desire for efficiency and comfort.

VII. Evolution and Innovation:

The history of the blinking garage door opener unveils a journey of evolution and innovation. From the rudimentary designs of the past to the sophisticated smart garage door openers of today, the blinking light has remained a steadfast feature, albeit refined and improved. This continuity showcases the enduring relevance of certain design elements and the dedication of engineers to enhance user experience.

Conclusion:

In conclusion, the blinking Garage Door Repair Lake Worth TX opener is far more than a mere visual cue; it represents a convergence of functionality, safety, diagnostics, remote control communication, energy efficiency, and psychological impact. As an emblematic symbol of the intricate relationship between technology and human life, it serves as a poignant reminder of our pursuit of progress and convenience. The red light that flickers atop the garage door opener is more than just a blink; it is a testament to the profound impact of technology on our lives and our unyielding quest for a better tomorrow.

Lakeside Garage Door & Gates

3925 Telephone Rd #2, Lake Worth, TX 76135, United States

1-817-631-5670

The Benefits of Garage Door Windows: Light, Ventilation, and Aesthetics – Laguna Hills Garage & Overhead Doors

As a homeowner who recently installed garage door windows, I can attest to the numerous benefits they have brought to my property. The decision to add windows to my garage door was driven by a desire to enhance the functionality and aesthetics of the space while improving the overall appeal of my home’s exterior.

Based from the Garage Door Near Me, one of the most significant advantages of having garage door windows is the infusion of natural light into the garage space. Before installing the windows, my garage felt dark and dreary during the day, even when the sun was shining brightly outside. The addition of windows completely transformed the atmosphere, flooding the interior with natural light and creating a bright and inviting environment. Whether I’m using the garage as a workshop, working on DIY projects, or simply accessing my car, the abundance of sunlight has made the space more enjoyable and comfortable to be in.

The improved ventilation that the windows provide is another notable benefit. Previously, my garage had poor airflow, leading to the accumulation of heat and humidity, especially during the warmer months. With the windows in place, I noticed an immediate difference in air circulation. The fresh air flowing through the garage not only helps maintain a more pleasant environment but also prevents the buildup of unpleasant odors and stale air.

Energy efficiency was a concern I had initially when considering garage door windows. However, I opted for insulated windows with energy-efficient glass, and I was pleasantly surprised by the positive impact they had on the garage’s temperature. During extreme weather conditions, the insulated windows helped regulate the indoor temperature, keeping the space cooler in the summer and warmer in the winter. As a result, my garage has become more energy-efficient, which has translated into cost savings on my energy bills.

Beyond the practical advantages, the addition of garage door windows has greatly enhanced the overall aesthetics of my home’s exterior. The solid garage door was transformed into a visually appealing focal point, adding charm and sophistication to the facade. With a wide range of window styles and designs to choose from, I was able to customize the appearance of my garage door to perfectly match the architectural style of my home. The windows introduced a unique design element, breaking up the monotony of the solid door and elevating the curb appeal of my property.

One of my initial concerns about garage door windows was the potential lack of privacy. However, I was pleased to discover various privacy options available. I chose frosted glass for my garage door windows, which not only provides privacy but also adds a touch of elegance to the overall design. Inside the garage, I installed blinds to control the amount of sunlight and maintain privacy when needed. These privacy options gave me peace of mind, allowing me to enjoy the benefits of the windows while still preserving the privacy of my garage space.

The ability to customize the window arrangement on the garage door was an aspect I particularly enjoyed. This customization option allowed me to create a design that perfectly suited my preferences and complemented the architectural features of my home. Having control over the size, shape, and placement of the windows allowed me to achieve a unique and personalized look for my garage door.

In conclusion, according to Garage Door Near Me, the decision to install garage door windows has proven to be a highly rewarding one. The infusion of natural light, improved ventilation, enhanced aesthetics, and potential for customization have significantly contributed to the functionality and beauty of my property. As a homeowner, I highly recommend considering garage door windows as a valuable addition to any home, as they not only make the garage space more enjoyable but also elevate the overall appeal and value of the property.

Laguna Hills Garage & Overhead Doors

25361 McIntyre St #5, Laguna Hills, CA 92653, United States

949-776-5549

Page 2 of 6

Powered by WordPress & Theme by Anders Norén